Travel connectivity guide
Apple iPad Air 2019 cellular 64GB 5G eSIM
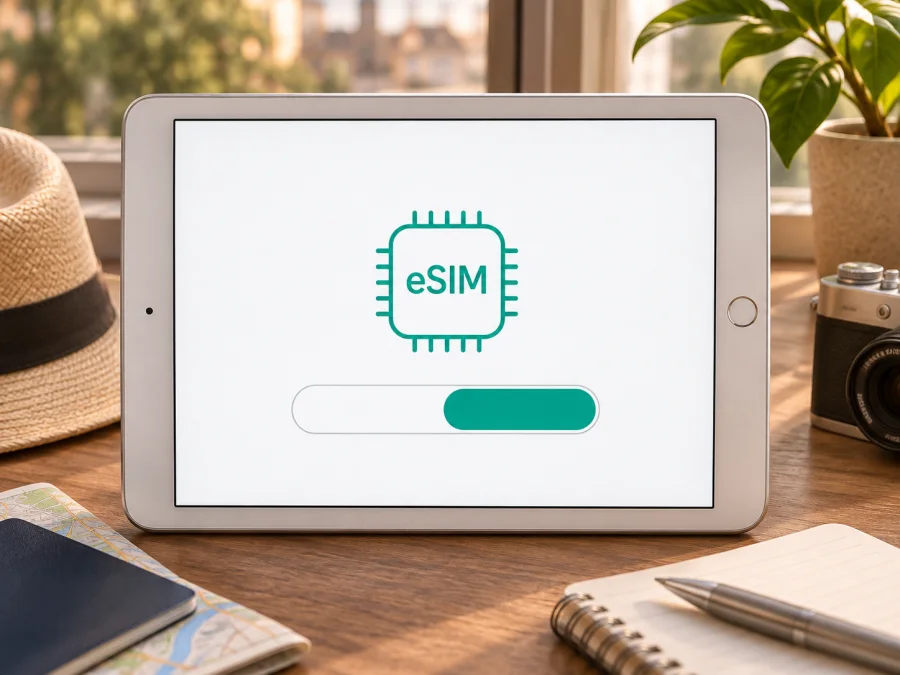
Apple iPad Air 2019 cellular 64GB 5G eSIM: compatibility and setup
Short answer: the 2019 iPad Air Wi‑Fi + Cellular supports eSIM on compatible regional versions, but the phrase “5G” does not describe this generation’s cellular technology. Apple’s model information identifies the 2019 iPad Air (3rd generation) as a 4G LTE device. So a listing called Apple iPad Air 2019 cellular 64GB 5G combines a real 64GB cellular configuration with a 5G label that does not match Apple’s specifications. Keep the exact product name in mind when searching, but verify the model number and eSIM menu on the iPad before buying a plan.
This is not a guarantee for every item described by a marketplace listing. “Cellular” means the iPad has mobile-network hardware; it does not, by itself, prove that a particular regional variant can activate every eSIM service. The exact model, country or region of sale, iPadOS version, and the provider’s support all matter.
Does Apple iPad Air 2019 cellular 64GB 5G support eSIM?
Apple lists eSIM support for iPad Air (3rd generation) Wi‑Fi + Cellular. The third-generation Air was introduced in 2019 and came in 64GB and 256GB capacities. In Apple’s current comparison information, its cellular technology is 4G LTE; 5G is listed for later Air models, not this 2019 generation. The “5G” portion of the supplied name should therefore be treated as a listing keyword or possible seller error, not as a confirmed capability.
For a standard international cellular model, eSIM is available alongside the physical nano-SIM tray. The iPad can use one cellular data plan at a time; eSIM is a way to add a compatible digital profile, not a way to turn the tablet into a 5G device. The iPad Air 3 also uses data-only cellular service: it does not provide a conventional phone number for ordinary calls and SMS through the mobile plan. You can use internet-based messaging and calling apps when connected.
| Item | What is verified for the 2019 cellular generation |
|---|---|
| Product wording in this guide | Apple iPad Air 2019 cellular 64GB 5G |
| Apple generation | iPad Air (3rd generation), introduced in 2019 |
| Listed capacity | 64GB is an official capacity option; the 256GB version is separate |
| Cellular hardware | Wi‑Fi + Cellular models support 4G LTE, not 5G |
| eSIM | Supported on eligible iPad Air (3rd generation) Wi‑Fi + Cellular versions |
| Physical SIM | A nano-SIM tray is present on the cellular model |
| Typical use | Cellular data for browsing, maps, email, messaging, and apps |
| Important qualifier | Regional model and provider support can affect activation |
A Wi‑Fi-only iPad Air (3rd generation) does not gain eSIM capability through an iPadOS update or by adding an account. The eSIM radio is part of the cellular hardware. Likewise, a seller’s use of “5G” does not add 5G support: software cannot change the modem installed in the tablet.
Identify the exact regional version
Apple’s model identification page separates the 2019 iPad Air into Wi‑Fi and Wi‑Fi + Cellular models. The cellular model numbers include A2123 and A2153 for many markets, plus A2154 for the Wi‑Fi + Cellular version designated for mainland China. A2152 is the Wi‑Fi model. The 64GB storage size does not identify the radio version: both Wi‑Fi and cellular devices can have the same capacity, so storage alone is not proof of eSIM support.
Check the model number on the device itself rather than relying only on the box, a receipt, or a refurbished-device title. On the iPad, open Settings → General → About. Find Model Number and tap the displayed part number if necessary to reveal the A-number. Apple also prints the model number in small text on the back casing. Compare that number with Apple’s model list and confirm that the description says Wi‑Fi + Cellular.
Regional versions need an extra check. Apple’s current setup guidance notes that eSIM activation in mainland China is limited to iPad models that support eSIM there and directs users to the relevant provider. The A2154 model is explicitly identified as a mainland-China version, so do not assume that its eSIM will accept a travel profile simply because another iPad Air 3 does. Ask the seller and the intended eSIM provider to confirm the exact A-number, market, and activation method. If confirmation is not available, use the on-device EID and “Add eSIM” checks below before paying for a plan.
For a used or refurbished unit, ask the seller to remove any previous owner’s account and management profile. A working physical SIM confirms cellular hardware, but not eSIM activation. The nano-SIM tray is normal on this generation and does not rule eSIM out.
Check eSIM before buying a plan
Use more than one check where possible. Menus can vary slightly with iPadOS version and language, and a plan provider may impose requirements beyond the tablet’s hardware.
On-device checklist
- [ ] The iPad is the Wi‑Fi + Cellular version, not Wi‑Fi only.
- [ ] The model number in Settings → General → About is an iPad Air (3rd generation) cellular model.
- [ ] An EID appears in the About screen. EID is the identifier of the embedded SIM component; it is different from the serial number, IMEI, and the number printed on a physical SIM.
- [ ] Under Settings → Cellular Data or Mobile Data, an option such as Add eSIM, Add Cellular Plan, or Add Data Plan is available. The exact label depends on iPadOS and region.
- [ ] The iPad is connected to Wi‑Fi during setup and can reach Apple activation services.
- [ ] The seller or provider confirms the exact regional model is eligible for the intended profile.
- [ ] The device is not subject to a carrier or organization restriction that prevents adding a plan.
Check your device before choosing a travel plan. If you are checking a device remotely, ask the seller for a clear photo of Settings → General → About with the model number and EID visible. They can obscure the serial number and other personal identifiers. Do not ask for or share an eSIM QR code as proof of compatibility: QR codes may contain a one-time activation credential and should be treated as private.
What the EID does and does not tell you
An EID confirms an embedded SIM identifier, but does not guarantee that a given provider accepts the regional model. Pair it with the Add eSIM menu and provider confirmation. If no EID appears, confirm the iPad is cellular, update and restart iPadOS, and check again. A Wi‑Fi-only model cannot gain an EID. If a listed cellular model still lacks both EID and add-plan option, ask Apple Support or the seller before buying a profile.
Install and activate an eSIM on iPad Air 3
Connect to Wi‑Fi before downloading a profile. Keep the QR code on another screen or printed page; the iPad cannot scan a code displayed only on itself. Follow the provider’s app or account flow if it offers direct installation. Treat activation QR codes as private and potentially single-use.
- Confirm compatibility. Check the model number, EID, add-plan menu, regional rules, and provider support. Make sure the chosen plan is for data use on an iPad.
- Prepare the iPad. Update iPadOS if possible, connect to Wi‑Fi, and make sure Date & Time is set automatically. Keep the iPad unlocked during installation.
- Open cellular settings. Go to Settings → Cellular Data (called Mobile Data in some regions). Select Add eSIM, Add Cellular Plan, or the equivalent option shown on your version.
- Use the activation method provided. Choose QR-code scanning if offered, then scan the provider’s code from a second screen or printed copy. If the provider gives manual details, select the manual-entry option and enter them exactly. Some providers instead send a notification or complete activation from their app.
- Confirm the profile. Follow the prompts to add the cellular plan. Give it a clear label such as “Travel data” so you can distinguish it from another plan. Wait until iPadOS reports that the plan has been added; keep Wi‑Fi connected until this finishes.
- Choose the data line. In Cellular Data settings, select the new eSIM as the line for mobile data. On a data-only travel plan, leave your regular plan selected only if that is what you intend and understand its roaming charges.
- Set roaming only as instructed. Some travel eSIMs require Data Roaming to be on for their profile; others do not. Follow the plan’s instructions and ensure you are changing the eSIM’s setting, not enabling expensive roaming on your home plan by mistake.
- Wait for the service conditions. A profile can install before it is usable in the destination. Depending on plan rules, its validity or data use may start at purchase, installation, first network connection, or a scheduled time. Check the plan details rather than assuming installation and service start are the same event.
For Apple’s iPad-specific setup flow, use the iOS installation instructions. The Android installation instructions are for Android devices and do not describe the iPad menus, but they can help if you are installing the profile on a separate Android device. Keep the profile’s QR code private and follow the instructions tied to the plan you selected.
After installation, the profile should appear in cellular settings. Some plans only register in their destination, so a lack of service at home may be expected. Do not remove the profile or reuse its QR code after an error; check the provider’s instructions first.
Use the iPad for mobile data while travelling
The iPad Air 2019 cellular model can be useful when a tablet is your main navigation, work, or entertainment device. Before departure, check that the eSIM plan covers every country or region on your route, the allowance and validity match your expected use, and the activation window suits your travel date. For a multi-country itinerary, confirm the complete route is covered; a plan described for one country should not be assumed to work in neighboring destinations.
Kaspersky eSIM Store is an app and website where you can choose, arrange, and activate an eSIM with a data plan for international travel. Plan conditions, such as covered destinations, data amount, validity, activation timing, and supported devices, belong to the selected plan and should be reviewed before checkout. If you want to review available destinations and current plan details, browse the Kaspersky eSIM Store. This is the general store homepage, not a specific country tariff page.
When you arrive, turn on the travel eSIM in Settings → Cellular Data, set it as the data line, and enable roaming for that eSIM only if its instructions require it. Turn off data roaming on your home line if you want to avoid accidental home-network charges; keep that line active only if you need it and understand its terms. Confirm that cellular data is enabled and that the displayed network is one permitted by the plan.
The Air is a tablet, not an iPhone replacement. Apple describes cellular iPad service as data service. A data-only eSIM normally does not provide a standard phone number for voice calls and SMS. You can use email, maps, cloud documents, video calls, and messaging applications over data. Calls that rely on a separate phone number or SMS verification may still require your phone or another service.
An iPad can share its internet connection only when the model, plan, and provider permit Personal Hotspot or tethering. Do not assume that every plan allows it. If the option is missing or another device cannot connect, check the plan’s terms and iPadOS settings before troubleshooting the eSIM itself. Using navigation, video, backups, and hotspot sharing can consume data quickly, so download maps and large files over Wi‑Fi where practical and keep an eye on usage.
Three practical travel setups
City break: install at home over Wi‑Fi if allowed, check when validity starts, then select the travel eSIM on arrival and test a webpage. Work trip: the iPad’s eSIM does not automatically provide data to your phone; check each device separately. Multi-country route: confirm each stop and transit country is covered, and save setup details while online.
Troubleshoot common eSIM problems
| Symptom | Checks to try |
|---|---|
| “Add eSIM” is missing | Confirm Wi‑Fi + Cellular model, check EID and model number, update/restart iPadOS, and verify regional eligibility. Wi‑Fi-only models cannot add an eSIM. |
| QR code will not scan | Increase screen brightness on the second device, clean the iPad camera lens, move the code farther away, or use manual entry if the provider supplies it. Avoid repeated attempts if the code may be single-use. |
| Profile downloads but activation fails | Keep Wi‑Fi on, check date and time, restart, verify that the profile was not already used, and ask the provider whether the exact iPad model is supported. |
| Profile is installed but there is no signal | Confirm you are in a covered destination, the plan is active, the eSIM is turned on, and the provider’s required roaming setting is enabled. Toggle Airplane Mode briefly, then allow the iPad time to register. |
| Signal appears but apps cannot connect | Select the travel eSIM under Cellular Data, confirm cellular data is enabled, review any APN instructions supplied by the provider, and check remaining data or plan validity. |
| The iPad connects to the wrong line | Reopen Cellular Data settings and select the intended eSIM for data. Check that automatic line switching or other line settings have not changed the selection. |
| Data works but a website or app does not | Test more than one app, disable Wi‑Fi temporarily, check the plan’s data allowance, and verify the app is allowed to use cellular data. A single app issue does not necessarily mean the profile is faulty. |
| The plan worked before, then stopped | Check the destination, validity end time, data balance, network selection, and any maintenance notice from the provider. Do not delete the eSIM before asking support whether it can be reinstalled. |
Change one setting at a time. Avoid resetting network settings or deleting the eSIM early, since a one-time profile may not be recoverable. When contacting support, share the model number, iPadOS version, destination, and error text—but never an unused QR code or account credentials. A successful installation does not guarantee coverage in every location.
FAQ
Can Apple iPad Air 2019 cellular 64GB 5G use an eSIM?
Yes, if it is a supported 2019 Wi‑Fi + Cellular regional model and the provider accepts it. Confirm the A-number, EID, and Add eSIM option. The “5G” label is inaccurate for this 4G LTE generation.
Is every 64GB version compatible?
No. Wi‑Fi and Wi‑Fi + Cellular are separate versions. Capacity alone does not establish eSIM support.
Does the eSIM provide calls and SMS?
Usually not. Cellular iPad and travel eSIM plans are generally data-only; use internet messaging or calling apps for online communication.
Can I transfer the profile to another device?
Do not assume so. Many travel profiles use one-time activation or are tied to one device. Check the provider’s transfer and reinstall rules before deleting or moving a profile.
Can I install it before departure?
Often, but installation and plan start are different events. Check whether validity starts at purchase, installation, a scheduled time, or first connection abroad.
Why might EID be present but activation fail?
EID confirms the embedded SIM identifier, not universal plan support. Regional rules, provider restrictions, iPadOS, or device management can still prevent activation.
Before you choose an eSIM for a trip
For Apple iPad Air 2019 cellular 64GB 5G, treat the 2019 cellular generation as 4G LTE and verify the actual model rather than trusting the “5G” label. Confirm that it is Wi‑Fi + Cellular, check the A-number, look for an EID and an Add eSIM option, and ask the provider about any regional or carrier-specific limitation—especially for a mainland-China A2154 unit.
Then compare the selected travel plan’s coverage, data allowance, validity, supported-device conditions, and activation timing with your itinerary. Install the eSIM over Wi‑Fi using the provider’s steps, keep its QR code private, and set it as the data line only when you are ready to use it. Kaspersky eSIM Store can help you browse, arrange, and activate an eSIM with a data plan for an international trip; the final compatibility and plan conditions should be confirmed before checkout.


