Travel connectivity guide
Apple iPad Pro 12.9-inch 5G 1TB eSIM Guide
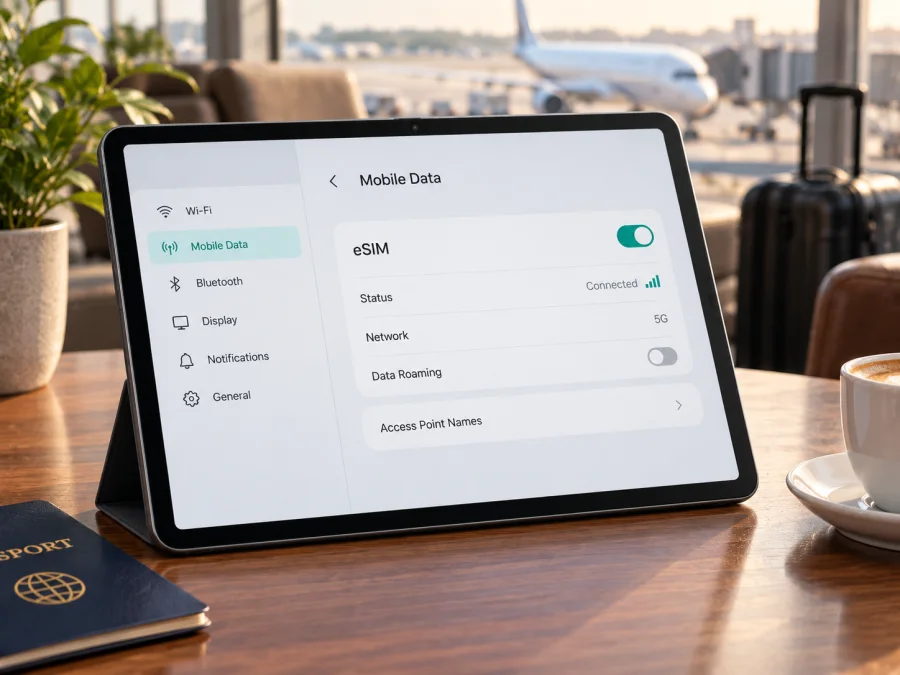
Apple iPad Pro 12.9-inch 5G 1TB eSIM compatibility and setup guide
The Apple iPad Pro 12.9-inch 5G 1TB is a cellular tablet configuration, and the supported 12.9-inch Wi‑Fi + Cellular generations can use eSIM for mobile data. Apple lists the 3rd through 6th generation iPad Pro 12.9-inch Wi‑Fi + Cellular among iPad models that support eSIM. The name supplied here does not identify a generation or sales region, however, so check the model number and the settings on your own iPad before choosing a plan. Carrier support and eSIM availability also vary by country or region.
An eSIM is a digital SIM profile downloaded to the tablet. The eSIM profile and data plan are separate from the iPad’s 1TB storage configuration: storage size does not determine whether the cellular hardware supports eSIM.
Compatibility at a glance
| Item | What it means for this model |
|---|---|
| Device name | Apple iPad Pro 12.9-inch 5G 1TB |
| Connection type | The “5G” configuration is a Wi‑Fi + Cellular iPad; Wi‑Fi-only iPad Pro models cannot add a cellular eSIM. |
| eSIM support | Apple lists 12.9-inch Wi‑Fi + Cellular iPad Pro models from the 3rd to 6th generation as eSIM-capable. |
| Generation | Not included in the supplied name. Check Settings or the model number to confirm the generation. |
| Storage | 1TB; storage capacity has no bearing on eSIM support. |
| Network availability | Depends on the exact regional model, the carrier or eSIM provider, local rules, and supported bands. |
| Calls and texts | A travel data plan usually provides mobile data only; confirm the plan terms for any voice or SMS service. |
Short answer: eSIM is supported on the cellular 12.9-inch iPad Pro generations Apple identifies as compatible, including the 3rd, 4th, 5th, and 6th generations. A 5G 1TB configuration is not itself enough to determine the exact generation or regional model. Confirm that the device is a Wi‑Fi + Cellular model and that it shows an EID or an option to add a cellular plan. If either check is missing, pause before purchasing an eSIM plan and identify the exact model first.
Why the exact version matters
The 12.9-inch iPad Pro name spans several generations and regional hardware variants. Apple’s current eSIM guidance identifies Wi‑Fi + Cellular models from the 3rd through 6th generations as compatible. Earlier 12.9-inch Pro models use different cellular and SIM capabilities, and the 1TB capacity alone does not identify which generation you have. The “5G” wording normally points to a later cellular model, but the safe check is the model details shown on the device, not a listing title or a seller’s shorthand.
A Wi‑Fi + Cellular iPad has cellular radios and can connect to a supported mobile data plan. It may also have a physical nano-SIM tray, depending on generation and region. Having a SIM tray does not rule out eSIM: compatible older cellular iPads can support both a physical SIM and an eSIM. Conversely, a Wi‑Fi-only iPad cannot gain cellular service by installing an app or scanning a QR code.
The country where the iPad was sold can affect which SIM options are available. Apple notes that eSIM service is not offered by every carrier or in every country and region. Local activation rules, carrier provisioning, and the specific model number can also matter. If the iPad was bought abroad, refurbished, or supplied by an organisation, check its model number and ask the carrier or eSIM provider whether that exact version can activate its profile where you plan to use it. Do not assume that a plan supported by one iPad region or operator will work on every 12.9-inch model.
An iPad eSIM is generally for cellular data. It does not automatically add a regular phone number or traditional voice service. Messaging and voice apps can work over an internet connection, subject to each service’s requirements. For a trip, check whether the selected plan covers every country on your route, how much data it includes, how long it remains valid, whether tethering is permitted, and when its validity period begins.
Check your iPad before buying a plan
Use both the model information and the iPad’s settings. A product description can be incomplete, and an EID is a stronger device-level clue than a broad family name.
- Confirm the cellular model. Open Settings → General → About and review the model name and model number. You can tap the part number if needed to reveal the model number. Compare it with Apple’s identification for your generation, or ask Apple Support or the seller to identify it. A Wi‑Fi-only model will not show cellular plan controls.
- Look for an EID. On the same About screen, look for EID. An EID is an identifier associated with the eSIM hardware. Its presence is a useful confirmation, but it does not by itself guarantee that a particular carrier, country, or travel plan will activate.
- Check cellular settings. Open Settings → Cellular Data (the wording may vary slightly with iPadOS language or version). A compatible iPad should offer a way to set up or add a cellular plan. Depending on the current plan and software, the button may be labelled Add New Plan, Add Cellular Plan, or similar.
- Check the plan and restrictions. Confirm that the iPad is not restricted by a carrier, school, employer, or device-management profile. Ask the provider whether its eSIM profile is supported on iPad, not only on phones, and whether the service is available in your destination.
- Check the trip conditions. Confirm the destination list, data allowance, validity, activation method, and any roaming or tethering conditions before payment.
Use this quick checklist before checkout:
- [ ] The device is Apple iPad Pro 12.9-inch 5G 1TB, and its About screen confirms a Wi‑Fi + Cellular model.
- [ ] The model number identifies a generation Apple lists for eSIM support.
- [ ] An EID or cellular-plan setup option appears in Settings.
- [ ] The iPad is not carrier-locked or blocked from adding a plan by a management policy.
- [ ] The provider confirms compatibility with this iPad and the travel destination.
- [ ] The plan’s data amount, validity, activation conditions, and permitted uses fit the trip.
Check whether your device is compatible before you purchase a travel plan.
Install and activate an eSIM
Set up the eSIM over reliable Wi‑Fi, with enough battery and the provider’s QR code or activation details available. A QR code must be displayed on another screen so the iPad camera can scan it. Some providers instead offer an app, installation link, or manual details.
- Choose a plan for your route. In Kaspersky eSIM Store, use the app or website to choose a destination and review eSIM plan details for mobile internet abroad. Compare the coverage area, data allowance, validity, and terms before completing the order. Kaspersky eSIM Store is the app and website for choosing, ordering, and activating a travel eSIM plan; it is not a mobile operator or network provider.
- Check when validity begins. It may start at purchase, installation, or first connection. Install before departure only if the plan permits it and the validity period will not start too early.
- Add the profile. Keep Wi‑Fi connected and open Settings → Cellular Data → Add New Plan. Scan the provider’s QR code or enter the SM-DP+ address and activation code when prompted. Follow any onscreen confirmation and label the plan so you can identify it later.
- Select and activate it. In Settings → Cellular Data, select the travel plan when you want it to provide data. At your destination, turn on its line and enable data roaming for that line only if the provider requires it. Keep your home plan’s settings as intended.
- Test the connection. Wait for registration on a supported network, confirm Cellular Data is on, then open a webpage or map. If service does not work, use the checks below and the provider’s instructions. Do not delete a profile during troubleshooting unless the provider confirms it can be installed again; some codes are single-use.
For device-specific walkthroughs, see the Android eSIM installation instructions and iOS eSIM installation instructions. The iPad runs iPadOS, so start with the iOS guide and follow the iPad-specific prompts.
Keep the right data line selected
An iPad can store multiple eSIM profiles, while only the selected plan is used for cellular data at a time. Menu labels and profile limits may vary by model and software. In Settings → Cellular Data, verify the selected line, especially if a physical SIM is also installed. When the trip ends, switch back to your preferred line or turn off the travel plan. Keep its profile only if its terms allow reuse; do not assume the allowance or validity renews automatically.
Travel scenarios for a large-screen iPad
Before departure: Install at home only if the plan’s instructions allow it and its validity will not begin too soon. Download maps or travel documents as a backup, then leave the travel line off until you need it.
During a work trip: Use the iPad for email, documents, and meetings when Wi‑Fi is unavailable. Video calls and large uploads can use data quickly, so estimate usage against the plan allowance. Speed and availability depend on the local network and plan.
On a multi-country route: Check that every stop is included; a plan for one country may not cover a neighbour. Review validity against the full itinerary and check whether the provider requires manual network selection after a border crossing.
With your phone: The iPad can use its own data plan while your phone keeps its regular line for calls and texts. If you want to share the iPad connection, verify that the plan permits tethering or Personal Hotspot.
Compare a travel plan with your home operator’s roaming terms using your actual route and expected data use. Check allowance, expiry, top-up conditions, and any fair-use terms before choosing.
Troubleshooting: what to check first
No cellular-plan option appears. Confirm this is a Wi‑Fi + Cellular model, then check the model number, generation, and EID under Settings → General → About. Restart and check for an iPadOS update over Wi‑Fi. If the option is still missing, contact Apple Support or the seller before buying a plan; a reset cannot add eSIM hardware.
The QR code fails or the profile will not download. Use stable Wi‑Fi, display the full code on another screen, and confirm it has not expired or already been used. Make sure it is for this plan and device type. If manual activation is offered, enter the details exactly as provided. Do not publish the code or delete a profile without the provider’s advice.
The plan is installed but there is no internet. Select the travel plan for Cellular Data, turn on its line, and enable data roaming for that line only if required. Check Airplane Mode, the data toggle, remaining allowance, expiry, and destination coverage; restart and allow it to reconnect.
“No Service,” slow data, or app errors. Move to an area with a stronger signal and use automatic network selection first. Follow provider-specific network or APN instructions rather than guessing. Check the allowance and validity; congestion, bands, and building conditions can affect service. Test more than one app or website.
The home plan may be using data. Recheck the selected cellular data line and your home line’s roaming setting, especially after switching profiles or restarting.
If the issue remains, record the model number, iPadOS version, EID availability, plan name, destination, and error message before contacting the provider or Apple Support. Never share the QR code or activation details publicly.
Frequently asked questions
Does Apple iPad Pro 12.9-inch 5G 1TB support eSIM?
Apple lists 12.9-inch Wi‑Fi + Cellular iPad Pro models from the 3rd through 6th generation as eSIM-capable. The supplied name omits generation and market, so confirm model number, EID, and cellular-plan settings on the actual device.
Does 1TB storage or 5G guarantee compatibility with every plan?
No. Storage does not determine eSIM support, and 5G does not guarantee 5G service on every plan or in every destination. Compatibility depends on cellular hardware, regional model, carrier support, local coverage, and plan terms.
Can I keep a physical SIM, make calls, or move the profile?
Some supported models offer both physical SIM and eSIM, depending on region. A data plan does not automatically include a regular number, calls, or SMS. Do not assume a profile can be transferred or reinstalled after deletion; check with the provider.
Can I install before flying?
Follow the provider’s timing instructions. Validity may start on purchase, installation, or first network connection, so install early only if the terms allow it.
Before your next trip
The cellular Apple iPad Pro 12.9-inch 5G 1TB can use eSIM when its generation and regional version are among Apple’s supported Wi‑Fi + Cellular models. Confirm the model number, EID, and Settings → Cellular Data options on the actual iPad; then confirm that the provider supports that iPad and your destination. Complete installation over Wi‑Fi, choose the correct data line, and understand when the plan becomes active.
Before checkout, check your device’s compatibility, then use Kaspersky eSIM Store, the app and website, to choose and activate an eSIM plan for mobile data on your trip. Compare the destination, data allowance, validity, and terms with your itinerary. A short device check and plan review can help you leave with a clearer setup and fewer surprises on the way.


