Travel connectivity guide
Apple iPad Pro 12.9-inch cellular 2TB eSIM
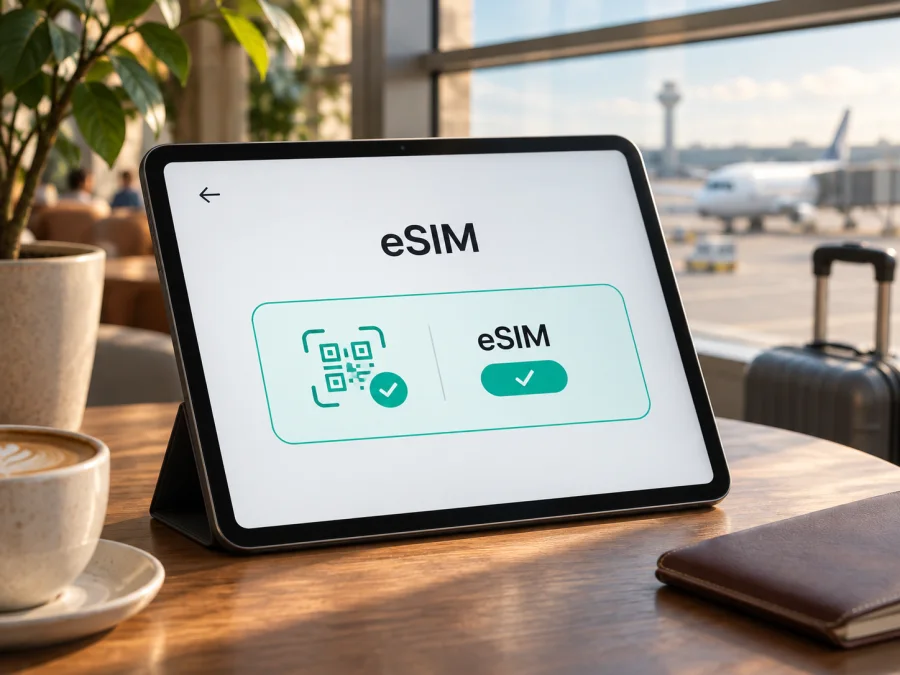
Apple iPad Pro 12.9-inch cellular 2TB eSIM: compatibility and setup
Short answer: if your Apple iPad Pro 12.9-inch cellular 2TB is a Wi‑Fi + Cellular model from the 5th or 6th generation, it supports eSIM according to Apple’s technical specifications. The 2TB cellular configuration is associated with those generations. The task name does not tell us which generation or regional model you have, so confirm the model number and EID on the iPad before choosing a plan. A Wi‑Fi-only iPad cannot use mobile data or install a cellular eSIM, regardless of storage capacity.
Apple’s “Identify your iPad model,” generation-specific technical specifications, and “Set up eSIM on iPad” support pages, checked in November 2026, list 2TB 12.9-inch iPad Pro configurations in the 5th and 6th generations and confirm eSIM for their Wi‑Fi + Cellular models. The setup guide includes Wi‑Fi + Cellular 12.9-inch iPad Pro models from the 3rd through 6th generations. This confirms hardware support for those configurations but does not guarantee that every provider, plan, country, or regional variant will activate in the same way. Apple’s “Using eSIM with your iPad in China mainland” page lists the models that can install eSIM profiles from providers in mainland China; the 12.9-inch 5th- and 6th-generation models are not on that list. In particular, model numbers A2462 and A2766 are China mainland-only models but are not listed as supporting eSIM activation from mainland Chinese providers. Check your exact model and destination before choosing a plan.
Apple iPad Pro 12.9-inch cellular 2TB at a glance
| Item | What to know |
|---|---|
| Device named in this guide | Apple iPad Pro 12.9-inch cellular 2TB |
| Likely generation | 5th generation (2021) or 6th generation (2022); storage size alone does not distinguish them |
| Cellular edition | Wi‑Fi + Cellular; a Wi‑Fi-only model has no cellular service or eSIM |
| eSIM support | Confirmed by Apple for Wi‑Fi + Cellular iPad Pro 12.9-inch models in the 3rd–6th generations, subject to exact regional model and provider support |
| Physical SIM | The 5th- and 6th-generation Wi‑Fi + Cellular models have a nano‑SIM tray as well as eSIM support in supported markets |
| Device identifier | Check Settings → General → About for the model number and EID; the number printed on the back may be a regulatory model number |
| Typical eSIM use | Mobile data on a compatible provider’s plan; iPad cellular plans are data-focused and do not turn the tablet into a conventional phone |
Which version do you have?
The input “Apple iPad Pro 12.9-inch cellular 2TB” is a useful product description but is not a full model identifier. Apple sold 2TB storage on the 5th- and 6th-generation 12.9-inch iPad Pro. Both generations had Wi‑Fi + Cellular versions and are listed by Apple as eSIM-capable. As the generation is missing from the name, it would be inaccurate to claim that this exact unit is one generation in particular.
Use these model numbers as a first cross-check. Apple identifies the following 12.9-inch 2TB generation families:
- 5th generation (2021): A2461 and A2379 are Wi‑Fi + Cellular variants; A2462 is identified as the Wi‑Fi + Cellular model for mainland China.
- 6th generation (2022): A2437 and A2764 are Wi‑Fi + Cellular variants; A2766 is identified as the Wi‑Fi + Cellular model for mainland China.
Before starting, separate three questions that are easy to conflate: does the tablet contain cellular hardware, does that hardware support eSIM in its market, and will the plan provider activate its service on this particular device? The product name answers the first question only when “cellular” describes the actual unit rather than a listing category. The model number and EID help verify the second; the provider confirms the third. These checks are useful even when a retailer advertises the device as unlocked, because that description may refer to a different restriction than regional eSIM eligibility.
Check compatibility before you buy
Run through this checklist while connected to Wi‑Fi. It is quicker than finding out at the airport that the tablet cannot add the plan.
- [ ] Confirm Wi‑Fi + Cellular. In Settings → General → About, look for an EID and cellular information. If the device is Wi‑Fi-only, it cannot connect to a mobile network by itself.
- [ ] Record the model number. Tap the model number in About if it initially shows a part number. Compare the resulting A-number with Apple’s identification guide, paying attention to generation and market suffixes.
- [ ] Look for the eSIM controls. On current iPadOS, open Settings → Cellular Data (in some regions or releases, the label can be Mobile Data). Look for Add eSIM, Add a New Plan, or another option to add a data plan. Menu wording differs by software version, country, and provider.
- [ ] Check EID. In Settings → General → About, scroll to EID. It is the identifier associated with the embedded SIM. Do not post it publicly; provide it only to a provider when its official activation process asks for it.
- [ ] Check the provider and plan. Confirm that the plan accepts an iPad, works in the destination, uses a setup method supported on iPadOS, and covers your intended dates and data use.
- [ ] Ask about restrictions. Confirm that the iPad is not carrier-restricted or blocked by an organization profile and that its regional model can register with the destination network.
- [ ] Prepare a connection. Keep Wi‑Fi available for downloading a profile. Install the latest iPadOS update you can use before leaving, and keep the QR code or activation details accessible on another screen or on paper.
Check your device before selecting a travel data plan. If the EID or add-plan control is missing, do not assume that resetting the iPad will create eSIM capability. Recheck the exact model and the Wi‑Fi versus Cellular edition, update iPadOS, and ask Apple or the seller to verify the hardware. If the model is a supported Cellular version but the option remains absent, have the provider check regional eligibility and account restrictions.
How to find the EID and model number
- Connect the iPad to Wi‑Fi and open Settings.
- Tap General, then About.
- Find Model Name, Model Number, and EID. The model number field can initially show an Apple part number; tap it to reveal the A-number.
- Compare the A-number with Apple’s iPad identification guide. Verify that the listed device is Wi‑Fi + Cellular and that the generation matches the 2TB configuration.
- Open Settings → Cellular Data or Mobile Data. Check whether the iPad shows a current plan or an option to add one.
Choose a data plan for a trip
An iPad can be a convenient second screen for maps, email, translation, ticket wallets, remote work, and video calls through internet apps. Before choosing an eSIM, match the plan to the route rather than to a generic “international” label. Check whether it covers every country on a multi-stop trip, how much data is included, how long the plan is valid, and when its validity begins. A plan may start on installation, activation, or first network connection, depending on its terms. Read the plan’s own activation rules instead of assuming that installing the profile starts—or delays—the countdown.
Kaspersky eSIM Store is an app and website where you can choose, arrange, and activate an eSIM plan for mobile data on an overseas trip. It is not the mobile network itself: the plan’s service, coverage, speeds, and local network access depend on the destination and the plan conditions. You can browse the Kaspersky eSIM Store to check the current destinations and plan details; the homepage is a general starting point, not a country-specific tariff. Confirm that your exact iPad version is compatible before you place an order.
Install and activate an eSIM on iPad
Set up the profile while you have stable Wi‑Fi, enough battery, and the provider’s instructions at hand. The exact screens vary with iPadOS, region, and plan. A plan can be purchased or assigned before installation, but follow the provider’s activation instructions: deleting a profile or scanning a one-time QR code again may not be supported.
- Check the order details. Confirm the destination, allowance, validity period, supported device type, and activation timing. If the provider gives you an installation QR code, keep it open on another display or print it; the iPad cannot scan a code displayed on its own screen with its rear camera.
- Connect to Wi‑Fi. Leave Wi‑Fi on during setup so the iPad can contact the provider’s activation service.
- Open cellular settings. Go to Settings → Cellular Data or Mobile Data. Choose Add eSIM or Add a New Plan if shown. Depending on the provider, iPadOS may offer carrier activation, an app, a link, or QR-code setup instead.
- Scan or follow the provider method. Use the camera to scan the supplied code and tap the detected mobile plan, then continue through the on-screen prompts. On supported iPadOS releases, a QR code displayed in an email or web page may be added by touching and holding it. If your provider supplies a direct activation link or app, use its official directions.
- Confirm the profile. Give the plan a clear label such as “Travel data” so you can distinguish it from another plan. Wait for the installation confirmation. Do not remove the eSIM profile to troubleshoot unless the provider confirms that it can be installed again.
- Choose the data line. In cellular settings, enable the travel plan and select it as the line for cellular data when you are ready to use it. If you want to avoid using your home plan abroad, turn off that plan’s data use or follow its roaming guidance.
- Connect at your destination. Turn on Cellular Data for the travel plan. If the provider requires data roaming for that profile, enable roaming for that line only after checking the plan instructions. Allow a short time for the iPad to register, then test a web page or map.
For Kaspersky eSIM Store’s platform guides, see the iOS installation instructions for an iPad and the Android installation instructions for Android devices. The iPad menus follow iPadOS and Apple’s setup flow, so use the iOS guide for this tablet and the activation details attached to your plan. If a screen or control differs, follow the current on-device instructions and contact support rather than repeatedly scanning the same QR code.
Use the eSIM while travelling
After arrival, open Settings → Cellular Data and verify that the travel plan is on and selected for cellular data. Keep Wi‑Fi assist or other automatic switching features in mind if your iPadOS version offers them. Check the plan name before opening data-heavy apps. If the iPad shows signal but pages do not load, toggle Airplane Mode on for about 10 seconds and off again, then wait for network registration. If the provider specifies a supported network selection or roaming setting, follow those directions.
Common problems and what to check
There is no “Add eSIM” option
Confirm that the iPad is Wi‑Fi + Cellular, not Wi‑Fi-only, and verify the model number under About. Check whether an EID is listed, update iPadOS, and restart the device once. If the model is confirmed as a Cellular variant but the controls remain absent, ask Apple or the service provider whether the exact regional model and account can add a plan. A missing menu is not a reason to buy a second plan or repeatedly reset the device.
The QR code does not scan
Increase screen brightness on the device showing the code, clean the iPad camera lens, and hold the camera steady. Make sure the code is for eSIM installation and has not already been used or expired. If it is on the iPad itself, show it on another screen or use the provider’s supported manual method. Do not share the QR code publicly; it can contain credentials that allow profile installation.
The profile installs but there is no service
Check that the plan is enabled and selected for cellular data, the destination is included, and the plan’s validity has started. Turn Airplane Mode on and off, restart once, and give the iPad time to register. If the plan requires data roaming, enable it only for that travel profile and in accordance with the plan instructions. Check that your iPadOS version is current and that the device is not carrier-restricted. If it still cannot connect, contact the plan provider with the order reference, iPad model number, and a description of the screen; share the EID only through a private official support channel when requested.
The iPad uses the wrong plan or home data
In Cellular Data settings, make sure the travel profile is selected for mobile data. Review the home plan’s roaming settings with your regular provider, and disable its cellular data if you do not want it used abroad. Do not assume that turning off a data line removes charges from every type of service; check your home provider’s terms. For an iPad with multiple saved plans, labels help avoid switching the wrong line.
Data does not seem to work or runs out early
First test a lightweight website with Wi‑Fi disabled so you know the iPad is using cellular data. Review the plan balance in the app or account where it was arranged. Video streaming, background photo sync, backups, app updates, and tethering can consume more data than expected. Turn off automatic updates and cloud syncing on cellular data, lower streaming quality, and use offline downloads. If the displayed usage appears wrong, record the time and contact the provider for a usage check.
FAQ
Does Apple iPad Pro 12.9-inch cellular 2TB support eSIM?
Apple’s official specifications confirm eSIM for Wi‑Fi + Cellular versions of the 12.9-inch iPad Pro 5th and 6th generations, both of which were offered with 2TB storage. The supplied name does not identify the generation or regional model, so verify the A-number and EID on your iPad. A Wi‑Fi-only edition does not support cellular eSIM.
Can I use an eSIM from any provider?
Not automatically. The iPad, regional version, provider, and plan must all be compatible. Providers may support different activation methods or have separate rules for tablets, destinations, and account restrictions. Confirm these details before purchase.
Can I install the plan before my flight?
Often you can install a profile over Wi‑Fi before travelling, but the point at which validity begins depends on the plan. Read its activation terms and follow the provider’s timing guidance. If validity starts immediately, installing too early could use part of the period before your trip.
Final check before your trip
Before paying for a plan, confirm three things: the iPad is the Wi‑Fi + Cellular version, its model number and EID match a supported regional variant, and the provider’s plan covers your destination and the way you intend to use data. The 2TB name points to a 5th- or 6th-generation configuration, but the exact generation and sales region still matter. If any detail is unclear, verify it with Apple, the seller, or the provider using the model number shown in Settings.
Once compatibility is confirmed, compare the plan’s destinations, data allowance, validity, and activation timing. The Kaspersky eSIM Store website and app let you check current plan details and arrange an eSIM for mobile data during an overseas trip. Browse available travel eSIM plans, then install and activate the selected profile according to its instructions. Keep Wi‑Fi available for setup and save the support information before departure.


