Travel connectivity guide
Apple iPhone 14 Plus 512GB eSIM Guide
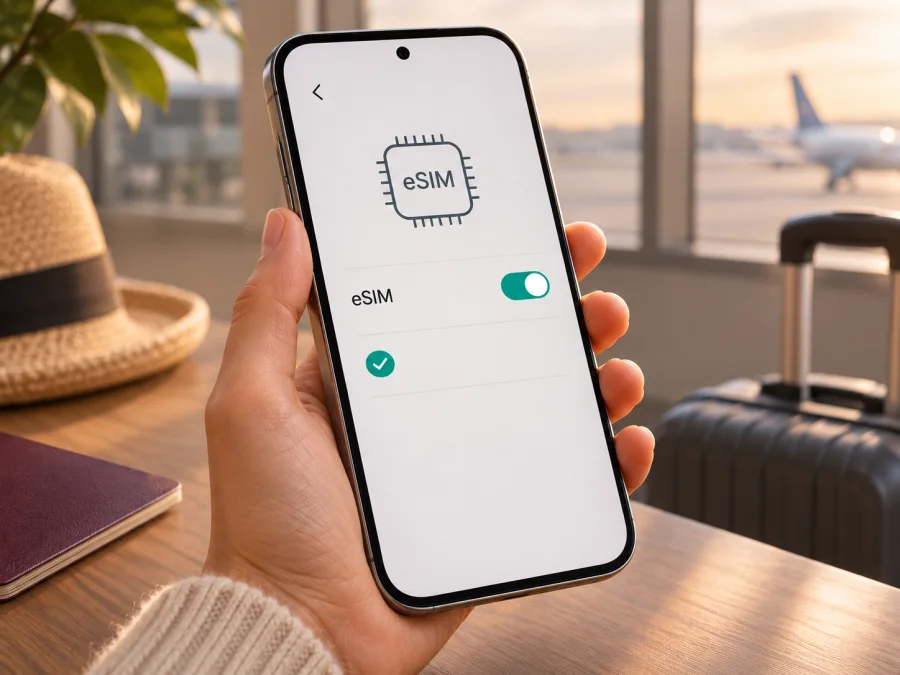
Apple iPhone 14 Plus 512GB eSIM: compatibility and travel setup
The Apple iPhone 14 Plus 512GB supports eSIM in the regional versions that Apple designed for it. The important caveat is that the name and storage capacity alone do not identify the SIM hardware: the country or region where the phone was sold matters. US models are eSIM-only; many other markets have both eSIM and a physical nano-SIM; units sold for mainland China, Hong Kong, and Macao can have a different SIM configuration and should be checked by exact model number and on the device itself.
The 512GB option does not change eSIM capability. Before choosing a travel plan, confirm that your phone shows an EID and an Add eSIM option, is unlocked, and can use the plan at your destination. Apple lists eSIM and two active eSIMs for compatible iPhone 14 Plus versions; regional exceptions still apply.
At a glance
| Item | What to know |
|---|---|
| Exact device | Apple iPhone 14 Plus 512GB |
| eSIM support | Yes for eSIM-capable regional versions; verify the individual unit |
| US configuration | eSIM-only; no physical SIM card support |
| Many other markets | eSIM plus one nano-SIM, depending on sales region |
| Mainland China / Hong Kong / Macao | Some iPhone 14 Plus models use two physical nano-SIMs and do not offer the same eSIM setup; check the model and Settings |
| Dual eSIM | Apple lists two active eSIMs for eSIM versions; availability and carrier support can affect use |
| What 512GB changes | Storage capacity only; it does not add or remove eSIM capability |
| Main checks before travel | EID, Add eSIM menu, carrier lock, provider compatibility, plan coverage and validity |
Does Apple iPhone 14 Plus 512GB support eSIM?
The straightforward answer is yes, if the phone is an eSIM-capable regional version. Apple's iPhone 14 Plus specifications describe the model as using eSIM technology and list Dual eSIM. Apple also notes that eSIM requires a wireless provider that supports it and a service plan. Those statements describe the phone family, not every regional hardware configuration sold under the same retail name.
A US-market iPhone 14 Plus is designed to activate with eSIM and has no SIM tray for a physical nano-SIM. A large number of iPhone 14 Plus units sold outside the United States support an eSIM alongside a nano-SIM. The product name does not reveal which configuration you have, particularly if the phone was bought second-hand, imported, refurbished, or supplied by a carrier in another country.
There is an important regional exception. Apple identifies certain models sold in mainland China, Hong Kong, and Macao as supporting Dual SIM with two nano-SIM cards. That is a physical-SIM arrangement rather than the standard eSIM-plus-nano-SIM arrangement. For an iPhone 14 Plus sourced from one of these markets, do not assume that a familiar iPhone menu or an online compatibility list applies. Verify the precise device. Apple’s published mainland China eSIM guidance also describes a market-specific carrier-store process for the models that support eSIM there; that should not be confused with the normal international travel-eSIM setup.
For this reason, there is no reliable yes-or-no answer based only on “Apple iPhone 14 Plus 512GB.” The exact version, sales region, carrier restrictions, software state, and the eSIM provider’s acceptance all matter. The 512GB modifier is useful for identifying the storage variant, but it is not the regional model number and is not evidence of an eSIM feature.
Regional versions and operator restrictions
An eSIM-ready phone still needs to be allowed to join the network associated with the eSIM plan. Two separate checks are involved:
- Hardware and software capability: does this exact regional iPhone have an eSIM profile function, EID, and an Add eSIM option?
- Network eligibility: is the iPhone unlocked, and does the provider or travel plan support eSIM activation for that device and destination?
A carrier-sold phone can be locked to that carrier even if it has eSIM hardware. On an unlocked iPhone, Settings > General > About typically shows No SIM restrictions beside Carrier Lock. If another carrier name or a restriction appears, ask the original carrier whether it can unlock the phone before buying or installing a travel eSIM. Apple cannot unlock it on the carrier’s behalf.
How to identify your particular version
Use the phone as the final check:
- Open Settings > General > About and note the model name, model number, IMEI, and EID if shown. On some iOS versions, tapping the displayed part number or model number changes the value to the hardware model number beginning with “A”.
- Compare the hardware model number and original sales market with Apple’s current model-identification and SIM guidance. If the seller cannot confirm where the phone was originally sold, use the device menus and EID check below.
- Look for a SIM tray, but do not treat its presence alone as proof that eSIM is absent. Many international iPhone 14 Plus units have both a tray and eSIM. Conversely, a two-nano-SIM tray on a regional unit is a reason to check the market-specific model details carefully.
- Confirm that the phone is not carrier-locked. A listing that says “unlocked” is useful, but the Carrier Lock field on the device is more direct.
- Check that the iPhone can connect to Wi‑Fi and that iOS is up to date before attempting installation. A pending software or carrier-settings update can interrupt setup.
Check compatibility before buying a plan
A quick pre-purchase check reduces the chance of receiving a plan you cannot install. Complete each item on the iPhone you intend to use, not on a different phone with a similar name.
- [ ] In Settings > General > About, an EID is present.
- [ ] In Settings > Cellular (called Mobile Service in some regions), Add eSIM or an equivalent option is available.
- [ ] Carrier Lock says No SIM restrictions, or the current carrier confirms that the phone can use another provider.
- [ ] The model and original sales market do not place it in a two-physical-SIM configuration without eSIM.
- [ ] The travel plan supports eSIM activation on iPhone and covers the country or countries on your route.
- [ ] You have Wi‑Fi or another reliable internet connection available for the installation process.
- [ ] You understand when the plan validity begins, how much data it includes, and whether the plan requires data roaming to be enabled on its line.
EID means Embedded Identity Document. It is an identifier associated with the eSIM hardware; it is not a phone number, activation code, or guarantee that every provider will accept the device. Its presence is a strong practical sign that the iPhone can use eSIM. If no EID is shown and no Add eSIM control appears, pause before paying. Check the region and model number with Apple or the seller, and ask the intended provider to confirm the exact model. A missing menu can also result from a restriction or software issue, so verify both indicators rather than relying on one screenshot or a general compatibility page.
Check whether your device is compatible before selecting a travel plan. Device support, carrier unlocking, and destination coverage are separate requirements; all three need to line up.
Choose a travel eSIM for the route
Once compatibility is confirmed, think about how the phone will be used. A short city break with maps and messaging has different data needs from a multi-week trip with video calls, navigation, and hotspot use. Check the amount of data, validity period, supported destinations, activation timing, and any hotspot or fair-use limits in the plan terms. For a multi-country itinerary, confirm that every stop is included rather than assuming a neighboring country or an entire region is covered.
Kaspersky eSIM Store is an app and website where you can choose, arrange, and activate an eSIM with a mobile-data plan for an international trip. Browse the current travel plan options and check the destination, data allowance, validity, and activation details shown for the option you are considering. Availability and terms can change, so use the details displayed for your route at the time you plan your trip. This is a way to prepare mobile data without replacing your usual line for calls and messages; the travel eSIM described here is for mobile data unless the individual plan says otherwise.
Install and activate eSIM on iPhone 14 Plus
The exact labels can vary slightly by iOS version, language, and region. The provider’s instructions take precedence for its plan. Before you start, make sure the phone is online over Wi‑Fi, has a charge, is unlocked if the plan uses a different provider, and has the activation QR code or in-app flow ready. Do not scan a QR code from an untrusted source or share a one-time code publicly.
Option A: install with a QR code
- Open Settings > Cellular (or Mobile Service) and choose Add eSIM.
- Select Use QR Code. If the QR code is on the same phone, use the provider’s app or its manual installation instructions instead of trying to scan the screen with the iPhone camera.
- Scan the code supplied for your plan. Follow the on-screen prompts and enter a confirmation code only if the provider supplied one.
- Wait for the eSIM profile to download. Keep the phone connected to Wi‑Fi and do not close the setup flow while it is processing.
- Give the line a clear label such as “Travel” so that it is easy to distinguish from your primary number.
- When asked which line to use for calls, messages, and mobile data, choose according to your plan and normal-number needs. You can usually change the default data line later in Settings.
- Review the provider’s activation instructions before enabling the travel line. Some plans activate on installation; others start when they first connect to a supported network or on a scheduled date.
Option B: add a plan assigned to the iPhone
If a supported provider has assigned a plan directly to the phone, iOS may show a notification that a mobile plan is ready to install. Tap the notification, continue through the confirmation screens, and follow the provider’s directions. The provider must support this activation method; not every travel plan uses it.
Option C: enter activation details manually
If the provider supplies a SM-DP+ address and activation code instead of a QR code, open Settings > Cellular > Add eSIM, choose the manual-entry option, and enter the details exactly as provided. These values are private activation credentials. Do not substitute an IMEI, EID, or password for the activation code. If the provider’s app handles installation, use that app’s guided flow instead.
For visual setup steps, see the iOS eSIM instructions. If you are helping someone install a plan on an Android phone, use the separate Android eSIM instructions.
Turn on the travel line at the right time
After installation, the profile may appear in Cellular settings before it is ready to use. If you want to avoid using the travel data before arrival, leave the line off until the time specified by the plan. At your destination, turn on the travel line, select it as the mobile-data line if appropriate, and enable data roaming for that line only when the plan’s instructions require it. Roaming is a setting that can be necessary for a travel eSIM to connect through a partner network; whether it is required depends on the plan. Check the provider’s terms rather than switching roaming on for every line by default.
You can normally keep your primary line active for incoming calls or messages if your carrier allows it, but the home carrier may charge roaming fees for that line. Review your home plan’s roaming rules and disable mobile data switching if you do not want the iPhone to move data to your primary line. iPhone uses one cellular-data line at a time. Keep an eye on the data-line indicator and usage during the trip.
Use the iPhone while travelling
Before departure, download maps, tickets, and other essential travel information for offline use. Then install the eSIM while you have a stable internet connection, if the plan allows advance installation. Save the QR code and setup details separately from the phone, but protect them as you would a password. If installation is intended to happen only after arrival, wait for the timing specified by the provider.
When you land, check these settings in order:
- Open Settings > Cellular and confirm the travel line is turned on.
- Select the travel eSIM for Cellular Data if that is the intended data source.
- Check Data Roaming for the travel line and follow the plan’s instructions.
- Confirm that Airplane Mode is off and that the phone has selected a supported network. If automatic selection does not connect, consult the plan instructions before trying manual network selection.
- Open a simple webpage or messaging app and check data use. Allow some time for the local network to register after first activation.
Troubleshooting: eSIM does not appear or connect
There is no EID or Add eSIM option
First confirm the exact hardware model and original market in Settings > General > About. If the phone was sold for a region whose iPhone 14 Plus configuration uses two nano-SIM cards, the expected eSIM control may not be available. If the phone should support eSIM, update iOS, restart it, and check for device-management or carrier restrictions. If the EID is still absent, contact Apple or the seller with the model number before buying a plan.
QR code will not scan or the profile will not download
Use the code supplied for this plan, not an old screenshot or a code already used on another device. Make sure the QR image is clear, the phone is connected to Wi‑Fi, and the provider has not expired or cancelled the activation details. Some QR codes are one-use. If the camera cannot read a code displayed on the iPhone itself, open the provider’s installation flow or request manual details from the provider. Avoid deleting a partially installed profile until support tells you what to do.
The eSIM installs but has no service
Check that the eSIM line is switched on, the correct line is selected for cellular data, and the plan is active for the current destination and date. Turn Airplane Mode on briefly and off, then restart the iPhone. Confirm the time and date are automatic and check Settings > General > About for a carrier-settings prompt. If the plan requires roaming, enable it on the travel line only. If service still does not appear, ask the provider whether the local network or activation status is correct.
Mobile data works on the wrong line
Open Settings > Cellular > Cellular Data and select the travel eSIM. Review the setting that allows cellular data switching; turn it off if you want to prevent fallback to the primary line. Also review which line is used for default voice and messages. These choices do not change the plan’s coverage, but they help control which line the phone uses for each task.
The device reports a SIM restriction
Go to Settings > General > About > Carrier Lock. If No SIM restrictions does not appear, contact the original carrier and request an unlock. Installing a plan from a different carrier may fail until the restriction is lifted, even though an EID is visible and the Add eSIM option exists. An eSIM profile cannot override a network lock.
FAQ
Does 512GB mean this iPhone can store more eSIMs?
No. The 512GB figure describes storage for apps, photos, and files. It does not define the number of eSIM profiles or whether eSIM hardware is present. Apple lists eSIM capabilities separately, and regional versions can differ.
Can Apple iPhone 14 Plus 512GB use eSIM and a physical SIM together?
Many versions sold outside the United States support an eSIM and a nano-SIM together. US models are eSIM-only. Certain models sold in mainland China, Hong Kong, or Macao use two nano-SIMs instead. Check the exact unit in Settings and against Apple’s regional guidance before relying on a particular combination.
Can I use two eSIMs at once?
Apple lists two active eSIMs on compatible iPhone 14 Plus versions. The carrier must support the plan, and a regional hardware exception or carrier restriction can change what is possible. Only one cellular-data line is used at a time, even if more than one line is active.
What if an EID is visible but activation fails?
The EID confirms an eSIM-related identifier, not that the phone is unlocked or that a particular plan is eligible. Check Carrier Lock, iOS and carrier settings, destination support, activation timing, and the provider’s instructions. Contact the provider with the exact error and device details if the line still will not activate.
Before you go: verify, then choose
For Apple iPhone 14 Plus 512GB, eSIM support is real but region-dependent. Confirm the EID and Add eSIM menu on your own phone, identify its original regional model, and check that Carrier Lock shows no restrictions. Then compare the travel plan’s destinations, data allowance, validity, activation timing, and roaming instructions with your actual itinerary. The storage size does not affect this decision, and the product name alone cannot rule out a regional SIM exception.
When those checks are complete, choose an eSIM option for the trip, follow its iPhone installation steps, and keep your home-line settings and roaming costs in view. If compatibility remains unclear, pause before purchase and verify the model with Apple, the seller, or the plan provider. Checking the device first prevents setup trouble after arrival.


