Travel connectivity guide
Apple iPhone 17 eSIM: Compatibility & Setup
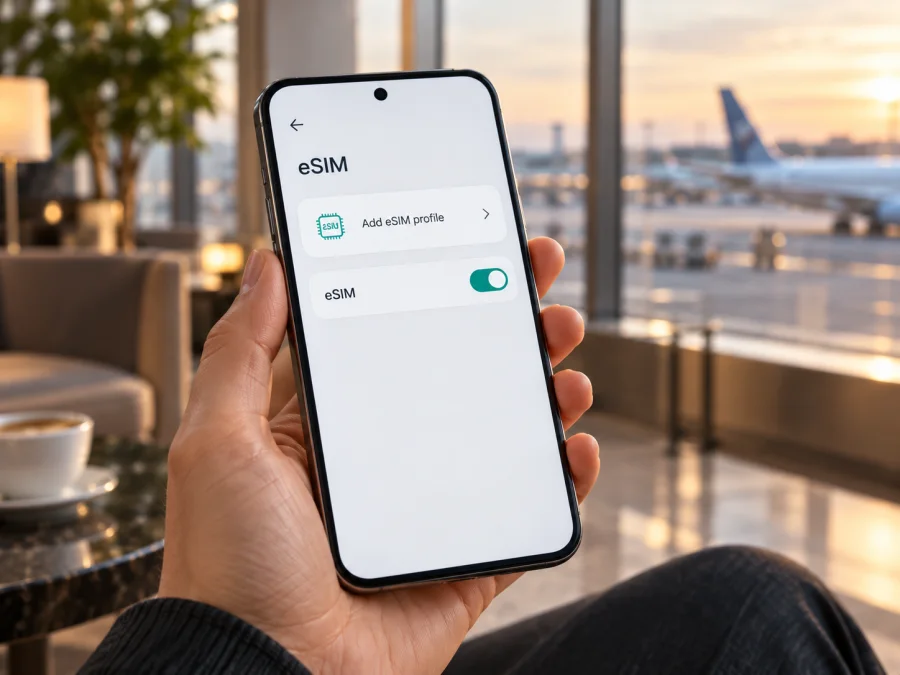
Apple iPhone 17 eSIM: compatibility, setup, and travel use
Short answer: Apple iPhone 17 supports eSIM, but the exact SIM configuration depends on where that particular phone was sold. Most versions sold outside mainland China can add a digital SIM profile. Some markets have an eSIM-only version with no physical SIM tray; many others have both a nano-SIM slot and eSIM. The iPhone 17 sold for mainland China uses two physical nano-SIMs and does not support eSIM. Check the phone itself before choosing a travel plan.
This distinction matters if you want to keep your usual number while adding mobile data for a trip. The model name on the box may simply say Apple iPhone 17, yet the region-specific hardware can be different. Check the device for an EID and an option to add an eSIM, then confirm it is unlocked and the plan supports your destination.
Does Apple iPhone 17 support eSIM?
Yes, for eSIM-capable regional versions. Apple’s specifications describe the iPhone 17 as supporting two active eSIMs and storing multiple eSIM profiles. In markets where Apple supplies a physical SIM tray, the phone can also use a nano-SIM alongside an eSIM. The U.S. version and versions sold in several other markets are eSIM-only, so they do not accept a physical SIM card.
There is one important regional exception: an iPhone 17 purchased for mainland China is a dual nano-SIM model. Apple’s current compatibility guidance does not list iPhone 17 among the iPhones that can install mainland Chinese carriers’ eSIM profiles. Do not assume that a phone supports eSIM merely because it is called iPhone 17 or because another country’s iPhone 17 does.
| Apple iPhone 17 version | SIM configuration | What it means for a travel eSIM |
|---|---|---|
| eSIM-only markets, including the United States, Canada, Mexico, Japan, Guam, the U.S. Virgin Islands, the United Arab Emirates, Saudi Arabia, Bahrain, Kuwait, Qatar, and Oman | eSIM; no physical SIM card | An eSIM is the only SIM format. Confirm that the plan can be installed and used in the destination. |
| Many other markets, including the United Kingdom and much of Europe | One nano-SIM and eSIM; dual eSIM support | You can usually keep a physical line and add a travel eSIM, subject to carrier and plan conditions. |
| Hong Kong or Macao version | eSIM is supported on the iPhone 17 version sold in these markets; exact dual-SIM setup depends on the configuration | Check the EID and the available cellular options on the actual phone. Do not confuse it with mainland China’s dual-nano-SIM model. |
| Mainland China version | Two physical nano-SIM cards; no eSIM support | A travel eSIM cannot be installed on this model. Use another compatible device or check other connectivity options before buying a plan. |
Regional availability and carrier support can change. The table describes Apple’s published regional configurations, not a guarantee that every seller has supplied the model intended for the stated market. If you are buying a used or imported device, verify the model number and the Settings screens before paying. A software update cannot add an eSIM radio or EID to hardware that was sold without eSIM capability.
eSIM support has three separate checks
It helps to separate three questions that are often treated as one:
- Does this hardware contain eSIM capability? On a compatible iPhone, Settings shows an EID and offers an eSIM setup option. A mainland China iPhone 17 is the notable exception in this generation.
- Is the phone unlocked for another provider? A carrier-locked iPhone may reject an eSIM from a different provider even when the hardware supports eSIM.
- Does the eSIM plan work for your destination and use? The plan’s destination, validity period, data allowance, supported networks, and activation conditions are separate from the phone’s hardware compatibility.
A “yes” to the first question does not automatically answer the other two. Complete all three checks before purchase, especially when travelling with a phone bought in another country.
Check your iPhone before buying a plan
Use the phone itself rather than relying only on a shop listing, an online compatibility chart, or the seller’s description. Menu wording can vary slightly with the iOS version and language, but the checks are straightforward.
Find the EID
- Open Settings.
- Tap General, then About.
- Scroll through the device information and look for EID.
- Confirm that Model Name says Apple iPhone 17. Tap the part number beside Model Number if you need to reveal the hardware model number.
An EID identifies the phone’s eSIM capability; it is not an activation code. Keep it private and share it only with trusted support. If it is missing, verify the exact model with Apple or the seller, especially for a mainland China iPhone 17.
Look for the add-eSIM control
Open Settings and then Cellular or Mobile Data. Look for Add eSIM, Set Up Cellular, or an equivalent option. You may see it even before you have purchased a plan. The presence of the option is a useful second check; the absence of it, together with no EID, is a strong sign that the device cannot add an eSIM.
If an EID appears but the add option does not, restart, update iOS, and check again. A work or school management setting may restrict cellular-plan changes. If still unclear, ask Apple or the seller to identify the model using its number and iOS version.
Check the carrier lock
- In Settings, open General, then About.
- Find Carrier Lock.
- An unlocked iPhone displays No SIM Restrictions.
If a carrier name or restriction appears, contact the carrier that locked the phone and ask whether it can be unlocked for another provider. Apple cannot remove a carrier lock on the carrier’s behalf. Do not buy a separate-provider travel plan on the assumption that eSIM support alone will bypass that restriction.
Compatibility checklist
- [ ] The device is Apple iPhone 17, and its region-specific model is known.
- [ ] An EID appears in Settings, and an option to add an eSIM is available.
- [ ] The phone shows No SIM Restrictions, or the existing carrier has confirmed that the phone can be unlocked.
- [ ] The eSIM plan covers every country or region on the itinerary.
- [ ] The plan’s data allowance, validity, supported network, and activation timing fit the trip.
- [ ] You have a reliable internet connection available for installation, usually Wi-Fi.
Check your device’s eSIM compatibility before you select a plan. If the iPhone is a mainland China model without EID, stop here: the standard eSIM installation steps below cannot make that hardware compatible.
Choosing a travel eSIM for Apple iPhone 17
A travel eSIM is useful when you want a separate mobile-data profile for a trip while keeping your normal number available for calls or messages. First match the plan to the itinerary. A single-country plan may suit a one-country visit; a regional plan may be more convenient when you cross borders. Read the plan details rather than inferring coverage from a nearby country or a broad region name.
Estimate data needs from the trip: maps, messaging, and browsing use less than streaming, video calls, cloud backups, or hotspot use. Check recent data usage and trip length, and pause large automatic downloads if you want to conserve data.
Check when the validity period begins. Some plans start when installed, some when first connected to a supported network, and others use a different activation rule. Install the profile at the right time for that plan. A successful installation does not always mean the data allowance has started, and seeing a profile in Settings does not guarantee that it is already connected to a network.
Kaspersky eSIM Store is an app and website where you can choose, arrange, and activate an eSIM with a plan for mobile internet on an international trip. It helps you review a destination and plan details before travel. To compare available options for an itinerary, choose a plan for your destination. Check the specific plan conditions and make sure Apple iPhone 17 has passed the device, region, and lock checks above before completing an order.
You can use the travel profile for data and keep your usual line available if your carrier allows it, but calls, texts, and data on that line may incur roaming charges. A data travel eSIM does not automatically include a phone number, voice service, or SMS.
How to install and activate an eSIM
Before starting, confirm compatibility, remove any VPN or network interruption only if it prevents the setup page from opening, and connect to Wi-Fi. Keep the installation instructions or QR code accessible on a different screen or printed page: an iPhone cannot scan a code displayed on its own screen with its rear camera. Do not delete a profile that has failed to connect until the plan provider explains whether it can be reinstalled.
Install with a QR code
- Open Settings on Apple iPhone 17.
- Tap Cellular or Mobile Data.
- Tap Add eSIM or Set Up Cellular.
- Choose Use QR Code.
- Scan the QR code supplied for your plan. If it is on another Apple device, some iOS versions allow you to open or press and hold the code instead.
- Follow the on-screen prompts to add the cellular plan. Enter a confirmation code only if the plan instructions provide one.
- Give the new line a clear label, such as Travel, so it is easy to distinguish from your usual number.
- Choose whether to use the new line for mobile data now or later. If the trip has not started and the plan’s validity begins on first connection, leave it installed but do not select it for data until the appropriate time.
Wording varies by iOS version and provider. If you receive an app link or manual activation details instead, follow those instructions. Many QR codes are single-use, so do not reuse an old code unless the provider confirms it is valid.
For device-specific walkthroughs, see the iOS eSIM installation instructions and the Android eSIM installation instructions. The Android guide is useful if you are helping another traveller, but Apple iPhone 17 uses the iOS steps above.
Turn on the travel line for data
- Open Settings, then Cellular or Mobile Data.
- Select the travel eSIM and make sure Turn On This Line is enabled.
- Tap Cellular Data or Mobile Data and select the travel eSIM as the data line.
- If you do not want the iPhone to switch data automatically to your home line, turn off Allow Cellular Data Switching.
- Check the plan instructions for Data Roaming. Turn it on for the travel eSIM only when the plan requires it; the correct setting depends on the plan’s network arrangement.
- When you arrive in a covered destination, turn Airplane Mode off and allow the iPhone a few minutes to register.
- Open a browser or map to confirm that mobile data works. If it does not, follow the troubleshooting steps below before changing multiple settings.
Using Apple iPhone 17 on a trip
For a common setup, keep your home line enabled for your usual number and select the travel eSIM for mobile data. On an eSIM-only iPhone 17, both lines must be digital profiles. On a nano-SIM version, the home line may remain on the physical SIM while the travel plan is added digitally. The available combinations depend on the particular regional model and the number of profiles currently active.
For a multi-country trip, confirm that every stop is included before installing the profile over Wi-Fi. A short city break may need less data than remote work or hotspot use; match the allowance to the itinerary.
At each border, confirm that the next country is included and that the travel profile remains selected for data. Automatic network selection can take a few minutes. Wi-Fi can help with setup, but does not provide mobile coverage after you leave it.
To reduce unexpected usage, turn off cellular access for apps that do not need it, pause large downloads, and review Cellular Data usage in Settings. Consider disabling data on the home line if you do not need it and want to avoid accidental roaming. Keep in mind that turning a line off may affect calls or verification messages. A data-only eSIM may still let you use internet-based messaging and calling apps, but it does not necessarily provide a local phone number or traditional SMS.
Troubleshooting common eSIM problems
“Add eSIM” is missing
Check Settings → General → About for an EID and confirm the regional model. If there is no EID and the iPhone was sold for mainland China, it is not an eSIM model. If an EID is present, update iOS, restart, and look again under Cellular or Mobile Data. A company or school administrator may restrict adding plans on a managed phone.
The QR code will not scan or the profile will not install
Make sure the display is bright and the full code is visible. Use another screen to show it, or follow the provider’s alternate installation method. Confirm that the iPhone is connected to Wi-Fi and that the code belongs to this plan and has not already been used. If the setup reports that the code is invalid, already used, or unavailable, contact the plan provider before deleting profiles or requesting a replacement.
The eSIM is installed but there is no service
Check that the travel line is turned on, Airplane Mode is off, and you are in a destination covered by the plan. Restart the iPhone, then wait for it to register. Check whether the plan requires Data Roaming or manual network selection. Verify that the plan is active and has not expired or run out of data. If the carrier settings prompt appears under Settings → General → About, follow it. Persistent network registration errors should be sent to the plan provider with the exact message and destination.
The phone connects, but apps have no internet
Confirm that the travel profile is selected under Cellular Data and that mobile data is enabled. If the plan requires roaming, enable Data Roaming for that line. Temporarily turn off Wi-Fi to confirm that the phone is actually testing cellular data. Check data limits and app-specific cellular permissions. If only one app fails, check that app’s own connection settings before reinstalling the eSIM.
The phone says the SIM is locked or unsupported
Open Settings → General → About → Carrier Lock. A plan from another provider normally requires No SIM Restrictions. Ask the original carrier to unlock the iPhone if needed. A carrier lock is separate from eSIM hardware compatibility, and the plan provider cannot remove it.
The home number is roaming or data switches to the wrong line
Review the selected mobile-data line and Allow Cellular Data Switching. Check roaming and billing terms with your home carrier. If you need to keep the home number reachable, confirm whether receiving calls or messages while abroad can incur fees. Changing the default line does not change the rules attached to your home plan.
For support, provide the model, iOS version, destination, and exact error. Share EID or IMEI only through a trusted channel when requested; do not post a full activation QR code publicly.
Frequently asked questions
Can Apple iPhone 17 use a physical SIM and eSIM at the same time?
On regional versions with a nano-SIM tray, Apple iPhone 17 supports a physical nano-SIM and eSIM. The U.S. and other eSIM-only regional versions have no physical SIM slot. Mainland China versions use two physical nano-SIMs and do not support eSIM. Check the individual device because the name alone does not identify the configuration.
Can I use two eSIMs on Apple iPhone 17?
Apple lists support for two active eSIMs on compatible iPhone 17 versions, with additional profiles stored on the device. The number of profiles you can store is not the same as the number that can be active at once. Carrier, region, and plan restrictions still apply.
Does the iPhone 17 work with every travel eSIM?
No. The phone must have eSIM hardware, be unlocked for the plan provider, and support the plan’s network and destination. The mainland China dual-nano-SIM iPhone 17 cannot install an eSIM. Check the plan’s device and country conditions before purchase.
Should I install the eSIM before leaving?
Usually you can install it while connected to Wi-Fi before departure, but follow the plan’s activation timing. Some profiles start their validity when first used on a supported network; others may start at installation or under another rule. Read the specific plan details so the allowance is available when you need it.
Before you travel: verify, then choose
Start with the exact Apple iPhone 17 in your hand: find the EID, confirm that Add eSIM is available, identify the sales region, and check Carrier Lock. Next, match the plan’s country or region, data allowance, validity period, and activation rule to your itinerary. Keep the setup code or app available, and install the profile over Wi-Fi when the plan’s instructions say to do so.
If every compatibility check passes, use the iPhone’s Cellular settings to select the travel eSIM for mobile data when appropriate. If any check fails or the market variant is uncertain, pause before purchase and ask the seller or plan provider to confirm the model and conditions. A few minutes spent checking Apple iPhone 17 first can prevent an unusable profile and leave you with a clearer plan for staying online abroad.


