Travel connectivity guide
Asus ROG Phone 9 Pro 12GB RAM eSIM
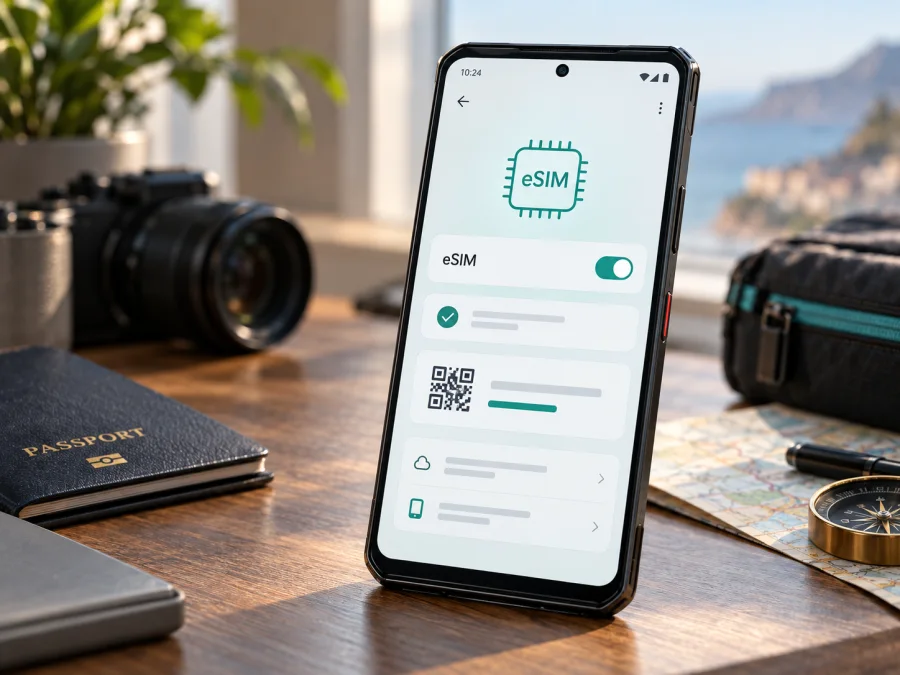
Asus ROG Phone 9 Pro 12GB RAM eSIM compatibility and setup
The Asus ROG Phone 9 Pro 12GB RAM needs a regional check before you rely on eSIM. ASUS lists the ROG Phone 9 Pro (model family AI2501) in its official eSIM setup guidance, but the feature is not universal across every market configuration. ASUS’s general WW, US and CN specifications describe two nano-SIM slots, while the Japanese specifications list two nano-SIM slots plus one eSIM. The RAM capacity alone does not identify which SIM hardware and software your handset has.
Practical answer: eSIM can work on supported regional versions of the Asus ROG Phone 9 Pro 12GB RAM, but do not assume it is enabled on every unit carrying that name. Confirm the exact model code and look for an EID or eSIM setup option on the handset before choosing an eSIM plan. If neither appears, contact ASUS support with the full model code and region; a carrier or travel eSIM cannot add an eSIM chip that the phone does not have.
Asus ROG Phone 9 Pro 12GB RAM: compatibility at a glance
| Item | What to know |
|---|---|
| Device checked | Asus ROG Phone 9 Pro 12GB RAM |
| Product family / model code | ROG Phone 9 Pro is identified by ASUS as AI2501; check the full code on your own unit and box |
| eSIM status | Region and SKU dependent; verify on the individual phone |
| Official ASUS information | ASUS publishes eSIM setup guidance for the AI2501 family; regional specifications do not all list the same SIM arrangement |
| Quick device check | Settings → System → About phone → Status → EID; menu names can vary by software version |
| Other check | Settings → Network & internet / Mobile network → Add eSIM, Download a SIM, or a similarly named option |
| Before purchase | Confirm the phone is unlocked, the EID is present, and the plan supports your destination and device |
The central distinction is between the product family and the particular unit. ASUS support material explains how to set up eSIM on ROG Phone 9 Pro AI2501 and warns that feature availability can vary by service provider, country or region, and device model. Meanwhile, ASUS’s broad international, US, and China specification listings show dual nano-SIM support; the Japanese listing explicitly adds eSIM. These official details do not justify a blanket claim that every ROG Phone 9 Pro supports eSIM, nor do they prove that every 12GB RAM configuration lacks it.
Memory is not the deciding component. “12GB RAM” describes system memory and can be shared by retail listings across markets. The eSIM capability depends on the exact regional SKU, embedded SIM hardware, firmware, and carrier support. Even two phones with the same commercial name can have different SIM options. Imported devices may also retain the original region’s configuration after a software update or reset.
What the regional difference means
Check the country where the phone was originally sold, its complete model number, and the SIM information ASUS publishes for that market. The AI2501 family designation is useful, but it may not distinguish every sales region on its own. Record the full model string from Settings → About phone, the label on the box, or the regulatory label. Do not rely only on the seller title, RAM, color, or a photo of another ROG Phone 9 Pro.
ASUS’s Japanese product specifications list “nanoSIM × 2 / eSIM × 1.” Its general specifications for WW, US, and CN describe “Dual-SIM / Dual-Standby” with a nano-SIM card in slot 1 and a nano-SIM card in slot 2. ASUS’s eSIM setup guidance covers the ROG Phone 9 Pro AI2501 but explicitly says eSIM support may differ by provider, country/region, and device model. Taken together, the official information points to regional availability rather than a single universal configuration.
“Global version,” “unlocked,” and “12GB RAM” do not, by themselves, promise eSIM. Unlocked status concerns carrier restrictions; it does not prove eSIM hardware is present. A software update cannot turn a dual physical-SIM model into an eSIM model.
Check your Asus ROG Phone 9 Pro 12GB RAM before you buy
Use this checklist on the exact phone, not on a similar model or a retailer’s demonstration device:
- [ ] Open Settings → System → About phone → Status and look for EID. On some software versions, use Settings search and type “EID.”
- [ ] Open the mobile network or SIM settings and look for Add eSIM, Download a SIM, or Add mobile plan.
- [ ] Confirm the full model number and the original sales region with the box, invoice, or ASUS support.
- [ ] Check that the phone is not carrier-locked or restricted by an employer, school, or device-management profile.
- [ ] Confirm that the eSIM plan supports the destination, provides the kind of data service you need, and can be installed on this device.
- [ ] Keep the phone connected to reliable Wi-Fi during download and installation.
Use the checklist to resolve uncertainty about this specific regional configuration before selecting a plan. Confirm that the handset itself reports an EID before proceeding. Check your device against these points. The EID is an identifier associated with the embedded SIM hardware. It is not the same as an IMEI, serial number, phone number, or SIM card number. Do not post the complete EID publicly; provide it only when a trusted carrier or eSIM provider needs it for a compatibility check.
If you cannot find EID, first use Settings search and check for a system update, then restart the phone and look again. Confirm that you are viewing the phone’s own system settings rather than a cloned profile or a carrier app. ASUS’s guidance states that if EID information cannot be displayed, the phone does not support that feature. Because menu placement and configuration can differ, verify the result with ASUS if you have a Japanese or other region-specific unit that should include eSIM. If both EID and an add-eSIM control are absent, treat the phone as not eSIM-ready until ASUS confirms otherwise; do not buy a plan hoping installation will enable it.
Install and activate an eSIM
Only continue if the exact handset shows an EID or an eSIM installation option and the plan is suitable. Read the plan’s installation instructions before scanning a QR code. Usually a QR code is single-use, so do not scan it casually or remove a profile to troubleshoot unless the provider confirms it can be reinstalled.
- Prepare the phone. Update Android and system components, charge the battery, connect to stable Wi-Fi, and temporarily disable any VPN or network filter if the download fails. Keep your existing SIM active until you have tested the new profile.
- Open SIM settings. On the Asus ROG Phone 9 Pro 12GB RAM, go to Settings → Network & internet → SIMs / Mobile network. The wording can vary by region or Android build. Alternatively, search Settings for “Add eSIM” or “Download a SIM.”
- Start adding a plan. Choose Add eSIM or the matching option. Follow the provider’s instructions to scan its QR code, enter an activation code, or use its supported in-app installation flow. If prompted, confirm that you want to download the mobile plan.
- Wait for the profile. Keep Wi-Fi connected and leave the setup screen open until Android reports that the eSIM has been added. Assign a useful label such as “Travel” so you can distinguish it from your regular SIM.
- Choose how to use it. In SIM settings, select the eSIM for mobile data. Keep calls and texts assigned to your usual line if desired. A data-only travel plan may not include a regular phone number, voice calls, or SMS; check the plan details.
- Activate at the right time. Some plans begin their validity period when installed, while others start on first connection to a supported network or at a specified time. Follow the plan’s own activation rule. If you want to preserve the full period for the trip, avoid installing early unless its terms say that installation does not start the validity clock.
- Test mobile data. When you reach the supported destination, enable the eSIM line and mobile data. Turn on data roaming for that eSIM only if the plan instructions require it. Confirm the phone registers on a supported network and load a simple webpage.
For Android-specific guidance, see the Android eSIM installation instructions. The iOS eSIM installation instructions describe Apple device menus; they are included for travellers who may also be preparing an iPhone. Menu labels on the Asus ROG Phone 9 Pro 12GB RAM can differ from generic Android screenshots, so follow the on-device prompts and the instructions supplied with your plan.
After installation, do not delete the profile simply because data is not working yet. The destination network may not be available until arrival, or the plan may activate only after a first connection. Deleting an eSIM can make a one-time activation code unusable. If the activation status is unclear, check the plan account or contact its support team before removing or reinstalling anything.
A practical setup for a trip
Suppose you are flying abroad and want to keep your normal number available while using a separate data plan. First confirm the EID and unlocked status at home. Choose a plan for the destination or complete route, check its data allowance and validity period, and install it while connected to Wi-Fi if its activation terms allow. Name the profile “Travel.” Keep your home SIM enabled for calls or messages if appropriate, but set the travel eSIM as the mobile-data line. Disable data roaming on the home SIM if you want to avoid unexpected roaming charges. At the destination, turn on the travel line, apply any required roaming setting to that line, and verify data access.
Kaspersky eSIM Store is an app and website where you can choose, arrange, and activate an eSIM with a mobile-data plan for an international trip. Compare destination coverage, data amount, validity, and activation conditions before deciding. Make sure your Asus ROG Phone 9 Pro 12GB RAM passes the EID and settings checks first. The Store does not replace your normal mobile operator, and an eSIM plan should not be assumed to include calls, SMS, or a local phone number unless its terms say so.
Troubleshooting common eSIM issues
There is no “Add eSIM” option. Search Settings for “EID,” “eSIM,” or “SIM.” Check the model code and sales region. Install available system updates and restart. If EID is also missing, contact ASUS with the full model number; the unit may be a regional configuration without eSIM. Do not assume that the 12GB RAM label guarantees support.
The QR code will not scan. Increase the display brightness, clean the camera lens, and hold the code steady. If it is on the same phone, use the provider’s manual activation method. Check whether the code has expired or already been used, and do not share it.
The profile downloaded but shows no service. Check whether you have reached a destination covered by the plan and whether the plan’s activation condition has been met. Turn the eSIM line on, select it for mobile data, and enable data roaming on that line only if instructed. Toggle airplane mode briefly or restart the phone. If automatic network selection does not work, use the provider’s recommended network selection steps.
The phone connects but websites do not load. Verify that mobile data is assigned to the travel eSIM, that the plan has remaining data and validity, and that any required APN settings are correct. Temporarily turn off other VPN, firewall, or private DNS settings that could interrupt testing. Then retry with a basic webpage. Do not change APN values based on guesses; use the plan’s documented settings or support advice.
Data works, but my usual number is unavailable. Check that the home SIM is enabled and assigned for calls or messages. A travel eSIM may be data-only, and dual-SIM behavior can vary by region and software.
The eSIM installed but the plan did not start when expected. Installation, profile activation, first network connection, and the start of the plan’s validity are separate events. Check the specific plan terms and account status. Some plans start at installation; others start after connecting in the destination. Contact the plan provider before deleting the profile or requesting a replacement code.
Frequently asked questions
Does the Asus ROG Phone 9 Pro 12GB RAM support eSIM?
Some regional ROG Phone 9 Pro versions support eSIM, and ASUS publishes setup guidance for the AI2501 family. However, official SIM specifications differ by region: the Japanese listing includes eSIM, while ASUS’s general WW, US, and CN listings describe two nano-SIM slots. The exact 12GB RAM configuration cannot be identified as eSIM-capable from memory alone. Check EID and the eSIM menu on your actual phone, then verify the full model code with ASUS if needed.
Can I add eSIM with an app if the EID is missing?
No. An app or QR code installs a plan on eSIM-capable hardware; it cannot create embedded SIM hardware or an EID. If there is no EID and no eSIM setting, confirm the region and product code with ASUS before buying a plan.
Can I use two nano-SIMs and an eSIM at the same time?
Do not assume all three lines can be active simultaneously. The physical slots and eSIM support vary by region, and dual-SIM operation depends on the phone’s configuration and software. Check the SIM manager and ASUS documentation for your exact unit. Select the line you need for mobile data and understand which line handles calls and messages.
Will a travel eSIM replace my phone number?
Usually not. Many travel plans are designed for mobile data and do not provide ordinary voice service, SMS, or a local number unless their terms explicitly include those features. Keep your regular line for calls or verification if you need it, and check roaming costs with its carrier.
When should I install the eSIM?
Follow the plan’s activation terms. Installing at home over Wi-Fi can make setup easier, but some plans start their validity as soon as they are installed. Others start only when they first connect in the destination. Confirm the rule before installation and leave enough time to resolve any setup problem.
Before you go: verify the phone, then choose the plan
The Asus ROG Phone 9 Pro 12GB RAM is eSIM-ready only when the particular regional unit includes the feature and its software exposes it. Check Settings → System → About phone → Status → EID, confirm the exact SKU and unlocked status, and look for an eSIM option in mobile-network settings. If any check is unclear, confirm it with ASUS before purchase. After compatibility is established, choose an eSIM plan for the destination, route, expected data use, and trip length; review when its validity begins and whether roaming or tethering settings are required. Install and test the profile according to those terms, and keep your regular SIM settings clear for calls and messages during the journey.


