Travel connectivity guide
Google Pixel 10 8GB RAM eSIM: Compatibility & Setup
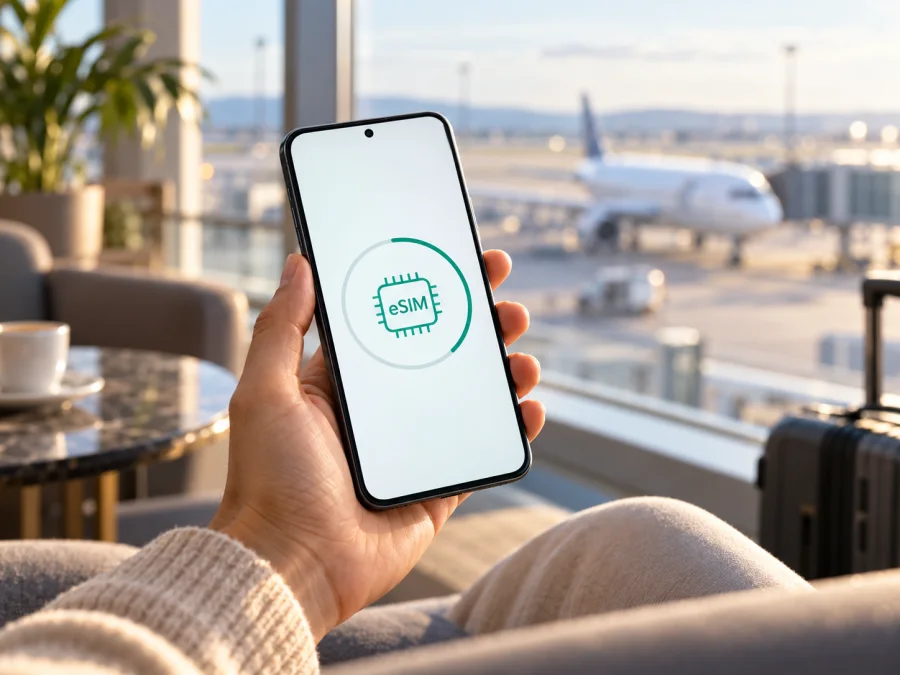
Google Pixel 10 8GB RAM eSIM: compatibility and setup
Quick answer: Google’s current Pixel 10 documentation confirms eSIM support for the Pixel 10 family, but it does not confirm a Pixel 10 configuration with 8 GB of RAM. The official Google Store specifications checked for the US, Australia, Spain and Japan list 12 GB of RAM for the Pixel 10. Treat “Google Pixel 10 8GB RAM” as an unverified product description until the phone’s model number and settings confirm what it is. If the device is an authentic Pixel 10, its eSIM capability is documented; still check the exact unit, carrier lock and available eSIM controls before choosing a travel plan.
Does Google Pixel 10 8GB RAM support eSIM?
For the officially documented Google Pixel 10, the answer is yes: Google’s Pixel 10 materials include eSIM, and its support documentation says Pixel 4 and later phones work with eSIM, subject to carrier compatibility. Google’s published Pixel 10 specifications do not identify an “8GB RAM” configuration. Google lists 12 GB RAM for the retail Pixel 10 configurations checked, so the exact variant remains unverified. This is a limitation on identifying the specific unit, not evidence that eSIM is absent.
The safe conclusion is conditional: if your handset is a genuine Pixel 10, has an active eSIM function in Android, and is not restricted by its carrier or market, it should be able to install an eSIM profile. If it is another model, a prototype, a refurbished or modified unit, or a seller has misidentified it, Pixel 10 family documentation alone cannot establish compatibility. Use the settings check below and ask the seller or carrier to confirm the precise model identifier before purchase.
| Item | What is currently documented | What you should confirm on your phone |
|---|---|---|
| Exact name in this guide | Google Pixel 10 8GB RAM | Whether the phone really is a Pixel 10; the 8 GB detail is not present in the checked official configurations |
| eSIM on the Pixel 10 family | Google documents eSIM support | EID appears in Settings and Android offers Add SIM / Download a SIM |
| Physical SIM | Depends on the sales market and device model | Whether your unit has a nano-SIM tray; do not assume all markets use the same setup |
| Carrier restrictions | Network and activation support depend on the carrier | The phone is unlocked and the carrier or travel plan can activate it |
| Travel data | A data plan can be used where its provider has a supported local network | Destination, coverage, data allowance, validity and activation terms for the chosen plan |
Regional and carrier versions: what changes
Google’s regional specifications show why it is better to identify the actual unit than assume all Pixel 10 phones have identical SIM arrangements. Google’s US Pixel 10 specifications list dual eSIM, while the Australian and Spanish specifications list one nano-SIM plus eSIM. Google’s Japanese specifications describe dual SIM as either one nano-SIM with one eSIM or two eSIMs. Google’s US support page also states that Pixel 10 phones sold in the US are eSIM-only and do not use a physical SIM.
Before buying an eSIM plan, also ask whether the handset is carrier-unlocked. A phone can contain eSIM hardware and still reject a profile because the original carrier has restricted it. For a second-hand phone, ask the seller to remove any carrier lock and account restrictions, then verify the eSIM menu yourself. When in doubt, the network operator that supplied the phone is the best source for its unlock status.
Check the EID and eSIM menu yourself
An EID is the identifier associated with the phone’s embedded SIM. It is a useful sign that an eSIM component is present, but seeing an EID by itself does not prove that a specific carrier or travel plan will activate. Pair the EID check with the add-eSIM menu and the carrier’s eligibility check.
On a Pixel running a current Android version, menu labels can vary slightly by software release. Try these checks:
- Open Settings.
- Tap About phone.
- Open SIM status and look for EID. On some software versions, the identifier may be shown directly under the phone’s identification details.
- Return to Settings and open Network & internet.
- Tap the plus sign beside Mobile network, or open the SIM section, and look for Download a SIM instead?, Add SIM, or Add eSIM.
- If prompted, continue only far enough to see whether Android offers eSIM setup. You do not need to scan a QR code or install a profile just to check the menu.
Google also documents checking the EID on the box and in Settings → About phone → SIM status. For a digital EID QR code, its support instructions describe opening Network & internet, choosing the add option beside Mobile network, selecting Download a SIM instead?, then following the additional prompts. Settings names can change, so use the closest equivalent on your software version.
Use this checklist before you pay for a travel plan:
- [ ] The phone’s model name and model number are consistent with a genuine Pixel 10.
- [ ] You understand that Google’s checked official Pixel 10 listings show 12 GB RAM, not the 8 GB wording in the listing you are considering.
- [ ] An EID appears in Settings or on the box.
- [ ] Android offers an add or download SIM option.
- [ ] The device is not locked to a carrier that blocks the profile you intend to use.
- [ ] The plan is valid in your destination and its terms fit the dates of your trip.
- [ ] You have Wi-Fi or another reliable internet connection available for installation.
A brief settings check can resolve an uncertain listing before you commit to a travel plan. Check your device compatibility before purchasing. If any point is unclear, confirm the exact model and carrier status with the seller or mobile provider. A menu check is especially useful for a phone described with an unusual memory configuration.
What to check before choosing a travel eSIM plan
Device compatibility is only one part of the decision. A plan can be correctly installed and still not meet your needs if it does not cover the destination, expires before you travel, or provides less data than you expect. Before ordering, match the plan terms to the route and way you use your phone.
Destination and route. Check every country where you expect to use mobile data. A country plan is not automatically valid in a neighboring country, and a regional plan may have a defined list of included destinations. For a multi-country itinerary, confirm each stop rather than assuming the plan follows you everywhere.
Allowance and duration. Estimate maps, messaging, ride-hailing, email, browsing and video use. Video calls, cloud backups and streaming can consume data quickly. Compare the stated data amount and validity period with your trip length, and note when the validity clock begins. The exact start rule depends on the chosen plan. Read the plan details at checkout instead of assuming that every plan starts on arrival or immediately after installation.
Data-only service. Travel eSIMs are often intended for mobile data. Do not expect an additional phone number, regular voice calls or SMS unless the specific plan says so. You can usually continue using your primary number for calls and messages if you keep that SIM active, but your home operator may charge for roaming. Internet-based calling and messaging apps can work over the travel data connection, subject to the app and account settings.
Kaspersky eSIM Store is an app and website where you can choose, order and activate an eSIM with a data plan for an international trip. The available destination and plan terms are shown in the store. Review those details for the specific trip; the homepage is a starting point for browsing current options, not a guarantee of a particular country tariff or local coverage.
How to install an eSIM on Google Pixel 10 8GB RAM
Prepare before starting: confirm compatibility, connect the phone to Wi-Fi, have the QR code or in-app installation details ready, and keep the phone charged. Install the profile on the phone where you plan to use it. Many QR activation codes are intended for one-time use, and transfer or reinstallation rules depend on the eSIM provider. Do not delete a working profile to troubleshoot until you know whether it can be installed again.
Add the eSIM profile
- Open Settings on the Pixel.
- Tap Network & internet.
- Tap the plus sign beside Mobile network or choose the option to add a SIM.
- Select Download a SIM instead? or Set up an eSIM, depending on the Android version.
- Connect to Wi-Fi if Android asks for an internet connection.
- Scan the QR code supplied with the plan, or use the provider’s app to follow its installation flow.
- Review the plan details shown on screen and confirm the download.
- Give the new line a clear label, such as “Travel data” or the destination name.
- Wait for Android to finish downloading the profile. This can take several minutes. Keep the phone online and do not repeatedly rescan the same QR code while the first attempt is processing.
The Kaspersky eSIM Store Android installation guide shows the general installation flow. Its pictured menu is Samsung-specific, so Pixel labels and placement may differ. For reference, the iOS installation guide applies to iPhone users, not to the Pixel. Follow the Pixel’s own Android prompts for this phone.
Activate the line for mobile data
Installing a profile and using it for data are separate steps. If you want to keep it installed until you arrive, leave it turned off or leave your primary SIM selected for data, according to the Android menu on your phone. When you are ready to use it:
- Open Settings → Network & internet → SIMs (the exact menu wording may vary).
- Select the travel eSIM and turn on Use SIM if it is disabled.
- Choose the travel eSIM as the line for Mobile data.
- Turn off mobile data switching or automatic switching between SIMs if your settings offer that option and you want to keep data on the selected travel line.
- Enable Data roaming for the travel eSIM only if the plan’s instructions require it.
- Keep the primary line’s mobile data disabled if you want to avoid accidental data use through your home operator. Decide separately whether to leave that line available for calls and texts, and check the home operator’s roaming charges.
- Wait a few minutes for the phone to register on a supported local network.
- Open a web page or a map to confirm that data works. If it does not, check the plan’s APN and network instructions before changing other settings.
Google’s Pixel help says Pixel 7 and later can use two eSIM profiles at once when the carrier supports the feature. That describes simultaneous active profiles, not a guarantee that every operator supports dual eSIM use or that every stored profile can be active together. Your actual market variant and carriers determine which combinations are available. If you only need the travel profile for data, set it as the data SIM and keep other line settings intentional.
Using the Pixel 10 eSIM while travelling
A practical approach is to install the profile while you still have stable Wi-Fi, then enable the travel line when you are ready to use the plan. Some plans begin their validity or data use at a defined point such as purchase, installation, activation or first network connection. There is no single rule for all eSIM plans. Read the selected plan’s own timing terms before installing it early.
At your destination, check that the travel profile is enabled and selected for mobile data. If the instructions specify roaming for that profile, turn it on for the eSIM. Keep the home SIM’s mobile data disabled if your priority is to use the travel plan. You may leave the home SIM available for incoming calls or SMS if your operator and device allow it, but charges can apply. The travel eSIM is for data unless the specific plan says otherwise; messaging and voice apps use data rather than adding a standard mobile number.
For a multi-country trip, verify that every stop is covered. Hotspot use, video and cloud uploads can consume data quickly, so check the plan terms and your expected use. Coverage and speed vary by location and local network.
Label each SIM clearly, confirm which one is selected for mobile data, and monitor the plan’s data allowance and validity.
Common eSIM problems and checks
“Add eSIM” or “Download a SIM” is missing
Restart the phone and check for Android updates. Look for an EID under About phone → SIM status and check Network & internet for an add-SIM option. If both are missing, confirm the exact model and market with the seller or Google support. Carrier restrictions can also limit activation.
Android finds no plan or rejects the QR code
Check Wi-Fi and confirm the QR code belongs to this plan and has not already been used. If it is displayed on the Pixel, show it on another screen. Do not rescan while Android is processing a download. If the code was consumed or the error persists, contact the provider; never share the QR code publicly.
The eSIM is installed but shows no service
Confirm that the profile is on, airplane mode is off, and the plan covers your location. Wait a few minutes, then toggle airplane mode or restart. Check the provider’s roaming, APN and network instructions; a plan cannot connect where its supported networks have no service.
The phone connects, but mobile data does not load
Select the travel eSIM for mobile data and check that its allowance is active. Follow the provider’s instructions for roaming and APN. With Wi-Fi off, test a basic website to confirm cellular data is being used.
The home SIM is using data or roaming unexpectedly
Check the default data line and disable automatic switching if available. Turn off mobile data for the primary SIM if you want to prevent it carrying data. Calls, texts or voicemail may still incur charges under your home operator’s terms.
Installation fails after changing phones or deleting the profile
A profile or QR code may be limited to one device or one installation. Check the transfer and reissue policy and contact the provider before moving the eSIM, deleting it or resetting the phone.
FAQ
Is Google Pixel 10 8GB RAM definitely a real Google configuration?
The “8GB RAM” configuration is not confirmed by Google’s official Pixel 10 specifications. The US, Australian, Spanish and Japanese listings specify 12 GB RAM for the standard Pixel 10. Verify the model number and memory information on the actual device before relying on the listing.
Does the standard Pixel 10 support eSIM?
Yes. Google documents eSIM for the Pixel 10 family. eSIM availability for a particular handset still depends on its exact market version, software, carrier support and unlock status. Check the EID and add-SIM controls on your own device.
Can I use a physical SIM and eSIM together?
It depends on the market version. Google’s Australian and Spanish Pixel 10 listings show nano-SIM plus eSIM; the US listing describes eSIM-only; and Japan’s specifications describe nano-SIM with eSIM or two eSIMs. Confirm the SIM arrangement for your handset and carrier rather than extrapolating from another region.
Can two eSIMs be active at once?
Google says Pixel 7 and later can use two active eSIMs when the carrier supports it. Check with both carriers if you need two lines at once.
Will a travel eSIM give me a regular phone number?
Only if the plan explicitly includes one. Many travel plans are data-only; internet calls and messages can still work through apps.
Should I install the eSIM before leaving?
You can install it over reliable Wi-Fi, but check whether validity starts at purchase, installation, activation or first network connection.
Final check before your trip
For an authentic Google Pixel 10, Google documents eSIM support. The “8GB RAM” modifier, however, does not match the official Pixel 10 configurations checked here, which list 12 GB RAM. Verify the model identifier, EID, add-eSIM menu, carrier unlock status and the SIM layout for the phone’s original market. Then check that the travel plan covers your destination, allowance and dates, and follow its own setup instructions.
Once those checks are complete, you can use the Kaspersky eSIM Store app or website to browse current destinations and plans and choose, order and activate an eSIM plan for mobile data on an international trip. Review the terms for the exact plan before purchase; the homepage is a starting point for browsing, not a specific country tariff. A few minutes spent checking the handset and plan can prevent a last-minute surprise at the airport.


