Travel connectivity guide
Google Pixel 10 Pro Fold 8GB RAM eSIM
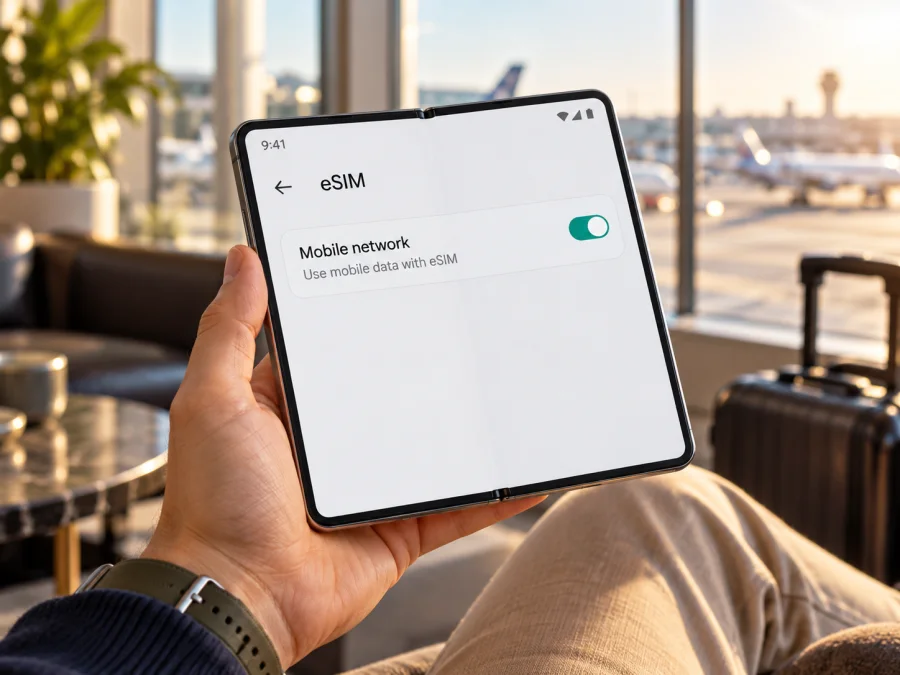
eSIM on Google Pixel 10 Pro Fold 8GB RAM: compatibility and setup
Short answer: Google confirms that Pixel 10 Pro Fold supports eSIM. Its current published specifications list 16 GB RAM, however, so the “8GB RAM” modifier in the exact name supplied here could not be matched to a Google-listed configuration. Treat it as a label to verify, not proof of a separate 8 GB variant. Check the model number, EID, eSIM menu, regional version, and carrier unlock status on the actual phone before paying for a travel plan.
The RAM discrepancy does not itself determine eSIM capability. If the handset is genuine Pixel 10 Pro Fold hardware, eSIM should be available, subject to its region, carrier restrictions, software, and network compatibility. If Settings has no eSIM option, pause and ask the seller or Google to confirm the device identity.
Does Google Pixel 10 Pro Fold 8GB RAM support eSIM?
Google’s current English specifications for Pixel 10 Pro Fold list a dual-SIM setup with one nano-SIM and one eSIM. Google’s Pixel support information also explains that newer Pixel phones can use two eSIM profiles at once when the device and carrier support the feature. This confirms eSIM capability for the Pixel 10 Pro Fold family, but it does not verify an 8 GB RAM configuration or guarantee that every carrier will allow every dual-SIM combination.
For the exact requested name, the safest conclusion is: eSIM support is confirmed for Pixel 10 Pro Fold; “8GB RAM” is not confirmed as a Google-listed Pixel 10 Pro Fold specification. The published configurations list 16 GB RAM with 256 GB, 512 GB, or 1 TB storage. Do not assume the RAM figure determines eSIM availability. Confirm the handset itself rather than relying only on the product title in an advert.
| Check | What is currently verified | What to confirm on your handset |
|---|---|---|
| Device family | Google publishes Pixel 10 Pro Fold specifications | The model number and device name in Settings |
| eSIM | The published US specifications list one nano-SIM and one eSIM | That “Add eSIM” or “Download a SIM” appears in your mobile network settings |
| SIM combinations | Google describes one physical SIM plus eSIM; two eSIM profiles may be possible where the carrier allows | Which combinations your regional model and operator permit |
| RAM in the task name | Google’s published storage options list 16 GB RAM | Whether the seller has mislabelled the phone or the device is a different product |
| Travel data | An eSIM data plan can be used where its included destination and partner network apply | Carrier unlock status, local band support, plan validity, and activation instructions |
Why the “8GB RAM” detail matters
RAM does not enable or disable eSIM. The detail matters because it is part of the exact product name, yet Google lists Pixel 10 Pro Fold with 16 GB RAM and 256 GB, 512 GB, or 1 TB storage. Check Settings → About phone, the memory and storage shown by the device, and the receipt or packaging. Ask the seller to explain any mismatch in writing. Do not assume another model with “Fold” in its name is equivalent.
Regional and carrier versions: what can differ
A phone’s features may vary by market even when the family name is the same. Google’s published US specification lists one nano-SIM plus eSIM and identifies a network model; its Japanese specification also documents a dual-SIM setup. Do not apply a band list, SIM tray, or eSIM combination from one market to every imported handset.
A carrier lock can prevent another provider’s eSIM from activating even when the phone has eSIM hardware. Carriers can also limit simultaneous profiles, and Android version or regional software may change menu labels. Confirm the full model number and country of origin with the seller. There are two separate checks for travel: whether the handset can install eSIM and whether it can connect to a supported local network under the selected plan.
How to check EID and eSIM availability
Check the phone directly before you choose a plan. Menu labels can differ slightly with Android version, language, carrier software, or regional variant, so use the settings search box if the path below is not exact.
- Find the model number. Open Settings → About phone. Note the model name and model number. If either one conflicts with the seller’s description, resolve that discrepancy before purchase.
- Open the SIM settings. Go to Settings → Network & internet → SIMs or Settings → Network & internet → Mobile network. On some software versions, open Add SIM or tap the plus sign.
- Look for an eSIM option. A genuine compatible device normally offers wording such as Download a SIM, Set up an eSIM, or Add eSIM. Do not proceed with a QR code until you can see the phone is ready to add an eSIM profile.
- Check the EID. In Settings, search for EID or open About phone → SIM status. The EID is an identifier associated with the embedded SIM. Its presence is a useful sign, but it does not by itself prove that the phone is unlocked or that a particular travel plan will work.
- Check the carrier restriction. If the handset has an active home SIM, ask the carrier or seller to confirm that the phone is unlocked and can accept another provider’s eSIM. A visible eSIM menu cannot remove a carrier lock.
- Check the Android version and updates. Install available system updates while connected to Wi-Fi, then return to SIM settings and check again. Restart the phone once if the menu was missing after an update.
If the EID is absent and the phone has no option to add or download an eSIM, do not assume a factory reset will create support. Verify the model number with Google or the seller. If the EID appears but the add option is unavailable or greyed out, confirm whether the device is carrier-locked, managed by an employer, or restricted by a profile or local policy. Contact the seller or carrier before buying a plan.
Use this page’s device check as another step before checkout: Check whether your device is compatible. A general compatibility result should be considered alongside the live EID, model number, regional version, and unlock status on your own phone.
Before you buy a travel eSIM
Run through this checklist while you still have a reliable Wi-Fi connection:
- [ ] The model number belongs to Google Pixel 10 Pro Fold, not a similarly named device.
- [ ] The “8GB RAM” description has been explained; Google’s listed Pixel 10 Pro Fold configurations show 16 GB RAM.
- [ ] Settings show an EID and an option to add or download an eSIM.
- [ ] The phone is not locked to a carrier that blocks another eSIM.
- [ ] The selected plan includes every country or region on your route.
- [ ] The plan’s data allowance, validity, activation timing, and any renewal settings suit your trip.
- [ ] You have access to Wi-Fi or another internet connection during installation.
- [ ] You know which line will handle mobile data, and you understand whether roaming must be enabled for that eSIM.
At this point, you can browse current eSIM plans and check available destinations. The site lets you choose a destination and review current plan details. Confirm that the destination and the terms shown at checkout match your route; the homepage is a general plan-browsing destination, not a tariff for a specific country.
How to install an eSIM on Google Pixel 10 Pro Fold 8GB RAM
Install the profile over a stable internet connection, preferably before departure. Keep the QR code or details available on another screen. Activation codes are often single-use; do not test one on another phone. Once installed, a profile may not be transferable, so confirm this is the device you intend to use.
On Pixel, open Settings → Network & internet → SIMs. Menu wording varies by Android version and region. Follow the plan’s supplied instructions. See the Android eSIM installation guide. The iOS installation guide is useful if you are comparing the steps on a different device.
Installation steps
- Check prerequisites. Confirm EID, eSIM support, carrier unlock status, destination, Wi-Fi, and battery.
- Open SIM settings. Choose Add SIM, Download a SIM, or the eSIM option.
- Choose a method. Select QR code or the direct installation option offered by the plan.
- Scan or enter details. Use a second screen for the QR code; copy manual details exactly.
- Approve the profile. Review the plan and wait for Android to finish downloading it over Wi-Fi.
- Label the eSIM. Use a clear name such as “Travel data” or the destination.
- Choose when to use it. Leave the travel profile off until needed, or keep your home SIM as the data line. Do not delete an installed profile just because it does not connect immediately.
Profile installation and connection to a local network are separate. The validity clock may start at a different time depending on the plan, so check its activation terms before installing or switching it on.
Using eSIM for mobile data while travelling
After arrival, open Settings → Network & internet → SIMs and select the travel eSIM for Mobile data. Keep your primary SIM for calls or texts only if needed and if your operator’s roaming terms allow it. Turn off automatic data switching if available. If required, enable roaming for the travel profile only; keep the home SIM’s roaming settings separate.
Check the plan’s destinations, data allowance, and validity. Maps, photo backup, streaming, hotspot use, and app updates can consume data quickly. Download maps before travel and check remaining data in the account or app where you arranged the plan. A data-only eSIM generally does not add a regular phone number or ordinary calls and SMS; messaging and internet-call apps can work over data if already set up.
Three practical travel scenarios
- Before departure: verify the model, EID, and unlock status; install over Wi-Fi and leave the profile off if the plan allows delayed use.
- After landing: select the travel profile for mobile data, enable its roaming if required, and allow a few minutes to register.
- Keep your home number: leave that SIM enabled for calls or verification as needed, but set the travel eSIM for data and disable automatic switching. Check your home operator’s charges.
Kaspersky eSIM Store is an app and website where you can choose, arrange, and activate an eSIM data plan for an international trip. It is not a mobile operator or owner of the local network; availability depends on the destination and plan terms.
Common problems and what to check
There is no “Add eSIM” option
Search Settings for “eSIM” or “EID,” confirm the model number, install Android updates, and restart. If the EID is missing or the menu remains unavailable, ask Google or the seller to verify the variant. A work-managed phone may restrict SIM changes.
The QR code will not scan
Increase brightness on the display showing it, clean the camera lens, and keep the full code in view. Use a second device if the code is on the Pixel. Check for an already installed profile before retrying, since a code may be single-use.
The profile is installed but there is no signal
Make sure the travel profile is on and the destination is included. Toggle Airplane mode briefly or restart, then allow a few minutes to register. If the plan specifies an APN, enter that value exactly; do not guess.
Data does not work
Select the travel profile for mobile data, enable mobile data, and turn on roaming for that profile if required. Check the plan’s activation date and allowance. Disable automatic data switching so the home SIM does not take over.
Activation fails or a second profile will not work
Check Wi-Fi, the supplied activation method, and the SIM list; the profile might have installed even if the confirmation timed out. Do not delete or reset it until you check provider instructions. Two stored eSIMs do not always mean two can be active at once; simultaneous use depends on the phone and carrier.
Coverage or speeds differ
Service depends on local network availability, supported bands, indoor conditions, congestion, and plan terms. Check the full model number and regional band support for your destination. No handset can guarantee a particular speed or signal everywhere.
Frequently asked questions
Does Google Pixel 10 Pro Fold 8GB RAM support eSIM?
Google confirms eSIM for Pixel 10 Pro Fold, including one nano-SIM plus one eSIM in its published US specification. The “8GB RAM” detail is not confirmed: Google lists 16 GB RAM. Check the model, EID, menu, and carrier unlock status on your handset.
Is there a Pixel 10 Pro Fold model with 8 GB RAM?
Google’s published configurations show 16 GB RAM with 256 GB, 512 GB, or 1 TB storage. The exact 8 GB variant could not be verified. Ask the seller to explain the memory listing and provide the model number.
How do I find the EID?
Search Settings for “EID” or check Settings → About phone → SIM status. The path can vary. An EID is a useful sign, but also confirm that you can add eSIM and that the phone is unlocked.
Can I use two eSIMs at once?
Possibly. Google says simultaneous use depends on the Pixel and carrier. The supported combination can vary by region and operator, so check with the carrier and in SIM settings.
Do I have to remove my physical SIM?
Usually not if the regional phone and carrier support nano-SIM plus eSIM. Choose the travel eSIM for data and check home-network roaming charges.
Does a travel eSIM include a phone number?
A data-only plan generally does not include ordinary calls, SMS, or a phone number unless its terms say otherwise. Internet messaging apps can work over data.
When should I install it?
Installing over Wi-Fi before travel makes troubleshooting easier. When to switch it on depends on the plan’s activation and validity rules.
Final check: verify the phone, then choose a trip plan
For this exact device name, the best-supported answer is that Google Pixel 10 Pro Fold supports eSIM, but Google’s listed hardware uses 16 GB RAM rather than the “8GB RAM” in the requested name. Treat that mismatch as a reason to inspect the physical handset, not as evidence that eSIM is unavailable. Confirm the model number, EID, add-eSIM menu, regional version, and carrier unlock status before checkout.
Then choose a plan for the places you will visit, compare the allowance and validity with your travel dates, and follow the installation steps for the provider. Set the travel profile as the mobile-data line only when you are ready, and enable roaming only for that profile if its instructions require it. Kaspersky eSIM Store helps you browse, arrange, and activate a data eSIM for travel; check the current destination and plan terms on the Kaspersky eSIM Store website before you proceed.


