Travel connectivity guide
Google Pixel 10 Pro XL 128GB eSIM Guide
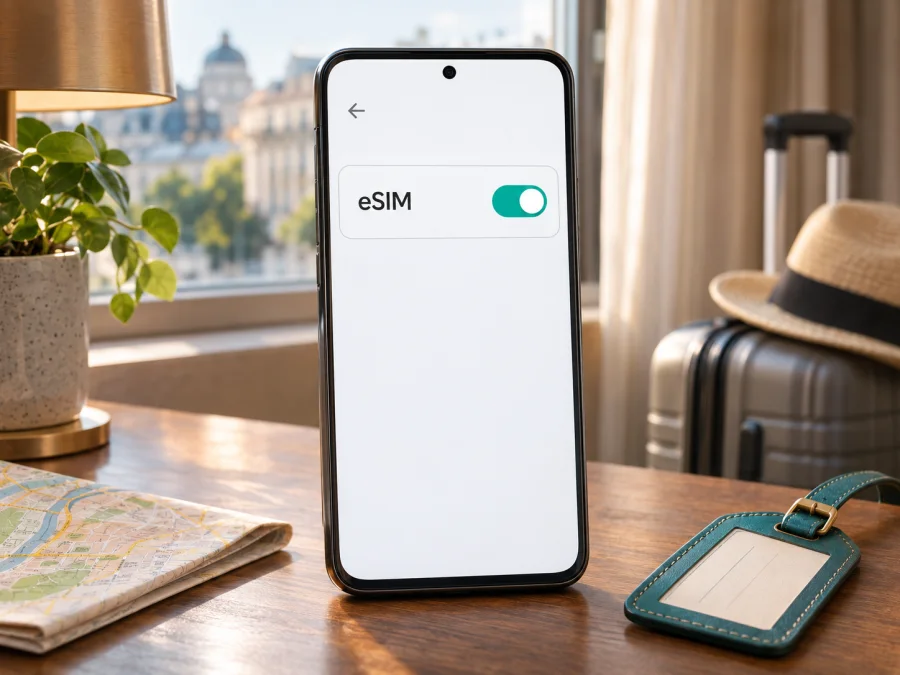
Google Pixel 10 Pro XL 128GB eSIM: compatibility and setup guide
Short answer: Google confirms eSIM support for the Pixel 10 Pro XL family. The U.S. version is eSIM-only; the rest-of-world configuration is listed with one nano-SIM slot plus eSIM. There is one discrepancy in the exact requested name, Google Pixel 10 Pro XL 128GB: Google’s current specifications list the Pro XL with 256 GB, 512 GB and 1 TB storage options, not 128 GB. Verify the phone’s model and storage before buying a plan or relying on a retailer’s description.
Compatibility at a glance
| Check | What Google currently lists | What to keep in mind |
|---|---|---|
| eSIM support | Pixel 10 Pro XL supports eSIM. | The device family can use a digital SIM profile. |
| U.S. version | Dual eSIM: two active eSIMs; stores eight or more profiles. | There is no physical SIM fallback. |
| Rest-of-world version | Dual SIM: one nano-SIM and one eSIM. | Carrier and plan support still apply. |
| 128 GB capacity | Not listed for Pixel 10 Pro XL on Google’s current specifications. | Confirm the actual device and storage with the seller. |
| Carrier access | eSIM and network service depend on provider support. | Check unlock status, model, destination and plan before purchase. |
If the phone is a genuine Pixel 10 Pro XL, eSIM is supported according to Google. The “128GB” capacity is not a configuration shown in Google’s current Pro XL specification. That mismatch could be a retailer typo, a copied title or an incorrectly identified device; it is not enough on its own to conclude that the phone is counterfeit or incompatible. Check Settings → About phone, the box label and the exact model number, then ask the seller to reconcile the capacity before you pay.
Regional and carrier versions
The Pixel 10 Pro XL SIM arrangement depends on its intended market. Google separates the U.S. version from the rest-of-world configuration: U.S. phones use eSIM only, while the listed rest-of-world version has a nano-SIM tray and eSIM. Both support eSIM, but only the latter offers a physical SIM slot. “Rest of world” is a specification category, not a promise that every country, carrier or travel plan will work.
A phone imported from another market may differ in network bands, carrier approvals or restrictions. Ask the seller which version is supplied and check that it is unlocked. A provider may require the EID or IMEI before issuing a profile. Google lists 256 GB, 512 GB and 1 TB for Pixel 10 Pro XL, not 128 GB; do not transfer specifications from another Pixel model. Resolve the listing discrepancy with the seller before purchase.
Check your Pixel before buying a plan
Use the phone you will actually take on the trip. A retailer’s title or packaging photo cannot confirm the installed software, eSIM menu or carrier lock.
Compatibility checklist
- [ ] In Settings → About phone, confirm the device name and model identifier. Check storage and resolve any difference from the “128GB” listing.
- [ ] Look for an EID in About phone or SIM status. Menu names vary by Android version and region.
- [ ] Open Settings → Network & internet → SIMs and look for Add SIM or Set up an eSIM.
- [ ] Confirm whether the device is the U.S. eSIM-only version or a rest-of-world version with a nano-SIM tray.
- [ ] Ask the current carrier or travel-plan provider to confirm compatibility with this specific model and that the phone is unlocked.
- [ ] Check the destination, data allowance, validity period, activation timing and network instructions for the plan.
- [ ] Use Wi-Fi for setup and keep the activation QR code or details accessible on another screen.
Use the actual device details as well: a generic compatibility result cannot resolve a mismatch between a seller’s capacity description and the model shown in Settings.
Find the EID and IMEI
Start at Settings → About phone. Depending on the software version, the EID and IMEI may be listed there or under SIM status. You can also check the original box. Search Settings for “EID” if you do not see it immediately. The EID identifies the embedded SIM; an IMEI identifies the mobile device. A provider may request either or both during activation.
An EID is a useful indication that the phone has an eSIM component, but it does not prove that a particular carrier supports the device or that the phone is unlocked. The setup menu is another practical check. If the EID or Set up an eSIM option is missing, confirm the exact model and market, check for software updates, and contact the seller, carrier or Google support rather than guessing from the product title.
Provide identifiers only to the provider that needs them, through its official activation or support channel. Do not post them publicly. Never substitute an IMEI for an EID unless the provider explicitly says it accepts that identifier. If you are unsure, check your device compatibility before paying.
Prepare an eSIM for a trip
An eSIM profile is a digital SIM stored on the phone. Installing it and connecting to a destination network are separate steps. Check when the plan’s validity starts: this may be installation, activation or first network connection. Before departure, confirm that every country on your itinerary is included, including stopovers, and review the data allowance, validity, supported networks and installation instructions. Do not infer coverage or speed from the Pixel model alone.
Decide which line should handle mobile data, calls and texts. Pixel settings let you select a preferred SIM for different uses, with one SIM selected as the default for data. If you rely on your home number for calls or verification messages, check its roaming conditions with your regular carrier. A travel eSIM is often data-only and should not be assumed to include a conventional number, calls or SMS unless its plan details say so.
Kaspersky eSIM Store is an app and website where you can choose, arrange and activate an eSIM with a data plan for an international trip. After verifying your device, browse the Kaspersky eSIM Store to check current destinations and plan terms. Plans, prices and conditions may change, so review the details for your destination before completing an order.
Install and activate an eSIM
The menu path below follows Google’s current Android setup instructions. Providers may activate a plan by QR code, in-app setup, transfer or manual code. Follow the instructions supplied with your plan, because activation timing and QR-code reuse rules can differ.
Before installation
- Confirm the model, EID or eSIM menu, and that the phone is unlocked for the intended plan.
- Connect to stable Wi-Fi, charge the phone and display the QR code on another screen if needed.
- Check installation timing and when the plan’s validity begins.
- Decide which SIM should carry data and whether your home line must remain available.
Add the profile in Android settings
- Open Settings.
- Tap Network & internet, then SIMs.
- Tap Add SIM, then Set up an eSIM. If the wording differs, search Settings for “SIM” or use the on-screen setup flow.
- Choose the provider if asked. Scan the QR code or enter the activation details as instructed.
- Wait for the profile to download and complete any carrier confirmation. Keep Wi-Fi on and do not interrupt a setup that is still processing.
- Give the line a clear label, such as “Travel data,” to distinguish it from your regular number.
- Return to Settings → Network & internet → SIMs, select the new line and make sure Use this SIM is on.
- Set the eSIM as the mobile-data SIM when you want it to carry data. If its instructions require data roaming, enable roaming for that profile only. Check your home SIM separately to avoid unexpected charges.
- At the destination, turn on mobile data and allow the device to register. Test a webpage with Wi-Fi off. Use a provider-specified APN or manual network selection only when its instructions call for it.
The Android eSIM installation guide offers an additional reference. Its steps can vary by device and software version, and the illustrated guide is specific to Samsung, so use the Pixel menu path above for this phone. The iOS installation guide is for a separate iPhone setup, not for installing an eSIM on the Pixel.
QR code or manual activation
Scan only a QR code issued for this plan. If it fails, check screen brightness and camera focus, and confirm that the code is valid and unused. Display it on another device if it is on the Pixel screen. Some codes allow only one installation; do not delete and reinstall unless the provider confirms that it is allowed. For a manual activation code, use Android’s manual option and enter the supplied details exactly. An EID is not an activation code.
Use Google Pixel 10 Pro XL 128GB while travelling
Once the profile is added, you can keep the home line for the functions you need and select the travel eSIM for mobile data. The rest-of-world version can use a nano-SIM plus eSIM; the U.S. version requires eSIM for both lines. Set preferences before departure so you can review them without relying on the travel plan.
At your destination:
- Open Settings → Network & internet → SIMs and check that the travel profile is switched on.
- Select it for mobile data. Keep calls and texts assigned to your preferred line, or choose “Ask every time” if available.
- Enable data roaming for the travel profile only if the plan instructions require it. Review roaming for the home line separately.
- Wait for network registration. If automatic selection fails, use manual selection only as the plan provider directs.
- Turn Wi-Fi off and test a simple webpage or messaging app before relying on maps or travel services.
- Monitor remaining data and validity in the provider’s account or app, and keep support instructions available offline.
An eSIM data plan does not necessarily include a phone number, voice calls or SMS. Internet calling and messaging apps can use mobile data, but they may not replace services that send verification codes by text. Check the selected plan details and keep your usual line if you need those messages. Network quality, availability and speed depend on the destination network and local conditions.
Practical scenarios
Weekend in one country: Install over Wi-Fi if the provider allows advance setup. Check when validity begins, then select the travel profile for data after landing and test it before opening navigation.
A route across borders: Compare the plan’s destination list with every country and stopover. Keep the travel profile selected as you move between networks, and do not assume a plan covers a neighboring country.
Keeping a home number: Set calls and texts to your regular line and data to the travel eSIM. The U.S. model needs an eSIM home line too; the rest-of-world version can use its nano-SIM tray. Confirm both carriers support the combination.
Troubleshooting: what to check first
Change one setting at a time and note what you changed. This makes it easier to restore your setup or explain the issue to a provider.
| Symptom | First checks |
|---|---|
| No eSIM setup option | Check EID, model number, region and Android updates; confirm the device with the seller or Google support. |
| QR code fails | Check brightness and focus; confirm the code belongs to this plan, is still valid and has not already been used. |
| Profile downloads but has no service | Confirm the plan covers the destination and dates, the profile is enabled, and the correct SIM is selected for data. |
| Signal appears but data does not work | Turn Wi-Fi off for the test; check mobile data, roaming instructions, allowance and validity. Restart once. |
| Carrier says the device is unsupported | Provide the requested EID or IMEI through its secure support channel and ask about this exact market version. |
| Profile disappeared or activation fails again | Do not reinstall blindly. Ask whether the code can be reused or the provider must issue a new profile. |
| Two lines show interruptions | Test each line separately and ask both carriers whether the combination is supported. |
Before resetting network settings or erasing an eSIM, check whether the profile can be reinstalled or must be reissued. If the menu is missing despite an EID, restart the phone, install available updates over Wi-Fi and check again. For “no service,” confirm plan destination and dates, turn airplane mode off, enable the profile and select it for data. Follow provider instructions for an APN or network selection. eSIM capability does not guarantee a signal in every location.
FAQ
Does Google Pixel 10 Pro XL 128GB support eSIM?
Google confirms eSIM support for Pixel 10 Pro XL. The U.S. model is eSIM-only; the rest-of-world specification includes one nano-SIM plus eSIM. The 128 GB capacity is not listed for the Pro XL in Google’s current specifications, so verify the exact handset and storage.
Can two eSIM profiles be active at once?
Google says eligible Pixel 7 and later phones can use two active eSIM profiles when the carrier supports it. The U.S. Pixel 10 Pro XL is listed with two active eSIMs. Check your market version and providers rather than assuming every setup behaves the same.
Should I install the eSIM before travelling?
Follow the provider’s timing instructions. If advance installation is allowed, Wi-Fi at home can make setup easier. Validity may begin at installation, activation or first network connection, depending on the plan.
What if the phone has no EID or eSIM option?
Search Settings for “EID” and “SIM,” check About phone and install available updates. Confirm the exact model and sales market with the seller. If the option remains missing, ask Google support or the carrier to help identify the restriction.
Final checklist: verify first, then choose a travel eSIM
For Google Pixel 10 Pro XL 128GB, the dependable answer is that the Pixel 10 Pro XL family supports eSIM, while Google’s current Pro XL specifications do not confirm a 128 GB capacity. Check the model number, storage, EID and Set up an eSIM menu on the actual phone. Confirm whether it is the U.S. eSIM-only version or a rest-of-world model with a nano-SIM tray, and verify carrier unlock and plan compatibility.
Before purchase, match the plan to every destination on your itinerary, its data allowance, validity and activation steps. Once installed, select the intended line for data, review roaming settings on each SIM and test mobile data after arrival. Kaspersky eSIM Store’s app and website let you choose, arrange and activate an eSIM with a data plan for an international trip; review current destination and plan terms before selecting one. Checking the exact device and settings first helps you avoid buying a plan the phone, carrier or route cannot use.


