Travel connectivity guide
Google Pixel 10 Pro XL eSIM Compatibility & Setup
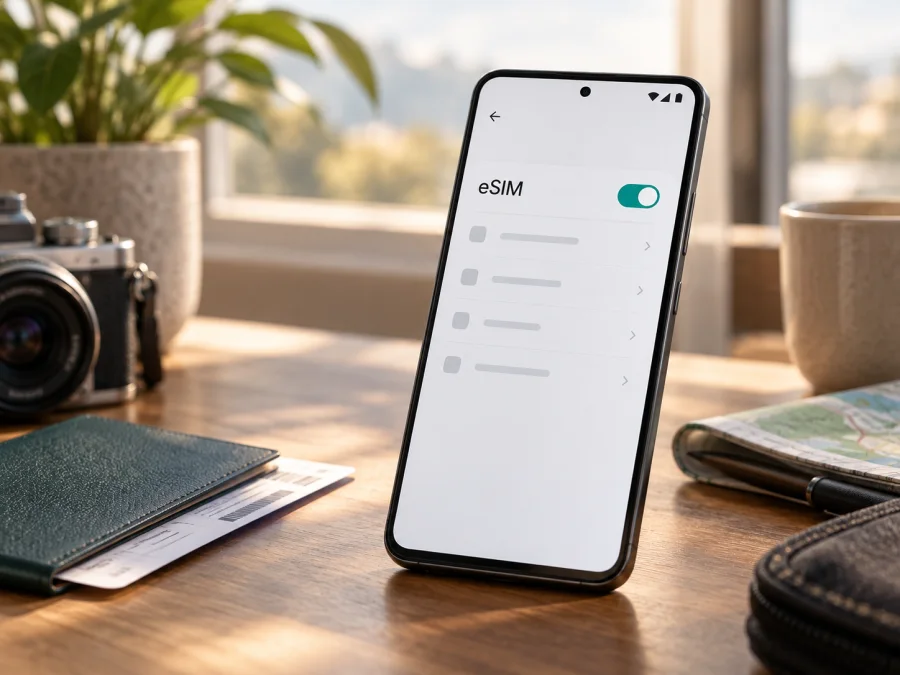
Google Pixel 10 Pro XL eSIM: compatibility and setup guide
The Google Pixel 10 Pro XL supports eSIM. Google’s current Pixel documentation lists eSIM support for Pixel 4 and later, including this generation. The important regional distinction is how the phone combines SIM types: Google lists US Pixel 10 Pro XL models as eSIM-only, while versions for the rest of the world (ROW) support dual SIM with one nano-SIM and one eSIM. A US model therefore has no physical SIM tray; a ROW model can use a physical nano-SIM alongside an eSIM. Both configurations support a digital eSIM profile, but the exact options available depend on the phone’s sales region, carrier, software and local service.
That answer covers the phone hardware, not every service plan. Your carrier or eSIM provider must support the model and destination, the phone must be unlocked for another provider, and the eSIM profile must be issued for your plan. Before buying a travel plan, check the phone itself and the plan’s conditions. The steps below help you confirm the device, install a profile and select the right line for mobile data.
Google Pixel 10 Pro XL eSIM specifications
| Item | What to expect |
|---|---|
| eSIM support | Yes. Google lists eSIM for Pixel 4 and later, including Pixel 10 Pro XL. |
| US configuration | eSIM-only for US Pixel 10 Pro XL; Google says physical SIM cards cannot be used on these US models. |
| ROW configuration | Dual SIM with one nano-SIM and one eSIM, according to Google’s device specifications. |
| Multiple profiles | A Pixel 7 or later can use two eSIM profiles at once when the carrier allows it. The phone can store more profiles than it uses simultaneously. |
| Network access | The eSIM profile and provider must support service in the destination. Device eSIM support alone does not guarantee coverage or 5G access. |
| Main checks | EID or “Add eSIM” in Settings, SIM-unlock status, carrier support, and the plan’s destination and activation terms. |
“ROW” is Google’s label for versions intended for regions outside the United States. It does not mean that every market has identical network bands, carrier settings or sales options. If the phone was bought through a carrier or imported, confirm its precise model and sales region with the seller or carrier. A carrier can also restrict which profiles a locked phone accepts. An eSIM-compatible device can still reject an otherwise valid plan when it is locked, the provider does not support that model, or the QR code has expired or has already been used.
Check your exact phone before choosing a plan
Start with the Pixel in your hand rather than a product listing. Android settings labels can vary slightly by software version, but the following checks are reliable starting points.
- Look for the eSIM option. Open Settings → Network & internet → SIMs → Add SIM. If you see Set up an eSIM, the phone exposes eSIM setup. You can stop before scanning or downloading a profile; opening this page does not activate a plan by itself.
- Find the EID. Open Settings → About phone → SIM status or search Settings for “EID”. The EID is the identifier for the embedded SIM hardware. Do not post the EID publicly. Share it only with the provider or carrier when they ask for it through an appropriate support channel.
- Check for a carrier lock. If the phone was sold with a mobile service agreement, ask the original carrier whether it is SIM-unlocked and can accept another provider’s eSIM. A visible EID confirms hardware, not an unlocked status.
- Confirm the service. Ask the carrier or plan provider whether it supports eSIM on your exact Pixel model and whether the plan covers your destination. Also check whether the data line requires roaming to be enabled and when the plan’s validity begins.
- Check the regional SIM layout. A US Pixel 10 Pro XL is eSIM-only. A ROW version has a nano-SIM slot and eSIM. If an imported model’s SIM layout or network compatibility is unclear, verify the model number and intended region before relying on it during travel.
If “Set up an eSIM” is missing but Google documentation says your model supports it, restart the phone, install available Android and carrier-services updates, and check again. Then confirm the phone’s exact model, sales region and carrier restrictions. Do not treat absence of the menu alone as proof that all versions lack eSIM; device software, carrier configuration and regional variants can affect the menu.
The EID helps a provider match a profile to the phone, but it does not identify which networks are available at your destination. For that, compare the model number and region with the carrier’s supported-device information. Likewise, seeing “Add eSIM” confirms that the phone can start a profile setup; it does not confirm that a particular plan accepts the handset, that the phone is unlocked, or that the plan covers your route. Hardware capability, carrier permission and plan coverage are separate checks, and each needs to be satisfied.
If the Pixel was bought second-hand or imported, use the model number in Settings → About phone, the seller’s listing and the options shown in Settings to identify the variant. If those details disagree, ask the seller or original carrier to confirm the intended sales region before travel. A US Pixel 10 Pro XL is eSIM-only; a ROW model has both nano-SIM and eSIM support. Carrier activation conditions can still differ by market or account.
Check your device against the travel eSIM requirements before purchase: confirm eSIM support, an available EID or setup option, an unlocked phone and a plan that covers your route. The check is specific to the handset you will carry, not simply to the Pixel family name.
Install and activate an eSIM
Before installation, connect to stable Wi-Fi, charge the phone, and keep the plan’s QR code or activation details available on another screen or printed page. Follow the provider’s instructions in the order supplied. Some plans install by scanning a QR code; others are added through an app, a carrier’s activation flow or manual details. Do not scan the same single-use code repeatedly or delete a profile to troubleshoot unless the provider tells you to: the code may not be reusable.
Step-by-step setup from Android Settings
- Open Settings → Network & internet → SIMs → Add SIM → Set up an eSIM. If initial phone setup offers mobile service, you can also add it there; it is possible to complete setup later in Settings.
- Follow the on-screen flow. If prompted to choose a network provider, select the provider that issued the eSIM. When the provider supplied a QR code, use the phone’s camera or the scanning option in the setup screen. For manual activation, enter the details exactly as provided.
- Wait for the profile to download and install. Keep Wi-Fi connected and do not close the setup screen or restart the phone during the download unless the instructions say to. Installation and activation are separate: a profile may appear in SIM settings before it is permitted to connect or before its data package begins.
- Give the line a recognizable label, such as “Travel data”. Labels help distinguish the eSIM from a home SIM or another stored profile. They do not change its service.
- Open Settings → Network & internet → SIMs and select the new profile. Turn on Use this SIM when you are ready for it to connect. For a data-only travel plan, choose that eSIM under Mobile data. Keep your regular line selected for calls and texts if that is what you want and your home carrier’s roaming charges are understood.
- If the plan requires it, enable Data roaming for the travel eSIM. Roaming is a network setting, and its requirement depends on the plan. Check the plan instructions before switching it on. Selecting an eSIM for data does not automatically make it the line for voice calls or messages.
- At the destination, allow the phone to register on a supported network. If the provider says the plan activates only after arrival or first network connection, leave the profile installed and follow that timing. Check the provider’s terms for the exact start of validity; downloading a profile does not always start the package.
For visual setup references, use the Android eSIM installation instructions and, when moving an eSIM from an Apple phone, the iOS instructions. Menu names on your Pixel can differ slightly from screenshots as Android updates. Kaspersky eSIM Store is an app and website where you can choose, arrange and activate an eSIM with a mobile-data plan for an overseas trip; it is not a mobile network operator. Read the individual plan’s coverage, validity, data allowance and activation conditions before completing an order.
Before you leave home
- Confirm that the plan covers every country on your route, and check its start time, validity and data allowance.
- Verify that the phone is unlocked and the provider accepts this regional variant.
- Install over reliable Wi-Fi if advance installation is allowed; save setup instructions and support details offline.
- Keep the profile installed until the provider says it can be removed. A travel profile may not connect before arrival.
- Choose your data line and review roaming settings and charges for your home SIM.
Using the Pixel 10 Pro XL on a trip
A travel eSIM can provide mobile data for maps, bookings, translation, ride services and messaging. One practical approach is to install it at home over Wi-Fi, leave it off until the provider recommends activation, then enable it after landing. Select it for mobile data; keep the home line for calls or verification messages only if supported and if you understand its roaming charges.
For a multi-country route, confirm that every stop is covered. A one-country plan may stop working at a border. The Pixel’s 5G capability does not guarantee 5G access on a roaming partner: bands, coverage, location and plan terms matter. If your data allowance is limited, use Wi-Fi for large downloads and restrict background data for apps that can wait.
Google says Pixel 7 and later can use two active eSIM profiles when the carrier allows it. Check that the intended line is enabled and selected for data; call, text and data defaults are separate. A data-only travel plan generally has no regular number, voice service or SMS unless its terms say otherwise. Internet calling and messaging apps can use its data connection.
Troubleshooting: when an eSIM will not connect
“Set up an eSIM” is missing. Search Settings for “eSIM”, then open Network & internet → SIMs → Add SIM. Restart and update Android, confirm the model and EID, and ask the selling carrier whether a lock or carrier configuration limits setup. Both US and ROW Pixel 10 Pro XL configurations include eSIM.
The QR code fails or download stops. Use stable Wi-Fi and show the full code at good brightness. If the code is on this phone, display it elsewhere or use manual details. Check for typos, expiry or an existing profile. Ask the issuer before requesting a replacement because a code may be single-use.
The profile installs but has no service. Make sure it is enabled and selected for mobile data. Toggle airplane mode, then restart. Check that the plan is active and covers your location; some profiles connect only in their destination. Follow the provider’s network-selection instructions.
Signal appears, but data does not work. Verify the data line, activation timing and any required APN. Enable roaming only if the plan requires it. Temporarily turn off the other data SIM to check line selection. Do not erase the profile unless the provider confirms it can be reinstalled.
Calls, texts or speed are wrong. Review the separate call, SMS and data defaults in Settings → Network & internet → SIMs. 5G varies with model, bands, roaming partner, plan and location; 4G may be the available service. A data-only eSIM supports internet apps, not necessarily a phone number. If a provider rejects the device, share its model and requested EID or IMEI privately, then confirm unlock and region support.
Quick FAQ
Does Google Pixel 10 Pro XL support eSIM?
Yes. Google lists eSIM support for Pixel 4 and later, including this model. US units are eSIM-only; ROW units support one nano-SIM and one eSIM. Carrier unlock and plan compatibility remain separate checks.
Can two eSIMs be active together?
Pixel 7 and later can use two active eSIM profiles when the carrier permits it. Stored profiles are not necessarily active, so verify support with both providers.
Does EID prove the phone is unlocked?
No. EID identifies eSIM hardware. Ask the original carrier to confirm SIM-unlock status before using another provider.
Will it work in every country, and does it need a physical SIM?
No plan guarantees service everywhere; check destination coverage and network support. ROW Pixel 10 Pro XL models have nano-SIM plus eSIM, while US models are eSIM-only. Line availability and roaming conditions vary by carrier.
Check compatibility, then choose a trip eSIM
Before buying, find an EID or Set up an eSIM on the exact Google Pixel 10 Pro XL, confirm the phone is unlocked and accepted for its region, and check that the plan covers every destination. Review activation timing, roaming requirements, data allowance and validity.
When the checks match, Kaspersky eSIM Store’s app and website can help you choose, arrange and activate an eSIM plan for mobile data on an overseas trip. Install over a reliable connection, select the eSIM for data when appropriate, and keep setup details handy for the journey.


