Travel connectivity guide
Google Pixel 7a eSIM: Compatibility and Setup
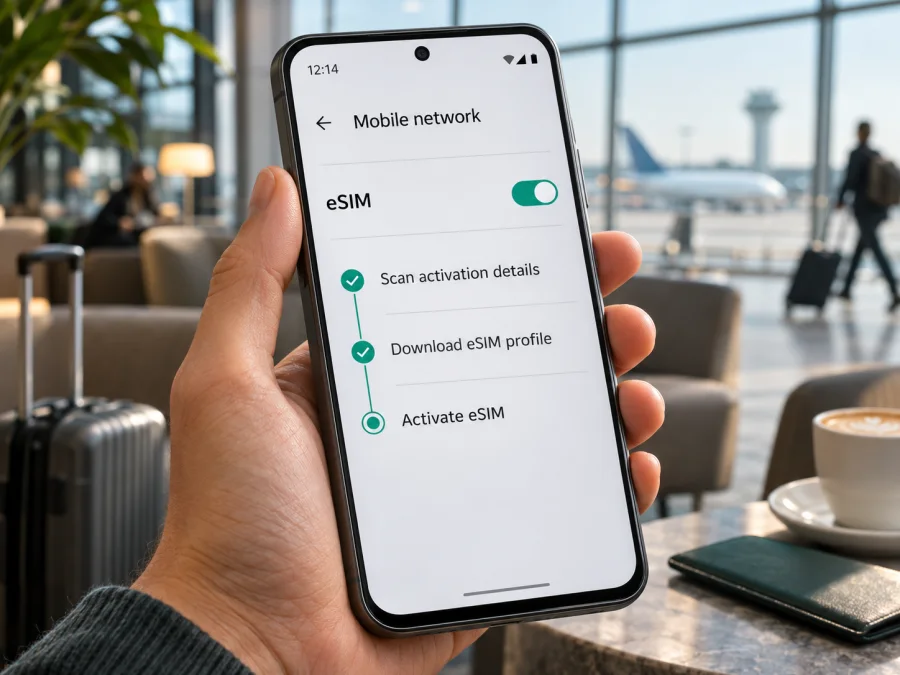
Google Pixel 7a eSIM: compatibility, setup, and travel use
Short answer: Yes. Google lists the Google Pixel 7a as a dual-SIM phone with one nano-SIM and eSIM. Its published network variants include eSIM support. You can therefore use a compatible travel eSIM on a Pixel 7a, subject to the exact handset, its software, carrier rules, and the plan’s supported network. Before choosing a plan, check the EID and eSIM setup option on your own phone, and confirm it is not carrier-locked.
This guide covers the Google Pixel 7a specifically, not the Pixel 7, Pixel 7 Pro, later Pixel A models, or similarly named phones. Google’s current hardware specifications list one nano-SIM and an eSIM, alongside distinct regional radio models. The exact model code and destination network therefore matter for service abroad.
Google Pixel 7a eSIM compatibility at a glance
| Check | What applies to Google Pixel 7a |
|---|---|
| eSIM hardware | Supported in Google’s published Pixel 7a specifications |
| SIM arrangement | One nano-SIM and one eSIM; compatible software and network required |
| Regional model codes | Google lists GWKK3, GHL1X, G0DZQ, and G82U8 network variants; the Japan-only variant is G82U8 |
| Number of active profiles | A Pixel 7 or later may use two eSIM profiles at once when the carrier supports it; this is not a promise that every network or plan allows it |
| What to check on your handset | EID under Settings, and whether Network & internet offers Add SIM / Set up an eSIM |
| Main limitation | A phone’s eSIM hardware does not guarantee that every operator, country, or plan will accept it |
The standard Pixel 7a supports eSIM, but check the individual device before paying. A product listing does not reveal carrier lock status or whether the operator will activate an eSIM on that phone.
Does the Google Pixel 7a support eSIM?
Yes. Google’s Pixel 7a hardware specifications identify a dual-SIM configuration consisting of a single nano-SIM and an eSIM. In the same section, Google lists eSIM for the Pixel 7a network variants GWKK3, GHL1X, G0DZQ, and G82U8. The G82U8 entry is marked for Japan. This is a positive manufacturer confirmation for the named model, rather than an assumption based on another Pixel generation.
That answer refers to the phone’s built-in capability. An eSIM still needs a compatible profile from a mobile operator or eSIM plan, and the operator must support activation on that Pixel 7a in the relevant market. Some carriers require an EID or IMEI before issuing a profile. A carrier may also restrict a phone that it sold or configured, or prevent eSIM activation while the device remains locked to its network. Ask the current carrier or seller to confirm these points if the phone was purchased second-hand, imported, or sold as a carrier device.
A travel data eSIM and your everyday SIM can often be kept on the same Pixel 7a. Google describes Pixel dual-SIM use as one physical SIM and one eSIM. The phone lets you choose which SIM is the default for mobile data, calls, and texts, but only one SIM can be the default for mobile data at a time. For a data-only travel plan, you can usually keep your regular number available for calls or messages and select the travel profile for data, depending on your operator settings and plan terms.
Google says Pixel 7 and later phones may be able to have two eSIM profiles active at once if the carrier allows it. This feature should not be confused with the basic ability to store more than one profile or switch between them. If you plan to keep two active eSIMs simultaneously, ask both relevant operators whether the service and your particular model support that arrangement.
Regional versions and operator conditions
“Regional version” can refer to different things: the hardware model code, the country where the phone was sold, the radio bands enabled for that model, the carrier that supplied it, or the market where you intend to use it. These details affect mobile service even when the product name on the box is the same.
Google’s Pixel 7a specification table lists the network variants GWKK3, GHL1X, G0DZQ, and G82U8, with the last one designated for Japan. Google lists eSIM for each of those variants. It also distinguishes radio capabilities, including a U.S. mmWave version, other sub‑6 GHz versions, and a Japan-only sub‑6 GHz version. The existence of eSIM support does not mean every model has identical radio bands or will connect to every network in every destination.
A country’s eSIM market and a handset’s regional model are separate checks. A local operator may offer eSIM but decline an imported phone; another may accept it. LTE or 5G service also depends on supported bands, local coverage, plan conditions, and registration rules. The phone’s 5G capability alone does not guarantee 5G abroad.
Before purchase, check the model number in Settings → About phone and compare it with the label or receipt if available. Ask the seller or carrier whether the handset is unlocked and whether eSIM activation is permitted for the model in your destination. If the seller cannot confirm, use the EID and eSIM settings checks below and contact the operator that will issue the profile. A missing eSIM option can be a clue that needs investigation; do not rely on the product name alone.
Check the EID and eSIM option yourself
The EID is the identifier associated with the phone’s embedded SIM. Google says a phone needs an EID to use eSIM. On a Pixel 7a, check the settings before choosing a plan:
- Open Settings.
- Tap About phone.
- Tap SIM status.
- Look for EID. If it is displayed, record it only when a carrier or activation flow asks for it; do not post it publicly.
- Return to Settings, then open Network & internet → SIMs.
- Look for Add SIM or Set up an eSIM. Menu wording can vary with the Android version and language.
The menu is a useful sign, but it does not guarantee that a particular operator will activate the phone. Confirm the EID, check for updates, and verify that the device is unlocked. If the EID or menu is missing, restart and update the phone, then ask the seller or carrier to verify the exact model before purchase.
Google also documents an EID QR code for some activation workflows. If an operator asks for it, follow the path presented by the current software rather than sharing a screenshot with personal identifiers. Never send a QR code or activation details to someone who is not helping you set up the plan: many eSIM activation codes are intended for a single installation.
How to install and activate an eSIM on Google Pixel 7a
Install the profile while you have a stable internet connection, preferably Wi‑Fi. Keep the activation instructions or QR code available on another screen if you need to scan it. Do not delete an installed profile just to repeat setup unless the provider instructs you to do so; some activation codes cannot be reused.
- Check compatibility. Confirm the EID, eSIM setup option, and unlocked status. Verify that the provider accepts the Pixel 7a and that the plan fits your destination.
- Prepare the activation details. Open the order or account instructions and identify whether the plan uses in-app installation, a QR code, or manual activation details. Keep the QR code on a second device if the Pixel cannot scan its own screen.
- Open the SIM settings. On the Pixel 7a, go to Settings → Network & internet → SIMs.
- Start adding the profile. Tap Add SIM, then Set up an eSIM. Follow the prompts. The wording may vary slightly by Android version, operator, or activation method.
- Scan or enter the details. Use the QR code or provider instructions. If your provider offers an install button in its app, follow that flow while connected to Wi‑Fi.
- Wait for the profile to download. Do not close the setup screen or remove the profile during installation. The download and registration can take a few minutes.
- Name the eSIM. Choose a label such as “Travel” so you can distinguish it from your regular SIM.
- Choose how to use it. If the plan is for data, set the travel eSIM as the mobile-data SIM when you want to use it. Keep calls and texts on the preferred line if appropriate.
- Follow the plan’s activation timing. Some plans begin when installed, while others begin when they first connect in the destination or on a specified date. Check the offer’s terms; do not assume that installing the profile starts or pauses validity.
- Test the connection. When the plan should be active, turn on mobile data for the travel eSIM and wait for it to register. If the provider requires data roaming for that eSIM, enable it only on the travel profile and follow its instructions.
Google’s menu path for setting up an eSIM is Settings → Network & internet → SIMs → Add SIM → Set up an eSIM. For a general Android walkthrough, see Kaspersky eSIM Store’s Android installation instructions. That guide notes that its illustrated steps are specific to Samsung, so use the Pixel menu path above for a Google phone. The iOS installation instructions are for iPhone and are included only if you are also helping another traveller with an iOS device.
Compatibility checklist before you buy
- [ ] The phone is the Google Pixel 7a, not a different Pixel model.
- [ ] An EID appears under About phone → SIM status.
- [ ] Network & internet → SIMs offers an eSIM setup or add-SIM option.
- [ ] The phone is unlocked, or the carrier confirms that it can accept another eSIM.
- [ ] The operator or eSIM plan supports activation on this Pixel 7a in the market where you will use it.
- [ ] The plan covers the destination or all countries on your route.
- [ ] You understand the data allowance, validity period, activation conditions, and any restrictions stated for the selected plan.
Check whether your device is compatible before selecting a travel plan. If any check is uncertain, verify it with the seller or carrier first. That is especially useful for imported and refurbished phones, where the original sales region or carrier lock may not be obvious.
Set the right mobile-data SIM for your trip
After installing the profile, open Settings → Network & internet → SIMs. Select the eSIM you want to use, check that it is enabled, and choose it under the mobile-data preference. The exact controls can differ slightly after software updates. If you want the phone to use your home SIM for calls and the travel eSIM for data, set each preference separately and review them again after switching profiles.
Some travel eSIMs require data roaming to be enabled for the eSIM profile to connect to a partner network. This setting does not mean that every line should have roaming enabled. Check the plan instructions, then turn roaming on only for the line that needs it. Disable mobile data or roaming on your home SIM if you want to avoid unintended charges from your usual operator. Remember that voice and text roaming can have separate charges even when mobile data is assigned to the travel eSIM.
When the trip ends, switch mobile data back to your preferred line or turn off the travel profile if you no longer need it. Check the provider’s terms before deleting a profile. Deleting it can make reinstallation impossible if the activation code is single-use, and an inactive profile may be needed for remaining plan validity or support.
Common setup problems and what to check
- The eSIM option is missing: Confirm the model, look for an EID, restart the phone, and check for system updates. Ask the seller or carrier whether a lock or regional restriction applies before buying a plan.
- The QR code will not scan: Display it on another device, raise its brightness, and hold the Pixel camera steady. If you have manual details, enter them exactly as supplied. Do not reuse a code after a failed attempt unless the provider confirms it is still valid.
- The profile will not download: Check your internet connection, airplane mode, and activation details. Try once more after restarting. Ask the provider whether the code has expired or been used and whether it needs a particular EID or IMEI.
- The profile installs but there is no service: Confirm the plan is active in the current destination, the eSIM is enabled, and it is selected for mobile data. Enable roaming on that profile only if the provider requires it. Wait in an area with signal; a downloaded profile alone does not guarantee local network access.
- Data goes through the wrong SIM or activation reports a lock: Review the mobile-data preference in Settings → Network & internet → SIMs. If the carrier reports a lock, contact the seller or original carrier to confirm whether the phone can be unlocked. Share device identifiers only with a trusted support channel.
Practical travel scenarios
- One-country trip: Check destination, validity, and activation timing. Install over Wi‑Fi if the provider allows it, then select the travel eSIM for data after arrival.
- Several countries: Verify every destination on the route and compare any regional plan’s actual included countries. A broad region name is not a coverage guarantee.
- Work trip: Keep the regular number available if needed, assign mobile data to the travel eSIM, and check home-carrier roaming charges. Confirm carrier support before attempting two active eSIMs.
- First eSIM installation: Keep the QR code accessible on another screen, follow the provider’s activation timing, and avoid deleting a profile to retry unless support advises it.
Choosing a travel plan for a Pixel 7a
The phone’s eSIM capability does not determine which plan fits your trip. Compare destination, data allowance, validity, activation trigger, network restrictions, and top-up or tethering conditions. Check every country on a multi-stop route and choose an allowance that fits your expected use.
Kaspersky eSIM Store is an app and website where you can choose, order, and activate an eSIM with a suitable plan for mobile data during an international trip. It is not a mobile operator and does not own the networks used by plans. Actual service depends on the selected plan and underlying network availability.
After verifying your Pixel 7a, browse current destinations and plans. The homepage is a general place to check current options, not a country-specific tariff or a guarantee of service in a particular location. Review the destination and full plan terms before choosing.
Frequently asked questions
Can Google Pixel 7a use an eSIM?
Yes. Google lists one nano-SIM and an eSIM for Pixel 7a, including its published regional network variants. The operator and plan must also support activation on your exact handset.
How can I tell whether my Pixel 7a has eSIM?
Look for an EID under Settings → About phone → SIM status, then check for Settings → Network & internet → SIMs → Add SIM. Confirm that the phone is unlocked and check carrier requirements.
Can I use my physical SIM and a travel eSIM together?
The Pixel 7a is listed for one nano-SIM and an eSIM. You can select which SIM handles data, calls, and texts, subject to carrier support. Only one SIM is the default for mobile data at a time.
Can two eSIM profiles be active simultaneously?
Google says Pixel 7 and later may use two active eSIM profiles when the carrier allows it. Confirm this with the relevant carriers for your handset, market, and plan.
Does a travel eSIM include a number, calls, or SMS?
Not necessarily. Many travel plans are data-only. Check the specific plan; internet messaging and calls through apps are not the same as ordinary carrier calls or texts.
Should I turn on data roaming?
Only if the eSIM provider requires it, and only for the profile that needs it. Check the instructions and your home carrier’s roaming terms.
Will the Pixel 7a get 5G abroad?
Possibly, if the regional model, local operator, plan, and coverage support it. Google lists different radio variants, and 5G support does not guarantee 5G access on every foreign network.
Can I install the eSIM after arriving?
Setup requires an internet connection, and some activation codes are single-use. Check the provider’s timing rules and install earlier over reliable Wi‑Fi when allowed.
Final check before your trip
The Google Pixel 7a is listed by Google as supporting eSIM alongside one nano-SIM. To make that support useful for your trip, confirm the EID and setup menu on your own handset, check its carrier lock and regional model, and verify that the plan supports your destination and expected use. Install using the provider’s instructions, set the correct SIM for mobile data, and enable roaming only if the travel profile requires it.
Once those checks are complete, you can compare current options for your destination through Kaspersky eSIM Store and choose an eSIM plan that matches your itinerary. Read the plan’s coverage and activation conditions before purchase; compatibility is necessary, but the actual network and service depend on the selected plan and local operator.


