Travel connectivity guide
Google Pixel 8 Pro 256GB eSIM: Setup Guide
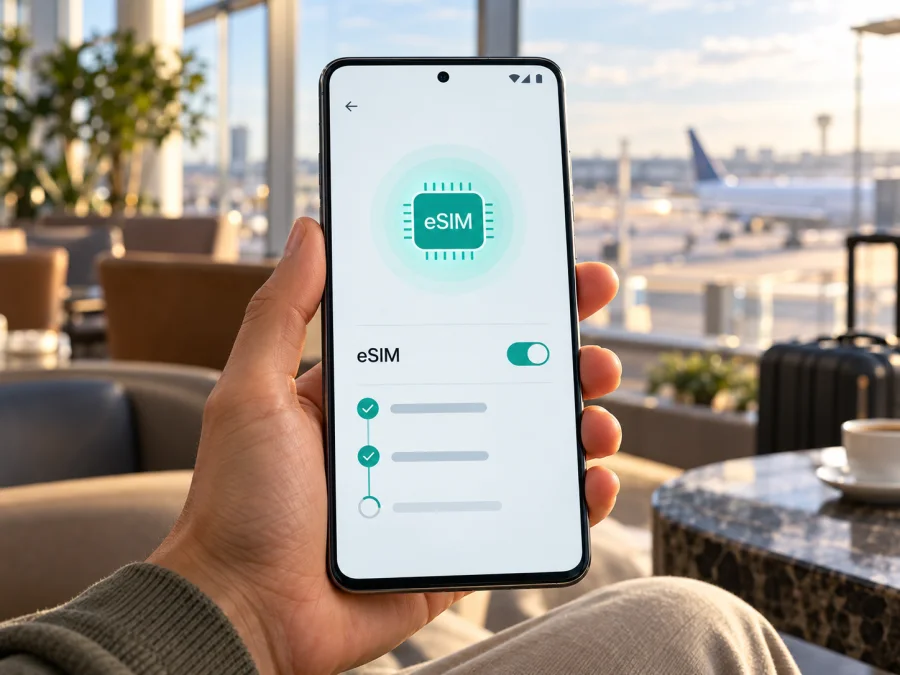
Google Pixel 8 Pro 256GB eSIM: compatibility and setup guide
Short answer: Yes. Google Pixel 8 Pro supports eSIM, and the 256GB storage configuration does not change that capability. Google’s current Pixel guidance lists eSIM support on Pixel 4 and later, while its Pixel 8 Pro hardware information identifies eSIM across the documented regional model variants. You can therefore use an eSIM profile for mobile data on this phone, provided the specific handset is not restricted by a carrier and the mobile operator for your plan supports eSIM activation on that device.
The model name alone does not identify its market version, carrier-lock status, or destination-band compatibility. Check the actual phone before choosing a travel plan, especially if it is imported, second-hand, or carrier-supplied.
Does Google Pixel 8 Pro 256GB support eSIM?
Yes. Google lists eSIM for Pixel 8 Pro. The phone can use a physical nano-SIM and an eSIM, subject to carrier support and the configuration of the handset. Pixel 7 and later phones can also use two eSIM profiles at once when the operator permits that arrangement; this does not mean that every carrier supports two active lines or that two profiles must be active together. For a travel data plan, one eSIM profile is usually enough.
“256GB” describes storage, not cellular model, market, SIM-lock status, or operator services. Pixel 8 Pro regional and carrier variants have different model numbers and may differ in supported bands, including some 5G bands. eSIM support does not guarantee that every plan or local network will work.
| Item | What to know |
|---|---|
| Exact device in this guide | Google Pixel 8 Pro 256GB |
| eSIM capability | Supported according to Google’s Pixel guidance and Pixel 8 Pro specifications |
| Physical SIM | A nano-SIM slot is available on documented Pixel 8 Pro versions |
| Storage configuration | 256GB storage does not determine eSIM capability |
| Regional variation | Model number, network bands, and carrier configuration may vary by sales market |
| Travel use | A compatible data-only eSIM can be selected for mobile data if the handset is unlocked and the plan’s operator supports it |
| Best pre-purchase check | Confirm EID, eSIM setup menu, carrier lock status, and plan compatibility on the actual phone |
Regional versions and operator restrictions
A Pixel 8 Pro purchased in one market may have a different model number or radio-band combination from a unit sold elsewhere. The difference matters most when the phone connects to a particular operator: a device can support eSIM but still lack a frequency band used by that operator, or a 5G feature may be available only on certain versions or networks. This is a network-compatibility question, separate from whether an eSIM profile can be installed.
Google lists several regional variants and notes that cellular service and bands depend on the carrier and area; some hardware bands may not be enabled. For an imported handset, check the model number in Settings or on the box against the destination operator instead of relying on the storage label.
A phone can show an EID yet reject another provider’s eSIM if it is carrier-locked or the line is not enabled. Ask the original carrier or seller to confirm unlock status; an unlocked phone still needs destination-network compatibility.
Check compatibility before choosing a plan
Use the handset itself as the first check. The menu labels can move slightly between Android releases, but on a Pixel the EID is normally listed in the phone information or SIM status screen. EID is the unique identifier associated with the embedded SIM hardware. Google also describes a route to view an eSIM QR code for carrier activation; the presence of an EID and eSIM menu are useful checks, but they do not replace checking carrier unlock and plan eligibility.
On-device compatibility checklist
- [ ] Open Settings → About phone → SIM status and look for EID. You may also check the original box if the phone is not yet set up.
- [ ] Open Settings → Network & internet → SIMs and look for Add SIM or Set up an eSIM. The exact wording can vary with Android version and current SIM configuration.
- [ ] Check that the phone is connected to Wi-Fi or another working internet connection before beginning an online download or activation.
- [ ] Confirm with the seller or original carrier that the phone is not SIM-locked. If in doubt, ask them to confirm that it can accept another provider’s eSIM.
- [ ] Compare the exact model number and destination network support with the plan’s compatibility information. eSIM support does not by itself confirm local frequency or 5G compatibility.
- [ ] Check the plan’s destination, data allowance, validity period, activation timing, and any usage conditions before payment.
- [ ] Keep the QR code or activation details available on another screen or device if the Pixel cannot scan a code displayed on itself.
If there is no EID or eSIM setup option, pause before paying. Restart the phone, install any available Android system update, and check the model number against Google’s support information. A missing menu can sometimes reflect software state, device configuration, or a restricted variant, but it should not be explained away without checking. Contact the seller or Google support with the model number and IMEI details if the result is unclear. Do not share the EID, IMEI, or QR code publicly; provide identifiers only through the operator’s or seller’s official support channel when they request them.
Use check your device as a reminder to complete these checks before you choose a plan. The key decision is based on this exact phone and its carrier status, not solely on the Pixel family name or storage capacity.
Prepare your phone for eSIM setup
Before installation, make sure you can access the account or order containing the eSIM, and read the plan’s activation instructions. Many eSIM plans are downloaded by scanning a QR code, while some services offer an in-app install or manual activation details. A QR code is usually single-use and may stop working after the profile has been installed or activation has begun. Do not scan it repeatedly or delete the profile just to retry unless the plan provider tells you to do so.
If this is your first eSIM, keep your existing SIM active until the new profile appears in the phone settings and you have confirmed how the new plan should start. For travel, determine whether the validity period begins at purchase, installation, or first connection in the destination. The wording varies by plan. If the plan supports delayed activation, follow the terms shown at checkout rather than assuming that installing the profile starts the trip period.
Kaspersky eSIM Store is an app and website where you can choose, arrange, and activate an eSIM with a plan for mobile data on an international trip. Review the destination and current plan terms before you proceed. Browse destinations and current eSIM plans.
How to install and activate an eSIM on Google Pixel 8 Pro 256GB
Labels can vary by Android version and provider. Follow the plan’s instructions if they differ from these general steps, and keep Wi-Fi connected until installation is complete.
Add a new eSIM by QR code
- Connect to Wi-Fi. Keep Wi-Fi enabled while the phone downloads the profile. Avoid relying on the eSIM that is not installed yet for this connection.
- Open the SIM settings. Go to Settings → Network & internet → SIMs.
- Start eSIM setup. Tap Add SIM, then choose Set up an eSIM or the corresponding download option.
- Select the provider if prompted. Some Pixel setup flows ask which network provider will supply the eSIM. Select the provider named in your plan details.
- Scan the QR code. Point the camera at the activation QR code provided for this eSIM. If scanning is unavailable, choose the manual entry option only if the plan provider supplied the required activation information.
- Download the profile. Confirm the on-screen prompt and wait for the eSIM to be added. Keep the phone online and do not close the setup flow while it is working.
- Name the profile. Give it a clear label such as “Travel data” so you can distinguish it from your home SIM. A label helps with selection but does not change the plan.
- Choose SIM preferences. If Android asks which SIM to use for calls, texts, or mobile data, select your preferred line for each use. You can change these choices later in SIM settings.
- Check the profile status. Return to Settings → Network & internet → SIMs and confirm that the new eSIM is listed and enabled. Turn on Use SIM if the setting is off.
- Follow the plan’s activation timing. Some plans connect only after arrival or once a destination network is available. Use the provider’s instructions for when to switch the line on and whether data roaming must be enabled for that profile.
Google’s official Android and iOS setup pages are available here: Android eSIM instructions and iOS eSIM instructions. The iOS guide is useful if you are preparing another Apple device; for this Pixel, follow the Android path and the activation details supplied with your plan.
Use the eSIM for mobile data while travelling
After installation, decide which line should carry mobile data. On Pixel, open Settings → Network & internet → SIMs, tap Mobile data, and choose the travel eSIM when you are ready to use it. Keep your home SIM enabled if you still want to receive calls or messages on that line, but review your home operator’s roaming charges and settings. A data-only eSIM normally does not provide a regular phone number or standard voice calls and SMS unless the plan explicitly states otherwise. Internet-based messaging and calls may work over its data connection.
For multi-country trips, confirm whether the plan covers every destination; a country-specific plan may stop working at a border. Coverage depends on the local operator, Pixel variant, signal conditions, and plan terms. Check included territories instead of relying on a broad plan name.
A practical travel sequence
Before departure: Confirm compatibility and unlock status. Check data, validity, network, and activation terms. Install over Wi-Fi if permitted, label the profile, and keep the home SIM configured as needed.
On arrival: Enable the travel eSIM and select it for mobile data. Turn on roaming for that profile only if its instructions require it. Check the selected data line before using data-heavy apps.
During the trip: Monitor remaining data and validity. Check the selected data SIM after any settings change, and review automatic data switching before enabling it.
After returning: Switch data back to your home line. Before turning off or erasing the travel profile, check whether the provider allows reuse; deleting it may be irreversible.
Common problems and what to check
There is no “Add eSIM” option
Check the EID in About phone → SIM status, install available Android updates, then restart and revisit Network & internet → SIMs. Make sure you are looking at the correct device and model number, especially if the phone was imported or refurbished. If the EID and menu are still missing, ask Google, the seller, or the original carrier to confirm the configuration. Do not purchase a plan on the assumption that a hidden setting will appear later.
The QR code will not scan
Increase screen brightness on the device displaying the code, clean the Pixel camera lens, and hold the phone steady at a comfortable distance. Make sure the complete QR code is visible and not cropped. If the code is on the Pixel’s own screen, display it on a laptop or another phone instead. If the plan provider offers a supported manual installation method, use only the details from that provider. A screenshot with poor resolution or a code that has expired may not work.
The profile downloads but does not connect
Check that the profile is enabled, mobile data is on, and the travel eSIM is selected under SIMs → Mobile data. If the plan requires roaming for its eSIM profile, enable it only for that line. Then switch airplane mode on briefly and off, or restart the phone, and allow it time to register. Confirm that you are in a covered destination and that the plan’s activation date or validity window has begun. If the device shows a network but has no data, check the plan status and any APN instructions from the provider before changing network settings.
The Pixel shows “No service” after arrival
Verify the selected eSIM, its enabled state, and the destination coverage. Move to an area with a clearer signal, then try automatic network selection again. If automatic selection does not work, use manual network selection only as directed by the plan provider. Check the exact model number and supported bands if this is an imported phone; eSIM compatibility does not guarantee that every local frequency is supported. If service remains unavailable, contact the plan provider with the error and destination, without posting your QR code or device identifiers publicly.
Mobile data is using the wrong SIM
Open Settings → Network & internet → SIMs and check the current mobile-data choice. Pixel allows you to select a preferred SIM for data, calls, and texts. Only one SIM is the default for mobile data at a time. Automatic data switching or “data during calls” features can affect which line carries traffic in certain situations, so check those options if usage appears on the wrong account. When unsure, temporarily turn off mobile data on the home line and confirm the travel profile is selected.
Activation says the code has already been used
First look in the SIM list for a profile that may already have installed. Do not repeatedly scan the same QR code or erase the profile as a test. Some activation codes can only be used once. If no profile is present, ask the provider to check the order and advise whether it can issue a replacement activation method. Keep your order reference available, but do not send the QR code through public channels.
Frequently asked questions
Can I use a physical SIM and an eSIM at the same time?
Pixel 8 Pro supports a physical nano-SIM and eSIM configuration, and Google documents dual-SIM operation on Pixel phones. The number of active profiles and available combinations can depend on the operator and device settings. Set the preferred SIM separately for data, calls, and texts.
Does an eSIM plan give me a new phone number?
A travel data plan may provide mobile internet only. Do not expect it to include a regular number, voice calls, or SMS unless the terms explicitly include those services. You can usually use internet messaging and calling apps over mobile data, subject to the apps’ own requirements.
Should I install the profile before I travel?
Often you can install it before departure over Wi-Fi, but follow the plan’s activation timing. If validity starts when the profile first connects, installing early may be convenient. If the plan activates immediately or has a scheduled start, follow the displayed terms to avoid starting the validity period earlier than intended.
Can I remove the eSIM and install it again if something goes wrong?
Do not erase it as a first troubleshooting step. An activation code may be single-use, and the profile might not be downloadable again. Check the provider’s instructions and ask support before deletion or transfer. Removing a profile does not necessarily cancel or reset a plan.
Will the Pixel connect to 5G in every destination?
No such guarantee can be made from the eSIM feature alone. 5G availability depends on the Pixel’s regional model and bands, the local operator, the plan, coverage, and network conditions. A 4G/LTE connection may be available even when a specific 5G band is not supported, but confirm with the operator for the destination if this matters to your trip.
Final check: your device and travel plan
Google Pixel 8 Pro 256GB supports eSIM. Before choosing a plan, confirm the EID and eSIM setup menu on the actual phone, verify that it is unlocked, identify its regional model number, and check the destination operator’s requirements. Then compare plan coverage, data allowance, validity, activation timing, and roaming instructions. Those checks help distinguish device support from the separate question of whether a particular plan will work for your journey.
Once compatibility is confirmed, use Kaspersky eSIM Store’s app or website to choose, arrange, and activate an eSIM plan for mobile data on your international trip. Browse destinations and current plans and review the terms for your route before you travel. If any compatibility detail is uncertain, resolve it with the device seller, carrier, or plan provider before completing the order.


