Travel connectivity guide
Manila eSIM: Mobile Data for City Travel
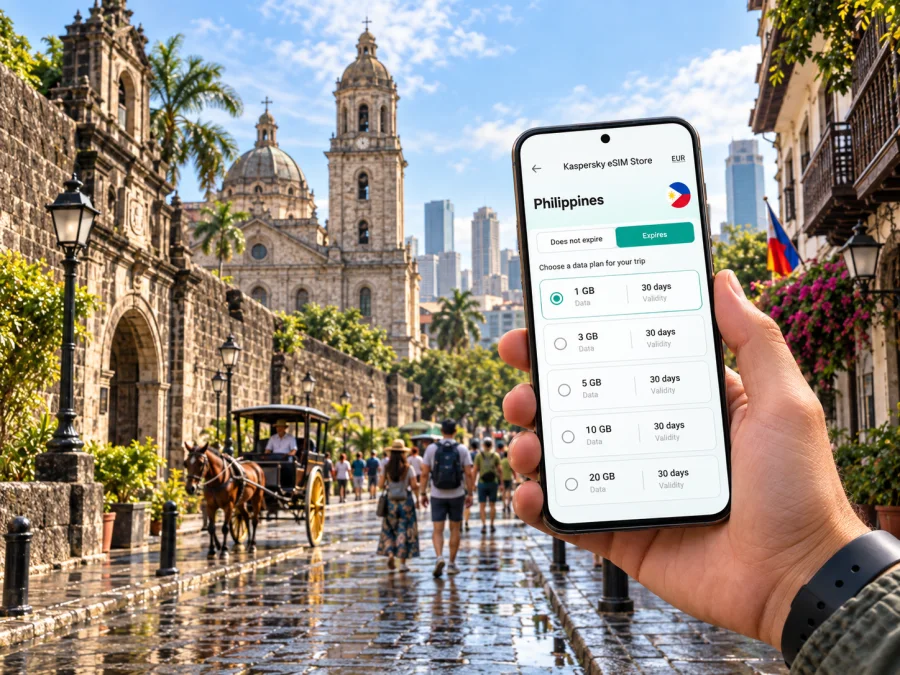
Manila eSIM: mobile connection and internet for a city trip
Manila is a busy, layered city: historic streets sit beside office towers, markets, ferry routes and major roads. A phone with mobile internet can make the practical parts of a visit easier, from checking a hotel address to sharing a pickup point or adjusting plans when traffic changes. An eSIM is one way to prepare data access for the Philippines without replacing your physical SIM card.
This guide focuses on using mobile internet in Manila: what to think about after landing, how to plan journeys across the city, and how to choose and set up an eSIM for your itinerary. Manila can mean the City of Manila or the wider Metro Manila area in everyday conversation. Those are not the same boundary. Makati, Taguig, Pasay, Quezon City and other nearby cities are part of the metropolitan region, so check the exact address when planning a route or accommodation.
Why mobile internet helps during a Manila visit
A phone with mobile internet can simplify the practical parts of a visit: checking a hotel address, sharing a pickup point, confirming a booking or changing plans when traffic affects a journey. You may need it after leaving the airport, while crossing town, on a walking route or between business appointments. Having data ready also means you do not have to look for public Wi-Fi at every stop.
Typical uses include maps, ride coordination, messaging a hotel, checking directions around Intramuros or Binondo, and accessing email or calendar details during a work trip. Download tickets, addresses and other essentials in advance where possible, so a weak connection does not leave you without basic information.
A data eSIM is not a substitute for every communication need. Unless an offer says otherwise, it does not provide a regular phone number, standard voice calls or SMS. Keep your usual SIM available for calls or verification messages if needed, and check your carrier’s roaming terms before travel.
First connection after arriving
Many international visitors arrive through Ninoy Aquino International Airport, often called NAIA, in Metro Manila. The onward route depends on your terminal, accommodation and time of day. Before leaving, confirm the hotel’s full address, pickup procedure and transport plan. Airport approaches can be busy, so a saved address and working map are useful even if someone is meeting you.
Use this short arrival sequence:
- Save your accommodation address in a note and, if useful, an offline map.
- Keep the district or nearby landmark with the street address; “Manila” alone may be too broad.
- Follow current terminal signs to the pickup area specified by your booking.
- Confirm the vehicle and destination before getting in.
- Message your host or travel companion with an update if plans change.
Do not assume a fixed route or travel time from the airport. Terminal, traffic, weather and time of day can all affect the journey. Leave flexibility in your first evening, especially if you have a timed reservation. For a short stopover, include time to exit and return for check-in; if the window is tight, choose a nearby activity rather than crossing several districts. Maps help with decisions but cannot remove congestion or guarantee arrival time.
Getting around: map the route, then choose transport
Manila’s urban area is extensive, and a short-looking journey can take longer on the road. Use navigation to compare routes, but treat its estimate as a guide. If a meeting or flight matters, allow a margin and check conditions before setting out. Pin the exact entrance as well as the destination: large buildings and malls can have several access points.
Depending on your route, you may use a taxi or app-based ride, rail, bus, jeepney, ferry or a combination. Availability, fares and service details can change, so check current information when travelling. Confirm the correct stop or station direction, and use local signage or staff guidance when choosing a boarding point.
| Situation | Prepare on your phone | Practical note |
|---|---|---|
| Airport to hotel | Full address and pickup details | Check the terminal and designated pickup area |
| Rail or bus connection | Station or stop name | Verify direction and current service information |
| Walk through a historic area | Street-level map and landmark | Allow for crossings, heat and rain |
| Ride across districts | Destination pin and contact | Traffic may change the arrival estimate |
| Business meeting | Building name and entrance | Save a contact and allow a time buffer |
The LRT and MRT serve parts of the metropolitan region, but stations do not cover every destination. Check which station is actually closest and whether you need another mode. A place described casually as “near Manila” may be in another Metro Manila city; verify its full address before choosing a station or booking a ride. Keep your phone secured, pause somewhere safe to check directions and pay attention when crossing streets.
Choose an eSIM for the trip you are taking
Choose a plan for your actual itinerary, not a generic estimate. Start with the number of days you need data and the activities you expect. Maps and messages usually use less data than frequent video calls, streaming, file transfers or tethering a laptop. Hotel Wi-Fi may cover some tasks, but it will not be available at every stop.
Before selecting an offer, check:
- Destination: confirm that it covers the Philippines and the rest of your route.
- Data allowance: include work calls, uploads and hotspot use if you expect them.
- Validity: compare the duration with your travel dates and read when it begins.
- Top-up terms: check whether more data can be added and what happens when the allowance runs out.
- Device and installation: confirm eSIM support, carrier eligibility and the setup requirements.
Kaspersky eSIM Store is an app and website that helps travelers choose, purchase and activate an eSIM with a suitable data plan for an international trip. Compare the destination, data amount and validity shown for an offer. For a Manila itinerary, the relevant destination is the Philippines: review eSIM options for travel in the Philippines. Read the selected offer’s terms, since details can vary.
To estimate data, think in categories: occasional navigation and messaging are lighter than a work-heavy schedule with video calls or file transfers. Download maps and documents over Wi-Fi, limit automatic media downloads and check which apps use background data to avoid unnecessary use.
Set up before departure or after landing
You can install an eSIM before flying if the offer allows it and you have reliable internet and time to follow each screen. If you wait until arrival, make sure Wi-Fi is available for setup and keep the instructions accessible. Installation and the start of validity are not always the same event; read the selected plan’s activation terms.
- Confirm that your phone supports eSIM and can accept another carrier profile. Check whether your device supports eSIM.
- Review the destination, allowance, validity and activation conditions.
- Keep your primary SIM if you need its number, and label the travel profile clearly.
- Follow the installation steps and do not delete the profile after setup unless instructed.
- When needed, select the travel eSIM for mobile data and check whether its instructions require data roaming.
- If data does not appear, check the profile, selected data line and plan status before restarting the phone.
Follow the guide for your operating system: eSIM installation instructions for Android or eSIM installation instructions for iOS. Menu names can vary by model and software version. Resolve unclear activation terms before relying on the connection for a pickup or meeting.
Use data thoughtfully in hotels, offices and neighborhoods
In a hotel, use Wi-Fi for large downloads or updates when appropriate, and keep mobile data for directions and time-sensitive tasks outside. For a business stay, test the meeting setup before an important call rather than assuming a room or lobby will be suitable. Navigation and calls can drain a battery, so carry a charger if you expect a long day.
Manila combines distinct areas. Intramuros is a historic walled district where nearby sights can form a walking route; account for heat, rain and crowds. Ermita has hotels and cultural stops, while Binondo, known as Manila’s Chinatown, is a popular area to explore on foot. Save a starting point and the exact restaurant or meeting address.
Other well-known destinations are in neighboring cities, not the City of Manila. Makati is a major business and hotel destination; Bonifacio Global City (BGC) is in Taguig; Pasay and Quezon City are also separate Metro Manila cities. A booking that says “Manila” may mean the metropolitan area. Read the full address before arranging an airport transfer or planning consecutive appointments.
Plan by location: group nearby Intramuros stops, save a specific Binondo meeting point, and keep the office building name and entrance with your calendar entry. Before dinner near the bay, consider how you will return. Avoid assuming distant stops fit into a short window. If a place is inside a large complex, agree on a particular entrance or lobby rather than a broad venue name.
Frequently asked questions
Is an eSIM useful if I am staying only in Manila?
It can help with maps, ride coordination, messages and bookings while moving around. Choose a Philippines plan whose duration and data amount fit your stay.
Is Manila the same as Metro Manila?
No. Manila is one city in the National Capital Region, commonly called Metro Manila, which includes multiple cities. Makati, Taguig, Pasay and Quezon City are separate from the City of Manila.
Can I keep my regular SIM active?
Many phones can configure an eSIM alongside a physical SIM, but options depend on the device and carrier. Check your settings and restrictions, select the intended data line, and review roaming charges with your usual carrier.
Does a travel eSIM include calls and texts?
A data plan generally does not include a regular number, voice calls or SMS unless the offer explicitly says so. Internet-based messaging apps can work over data; keep another way to receive important calls or verification messages if needed.
Should I install the eSIM before flying?
You can install it before departure if its instructions allow this and you have a reliable connection. Read when validity starts: an installed profile and an active plan are not necessarily the same thing. If you wait, keep Wi-Fi and setup instructions available.
How much data should I choose?
There is no single amount for every traveler. Estimate days and activities: navigation and messages are lighter than calls, hotspot use, streaming or large uploads. Compare that estimate with the listed options.
A practical Manila connectivity checklist
Before you leave, check that you have:
- the complete accommodation address, including the district or city;
- your airport terminal and pickup instructions;
- saved locations for your hotel, first appointment and return airport;
- a compatible, eligible device and a clear understanding of the plan’s validity;
- the right SIM line selected for data, calls and messages;
- essential tickets, addresses and contacts available offline;
- enough time for traffic and transfers between distant areas.
Good preparation reduces decisions made in a hurry. Keep the correct address ready, know which line handles data, and choose a plan that fits your itinerary.
Prepare your eSIM for Manila
Before your trip, compare the destination, data amount and validity for your itinerary in the Philippines. Kaspersky eSIM Store lets you use its app or website to choose, purchase and activate an eSIM plan for mobile data abroad. Review the offer terms and install it on a compatible device using the instructions for your phone. Choose an eSIM plan for your trip to the Philippines and save the setup details before you travel.


