Travel connectivity guide
Matsumoto eSIM: Mobile Internet in Japan
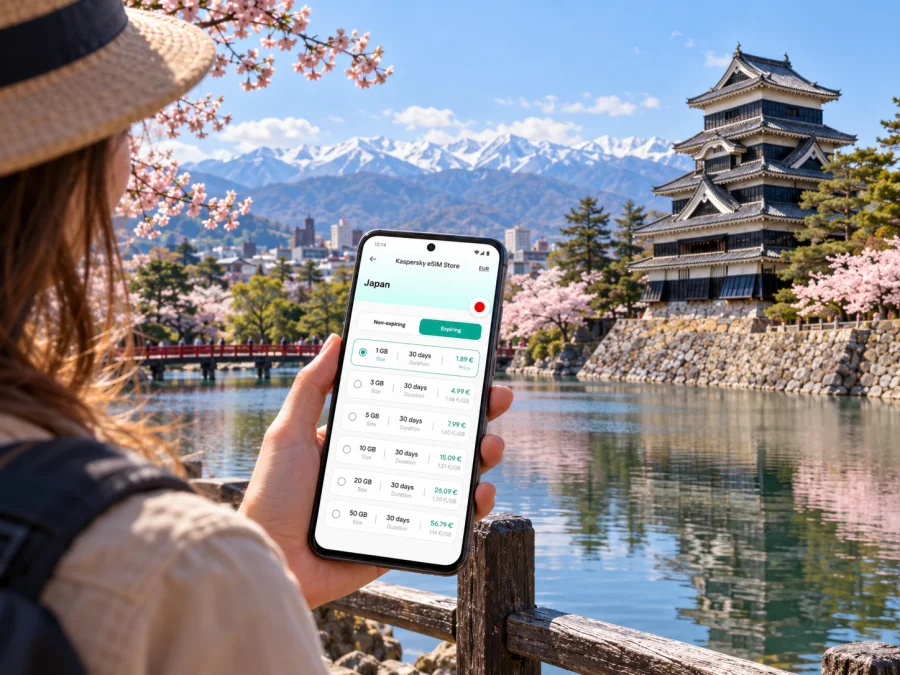
Matsumoto eSIM: mobile connection and internet for a city-and-mountain trip
Matsumoto rewards travelers who slow down: its historic center is easy to explore on foot, while the mountains and highland destinations beyond the city call for more planning. A reliable mobile internet setup helps with the practical transitions between them—finding your hotel after arriving, checking a bus stop, translating a menu, or confirming a connection before leaving the station. An eSIM can keep those tasks on your phone without swapping out your usual physical SIM.
This guide focuses on using mobile data in Matsumoto, Japan: arrival options, the station and castle area, local transport, day trips, accommodation, and a simple eSIM preparation checklist. Coverage, speed, and availability depend on the local network used by a particular plan, your device, and your exact location. Mountain valleys and rural routes can behave differently from the city center, so download essential information for offline use as well.
Arriving in Matsumoto and getting oriented
From Matsumoto Station
Matsumoto Station is the key arrival point for visitors coming by rail. The station has two exits commonly used for orientation: the Castle Exit (east) faces the historic center, while the Alps Exit is on the opposite side. If your lodging is near the castle, the Castle Exit is usually the easiest starting point. Check the address and map pin before leaving the station; hotels with similar names or entrances on narrow streets can be easy to pass.
The main castle area is close enough to reach on foot from the station, and Matsumoto Castle’s official tourism listing describes the walk as about 15 minutes. If you have heavy luggage, limited mobility, or bad weather, check the current local bus options instead. The Town Sneaker sightseeing loop stops at the station area, with routes serving different groups of sights. Bus stops and boarding points vary by destination, so match the route name and stop on the current map rather than assuming every bus leaves from the same place.
Save your accommodation pin, its Japanese name if available, contact details, and late check-in instructions offline. A map helps with the final blocks, where address numbering may not match a simple street grid.
From Shinshu Matsumoto Airport
Shinshu Matsumoto Airport is outside the city center. The official tourism information describes the airport shuttle from Matsumoto Bus Terminal as taking approximately 30 minutes; the transport operator publishes the current timetable and fare information. Service times can be coordinated with flight schedules and may change seasonally, so confirm the departure for your date instead of relying on a general travel estimate. When the direct shuttle is not operating, other local bus options may be relevant, but check their stops and journey time in advance.
A data connection can help you compare the airport bus with a taxi, locate the correct ticket machine or boarding point, and update someone waiting for you. Keep your destination address ready to show the driver or staff. If you land close to your next train or bus departure, leave a margin for luggage collection, buying a ticket, and road delays.
If Matsumoto is one stop on a longer route
Highway buses connect Matsumoto with destinations including Tokyo, Nagoya, Osaka, and Takayama. Some departures use Matsumoto Bus Terminal, a short walk from the station, while local sightseeing buses leave from stops near the station. That difference matters when you have a tight connection: check the ticket’s exact boarding location and allow time to cross the road or reach the terminal. A screenshot of the ticket and the boarding point is helpful if reception is weak or your phone battery is low.
Rail and road timetables, seasonal services, and platform information can change. Use the operator’s current information for the travel date, and treat any journey planner estimate as a guide rather than a guarantee. If a connection is important, identify the next feasible departure before you set off.
Walking through central Matsumoto
Matsumoto Castle and the surrounding streets
Matsumoto Castle is the city’s defining landmark and a natural reference point for walking around the center. From the station, you can approach it by walking or by checking the Town Sneaker North Course. The official tourism information gives a typical walking time of about 15 minutes from Matsumoto Station and notes that operating hours, seasonal schedules, and admission details may vary. Check the latest opening information if visiting the keep is a priority.
Navigation is useful around the castle moat, where a route may take you along one side of the grounds and then loop toward an entrance. Save the entrance pin as well as the general castle location, especially if you are meeting someone. Use mobile data to check the visitor information and current crowd updates where available; do not assume a map pin is also the ticket entrance.
Nawate Street runs near the Metoba River and the south side of the castle area. The Matsumoto city tourism site describes it as a pedestrian shopping street with small independent shops and food stops. It is a good place to wander without a strict route, but a map helps you reconnect with the river, the castle, or the station after browsing. Nakamachi Street, with its traditional storehouse-style buildings, is another nearby walk. These areas work well together as a half-day loop, with room for a museum visit or a café stop.
Choose a route by energy and weather
| Your situation | A sensible plan |
|---|---|
| First visit, clear weather | Walk from the station toward the castle, then continue to Nawate and Nakamachi. Use a map for short orientation checks. |
| Rain or strong sun | Split the walk into shorter sections and check indoor stops or opening times before heading across town. |
| Luggage or limited walking | Use a local bus or taxi for the first leg, then explore the compact center on foot. Confirm the stop closest to your destination. |
| Short layover | Pick one central area and allow time to return to the station; avoid adding an out-of-town trip without checking departures. |
| Traveling with children | Save meeting points and the accommodation pin, and agree on what to do if your group gets separated. |
Allow extra time for weather, luggage, and breaks; a map estimate does not account for your group’s pace.
Local transport: use the right departure point
Matsumoto’s bus system is useful for reaching sights and areas beyond the walkable center. The Town Sneaker city sightseeing bus has routes serving places such as Matsumoto Castle, the former Kaichi School, Nakamachi Street, the Matsumoto City Museum of Art, and Agata no Mori Park. Other buses leave from the station roundabout or Matsumoto Bus Terminal. The destination determines which departure point is appropriate.
Before setting out, search from the exact stop name printed on the operator’s map. A route search can return a stop on the opposite side of the street or a similarly named stop farther away. Check whether you board at the station’s Castle Exit, Alps Exit, or the bus terminal across from the station. Current route maps and timetable information are provided by the city and transport operator; schedules, fares, and payment methods are subject to change.
A quick pre-boarding routine:
- Enter the destination in Japanese or copy its name from an official listing.
- Confirm the route, direction, and stop name—not only the line color.
- Check whether the service departs from the station roundabout or the bus terminal.
- Review payment instructions for that route; acceptance can differ between services.
- Keep the destination stop visible and watch for the announcement or stop display.
Some local buses accept cashless payment, but the accepted cards and procedures are route-specific. Do not assume that a transit IC card or contactless bank card will work on every bus. If the instructions are unclear, ask before boarding or carry an alternative payment method. A translation app can help you ask a short question; save a few phrases in advance in case mobile data is temporarily unavailable.
For longer journeys, including buses toward Kamikochi, Norikura, or Takayama, check the departure point and any reservation requirements separately. A local sightseeing loop and an express or highway bus are different services. A data plan can make it easier to check a live timetable or communicate a delay, but it cannot replace a ticket or guarantee a seat.
Choose an eSIM plan around the trip, not just the city
A city break centered on the castle and nearby streets uses data differently from a multi-day itinerary with mountain excursions. Estimate how often you will use maps, translation, messaging, photo backups, and video. Navigation and messaging usually require less data than uploading large videos or streaming. If you plan to work remotely, check your likely call use and have accommodation Wi-Fi as a second option.
For Japan, compare eSIM options for your itinerary and review the plan’s destination, data allowance, validity, and activation conditions. The current Japan listing identifies KDDI and SoftBank as local telecommunications providers for the listed plans. That country-level operator information does not guarantee reception at every Matsumoto address or mountain location. Plan availability and terms can change. Travel eSIMs are often data-only, so check the selected plan if you need voice calls or SMS.
Think about the geography of your route. Matsumoto’s central streets, station, and airport are different environments from mountain roads, valleys, and trail areas. A plan’s coverage depends on the underlying local operator and network conditions. Do not infer rural or high-altitude coverage from an urban map, and do not treat a general country listing as a promise of reception at every stop. Save maps, reservation details, and trail or bus information before leaving town. In remote areas, tell someone your itinerary and expected return time.
A simple data estimate
Use your own habits as the starting point. These ranges are planning examples, not guarantees of consumption:
- Light use: maps, messaging, and occasional searches; disable automatic photo and app updates over mobile data.
- Regular travel use: frequent route checks, translation, email, and sharing photos; monitor usage during the first day and adjust settings.
- High use: video calls, hotspot use, cloud backup, or streaming; check the plan’s allowance carefully and use trusted Wi-Fi for large transfers when practical.
Turn off automatic app updates and cloud photo uploads if you want to preserve data. Download language packs, maps, and entertainment over Wi-Fi before travel. You can still use location services for some offline map functions, but live traffic, new search results, and updated bus information need a connection.
Keep your usual number available
Many travel data eSIMs do not include a local phone number, standard voice calls, or SMS. Confirm the included services for the plan you select. If you need to receive bank verification texts or calls on your regular number, check with your home carrier how to keep that line available and understand any roaming charges. On a dual-SIM phone, you can often choose which line handles mobile data, but the labels and controls vary by device.
Before purchasing, confirm that your exact device model and regional variant support eSIM and are not restricted by a carrier lock. Similar phone names can have different hardware or eSIM support depending on the country where the device was sold. Check your device’s eSIM compatibility and consult the manufacturer’s specifications for the precise model number. A compatible device is essential; the word “eSIM” in a product family name does not by itself confirm support for every variant.
Install and activate before you need directions
If your device is compatible, prepare the eSIM while you have stable Wi-Fi and enough time to follow the setup instructions. The exact steps depend on your operating system, device model, and plan. Read the activation conditions first: some plans start their validity when installed, while others start at a later network connection. Follow the plan’s stated rule.
A practical setup sequence:
- Choose the Japan destination and review the plan’s data, validity, and activation terms.
- Confirm device compatibility, remove any carrier restriction, and update your operating system if required.
- Install the eSIM over reliable Wi-Fi using the instructions for Android or iOS.
- Label the travel line clearly, such as “Japan data,” and keep your regular line identifiable.
- Set the travel eSIM as the mobile-data line when you are ready to use it. Check the plan instructions for data roaming settings; requirements vary.
- After arrival, allow the phone to register on a supported network, then test a simple page or message before relying on navigation.
Do not delete an installed eSIM as a troubleshooting shortcut unless the plan instructions or support team tells you to. Some eSIM profiles cannot be installed again after removal. If the connection does not start, check that the travel line is enabled, the data line is selected correctly, and the plan’s activation conditions have been met. Restarting the phone or selecting a supported network manually may help in some cases, but follow the provider’s guidance for that plan.
Plan a short stay or a longer visit
For a day visit, choose one or two central sights, check the return connection, and keep the route between the station and your next departure simple. An overnight stay gives you more time for the castle district, a museum or café, and an early trip toward the mountains. If Matsumoto is your base for a wider Nagano itinerary, verify each leg independently: services can be seasonal, require advance booking, or leave from the bus terminal rather than the station.
| Trip style | Save on your phone |
|---|---|
| Day visit | Return ticket, offline map, current attraction hours, meeting point. |
| Overnight | Hotel address in Japanese, check-in details, departure locations, backup route. |
| Several days | Excursion maps, current service information, weather, charging plan. |
A quick pre-departure checklist
- [ ] Confirm that your phone’s exact model and regional variant support eSIM and are unlocked.
- [ ] Review the Japan plan’s data allowance, validity, supported destination, and activation conditions.
- [ ] Install the eSIM over Wi-Fi and follow the relevant Android or iOS instructions.
- [ ] Save your accommodation address in Japanese, map pin, check-in instructions, and booking number.
- [ ] Download an offline map of central Matsumoto and any mountain destination.
- [ ] Check current bus, airport shuttle, and attraction information for your dates.
- [ ] Keep ticket screenshots and the exact boarding point easy to find.
- [ ] Carry a charging cable or power bank and a second payment option for transport.
- [ ] Know how your regular phone number and any roaming charges will be handled.
Frequently asked questions
Will an eSIM work everywhere in Matsumoto?
No mobile service can be promised everywhere. Reception depends on the plan’s underlying operator, network conditions, your device, buildings, terrain, and location. Service in the center may differ from service on a mountain route. Review plan coverage information and prepare offline materials for areas where you may lose reception.
Which bus stop should I use for local sightseeing?
It depends on your destination and route. Town Sneaker buses use the station area, while some regional and express services depart from Matsumoto Bus Terminal across from the station. Confirm the stop printed on current operator information; do not assume the two boarding areas are interchangeable.
Can I use a travel eSIM for normal calls and texts?
That depends on the specific plan. Many travel eSIMs are data-only and do not include a local number, voice calls, or SMS. Check the plan conditions and retain access to your usual number if needed.
What if my phone shows no data after activation?
Check that the eSIM is enabled, selected for mobile data, and configured according to the plan’s instructions. Confirm activation conditions and any required roaming setting. If service still does not start, use the provider’s support guidance rather than deleting the eSIM profile.
Plan the connection around your route
For Matsumoto, a useful mobile setup covers the transitions: arriving at the station or airport, reaching your lodging, moving around the castle district, and checking the departure point for your next trip. Before you travel, compare the Japan eSIM options in Kaspersky eSIM Store, review the individual plan terms, and make sure your phone’s precise regional model is compatible. The app and website help you choose, arrange, and activate an eSIM plan for mobile data abroad. Install it using the relevant instructions, save essential maps and bookings offline, and set out with a realistic backup for journeys beyond the city center.


