Travel connectivity guide
Motorola Edge 40 256GB eSIM: Compatibility & Setup
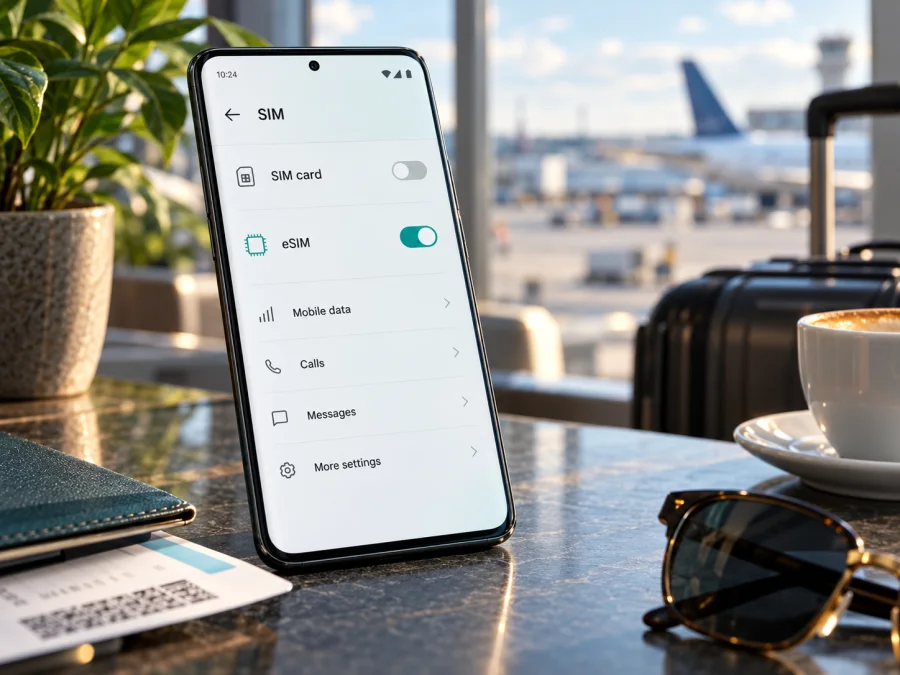
Motorola Edge 40 256GB eSIM: compatibility and setup guide
Short answer: eSIM can work on the Motorola Edge 40, but the “256GB” storage label does not by itself confirm that a particular handset has eSIM enabled. Motorola’s India support page says the Edge 40 supports an eSIM alongside a physical SIM and gives setup steps. Motorola’s broader Edge 40 manual also cautions that eSIM-related functions are available only on some versions sold in certain countries. Treat this exact phone as compatible only after checking its settings and confirming that it is unlocked and accepted by the eSIM provider for your destination.
That distinction matters when buying a phone second-hand or importing one. Two devices sold under the same family name can have different regional software, SIM configurations, or carrier restrictions. The guide below shows how to check the unit in your hand, install a profile, and use it for mobile data while travelling.
Does Motorola Edge 40 256GB support eSIM?
Motorola’s official support information establishes that eSIM support exists for at least the Indian-market Motorola Edge 40. The manufacturer’s model-specific manual describes downloading and setting up an eSIM, but its general wording is cautious: some features are available only on certain versions sold in certain countries. Public documentation does not identify every retail SKU by storage capacity, country code, or carrier variant. It therefore cannot verify every phone advertised as “Motorola Edge 40 256GB” individually.
At a glance
| Item | What can be confirmed |
|---|---|
| Device named in this guide | Motorola Edge 40 256GB |
| Storage modifier | 256GB, as stated in the device name |
| eSIM status | Supported on some Edge 40 versions; verify the exact market unit |
| Decisive check | EID or eSIM download option, plus unlock and plan eligibility |
| Check | What it tells you | What it does not prove |
|---|---|---|
| The exact model/SKU and country where it was sold | Which regional product you are checking | That eSIM is enabled on the handset today |
| An EID in the phone’s settings | The phone reports an embedded SIM identity | That it is unlocked or accepted by a particular plan |
| “Download a SIM” or “Add eSIM” in SIM settings | The software exposes eSIM setup | That activation will succeed with every provider |
| Seller or carrier confirmation for the exact IMEI/SKU | Whether that organization recognizes the unit | Destination coverage or plan suitability |
| An eSIM profile installed and connected | That this profile is working now | That all other operators or countries will work |
If you have not bought the phone yet, ask the seller for its full model number or regional SKU and a live view of the SIM settings. If eSIM is essential, make return eligibility clear before purchase. A generic specification page can be useful background, but the handset’s own settings and the eSIM provider’s compatibility confirmation are more relevant to your decision.
Regional versions, carrier locks, and the 256GB label
Check three separate layers:
- Hardware and regional firmware. The phone needs an eSIM-capable embedded component and software that exposes it. A model family name alone is not enough to identify this.
- Operator or device lock. A SIM-locked phone may accept only profiles or networks allowed by the organization that locked it. The phone can have eSIM hardware and still reject a travel plan.
- Plan and destination. A valid profile must be permitted for the destination and connect to a supported local network. Availability and network access depend on the specific plan and local partner arrangements.
How to check eSIM compatibility before you buy a plan
Start with the phone itself. You can check without deleting or replacing your physical SIM. Settings labels may vary slightly with Android version, region, and software updates, so look for equivalent wording if the paths below do not match exactly.
Check the eSIM menu
- Connect to Wi‑Fi and unlock the phone.
- Open Settings.
- Tap Network & internet.
- Open SIM preferences, SIMs, or the similarly named SIM and mobile-network section.
- Look for Download a SIM, Download new SIM, Set up an eSIM, or Add eSIM.
- Confirm that the option is available. You do not need to begin setup just to check it.
Motorola’s India support instructions for Edge 40 use Settings > Network & internet > SIM preferences, then the option to download and set up an eSIM. On another software version, a menu may use different labels. If you cannot find the control, search Settings for “SIM” or “eSIM,” install any available system update, restart the phone, and check again. A missing option is a reason to pause and verify the regional SKU with Motorola or the seller; it is not a reason to buy first and hope that a QR code will work.
Look for the EID
An EID is the identifier associated with the embedded SIM component. It is different from the IMEI, serial number, phone number, and the QR code used to install a plan. On some Android phones, it appears under Settings > About phone, Device details, or SIM status. Menu placement varies. You can also use the Settings search field and enter “EID.”
Keep the EID private. You normally do not need to post it publicly or send it to an unknown seller. If you are speaking with an official carrier or support team, provide device identifiers only through its trusted support channel and only when requested. An EID is a useful compatibility signal, but it does not guarantee that a specific carrier will unlock or activate the phone. Confirm both the EID or eSIM menu and the provider’s acceptance of the exact device.
Compatibility checklist
Before selecting a travel plan, make sure you can answer “yes” to each applicable item:
- [ ] This is the exact Motorola Edge 40 256GB handset I intend to use, and I know its market/SKU if available.
- [ ] The phone shows an EID or an active option to download/add an eSIM.
- [ ] The handset is unlocked, or the responsible carrier has confirmed that this eSIM is allowed.
- [ ] Android is current enough for the SIM menu and I can connect to Wi‑Fi during setup.
- [ ] The destination is included in the plan’s listed country or region.
- [ ] The data amount and validity period fit my trip, and I understand when validity begins.
- [ ] I know whether the plan activates on installation, first connection, or another stated event.
- [ ] I can display the activation QR code on another screen or have the provider’s manual details.
If you are uncertain about any of the first three items, check your device before paying for a plan. Compatibility should be confirmed on the actual phone, not inferred from storage capacity or another owner’s experience.
Before installation: prepare the phone and activation details
Before you start:
- Charge the phone and connect it to a stable Wi‑Fi network. The eSIM needs an internet connection to download.
- Keep the physical SIM installed unless the provider specifically tells you otherwise.
- Find the QR code or manual activation details supplied for your plan. If the code is on the Motorola Edge 40 256GB screen, the phone cannot scan its own display; open it on a computer or another phone, or use manual entry if offered.
- Read when the plan begins and whether the QR code can be scanned more than once. Do not assume an already-used code can be reused after deleting a profile.
- Check the plan’s country/region, data allowance, validity, and any instructions about data roaming.
How to install and activate an eSIM on Motorola Edge 40 256GB
Motorola’s Edge 40 instructions describe setup from the SIM preferences screen. The exact button names can vary, so use the equivalent option shown by your software and the activation instructions for your plan.
- Connect to Wi‑Fi. Keep a reliable connection active until the profile download is complete.
- Open SIM settings. Go to Settings > Network & internet > SIM preferences. If that path is different, search Settings for SIM.
- Start adding the profile. Tap Download a SIM, Set up an eSIM, or the available add/download option.
- Scan the QR code. Point the camera at the code supplied for your plan. If you cannot scan it, choose manual entry only if the provider gives activation details for that method.
- Review the displayed plan. Confirm that the information matches the intended eSIM before accepting the download.
- Wait for installation. Keep Wi‑Fi connected and do not close the setup process while the profile is being added.
- Name the profile. Use a clear label such as “Travel data” so you can distinguish it from your home SIM.
- Choose the data SIM. In SIM preferences, select the travel eSIM for mobile data when you want to use it. Keep your usual line selected for calls or messages if that matches your needs.
- Enable the profile at the right time. Turn on the eSIM and data roaming only as directed by the plan. Roaming may be necessary for a travel eSIM to connect to a partner network, but check the plan instructions first.
- Confirm the connection. When you are in a supported destination, turn off Wi‑Fi briefly and open a simple webpage. Check that the mobile-data indicator appears and that the intended SIM is selected for data.
For additional Android screenshots and general steps, see the Android eSIM installation instructions. The iOS eSIM installation instructions describe the Apple flow and are useful only if you are helping someone with an iPhone; they are not steps for Motorola. If the Android menu or QR flow differs on your software, use Motorola’s on-screen wording and the directions supplied for the eSIM plan.
Do not erase a profile as a first troubleshooting step. Deleting an eSIM can remove the downloaded profile without cancelling its associated service, and restoring it may require new activation details from the provider. Contact the plan’s support team before deleting or resetting a profile if you are unsure whether it can be downloaded again.
Using a travel eSIM for mobile data
For a data-focused trip, a common setup is to leave your home physical SIM available for calls or texts and select the travel eSIM for mobile data. The Motorola’s SIM preferences let you choose which line is used for data and, where supported, which line is used for calls or messages. Names and controls vary by software. Confirm the selected data SIM after installing the profile, because a phone can have an eSIM installed while continuing to use the home line for data.
Check whether the travel plan requires data roaming to be enabled on its profile. Enabling roaming on the travel eSIM may be necessary for it to register on a local partner network. That is separate from allowing the home SIM to use roaming. If you want to avoid unexpected home-network charges, review the home line’s roaming setting and data selection carefully. Avoid enabling data switching between lines unless you understand how your phone chooses a connection and what your home plan charges.
Practical trip scenarios
Installing at home before departure. If the plan allows early installation and its validity does not begin too soon, connect to Wi‑Fi, download the profile, label it, and leave it disabled until the plan’s stated start time. Before leaving, confirm that the profile remains listed and that you still have the QR or manual activation details. This reduces setup work after landing, but it does not prove that a network will connect before you reach the covered destination.
Moving between countries. Do not assume that one plan covers every border on your itinerary. Check each destination and any regional scope listed in the plan before departure. When crossing a border, verify which eSIM is selected for data and whether the profile has registered on a supported network. A plan’s included region, data amount, validity, and local network access are determined by its stated terms.
Common problems and what to check
There is no “Add eSIM” option
Search Settings for “eSIM,” “SIM,” or “download.” Confirm the exact model and market with the seller or Motorola support, install available system updates, and restart. If both the EID and the eSIM option are absent, do not assume a software trick will enable the feature; ask whether this exact regional SKU supports it. If the seller or support team cannot confirm, treat the handset as incompatible for your purchase decision.
The QR code will not scan
Increase the brightness on the screen displaying the code, clean the Motorola camera lens, and hold the phone steady at a reasonable distance. Avoid glare and reflections. Make sure you are scanning the code intended for this plan and that it has not already been used. If scanning fails, ask the plan provider whether manual activation is supported. Do not reuse or share the code publicly.
The profile download fails or stays pending
Check Wi‑Fi stability, disable captive-portal Wi‑Fi that requires repeated sign-in, and try another trusted connection. Confirm that the phone has enough free storage for normal system operation, date and time are automatic, and Android is updated. Close and reopen SIM settings, then restart once. If the profile still will not download, save the error text and contact the plan provider; repeated QR scans can complicate recovery if the code is single-use.
The eSIM is installed but there is no service
Confirm that the profile is enabled and selected for mobile data. Check whether you are in a destination included in the plan, data roaming is enabled for the travel profile if required, and airplane mode is off. Wait briefly after changing settings, then restart the phone. If there is still no signal, move to an area with better reception and check the plan’s network guidance. A correct profile cannot create coverage where the plan has no supported service.
There is signal but websites do not load
Verify that mobile data is on and the travel eSIM is the selected data line. Temporarily disconnect from Wi‑Fi to test cellular data. Review any access point name (APN) instructions provided with the plan; enter an APN only when the provider specifies one. Check that a data limit or Data Saver setting is not blocking use, and confirm that the plan is active and has remaining data. Do not change APN values based on guesses from unrelated phones.
The home SIM is being used for data
Open SIM preferences and inspect the default mobile-data line. Select the travel eSIM if that is your intention. Turn off automatic data switching if it could move data to the home line, and review roaming on both profiles separately. The labels may differ by Android version; check the active line in settings after any reboot or profile change.
Frequently asked questions
Does every Motorola Edge 40 256GB support eSIM?
No universal confirmation is available for every regional SKU. Motorola confirms eSIM support for the Edge 40 in its India support material, while the broader manual warns that some features are limited to versions sold in certain countries. Check the actual handset’s EID or eSIM menu and confirm the exact unit with its seller or carrier.
Is 256GB storage related to eSIM support?
No. Storage capacity identifies how much internal space the phone has; it does not establish the regional hardware or software configuration for eSIM. Treat 256GB as part of the exact device name, not as proof of eSIM availability.
Can I use a physical SIM and an eSIM together?
Motorola documents use of an eSIM alongside a physical SIM for supported Edge 40 versions. The available combination and SIM-management options can differ by market and software. Check SIM preferences on your own phone and follow the provider’s instructions for the profile.
Will a travel eSIM replace my regular number?
Not necessarily. A data-focused travel eSIM can provide mobile data without a regular phone number, while your physical SIM may remain available for calls or messages. Exact functions depend on the plan and the phone’s SIM configuration.
What if the eSIM menu is missing?
Check Settings search, update and restart the phone, then verify the exact regional model with Motorola or the seller. If the EID and add-eSIM control remain absent, do not buy a plan for this handset until its support is confirmed.
Final check: confirm the phone, then choose a plan
For Motorola Edge 40 256GB, eSIM support is plausible and officially documented for some markets, but the storage variant alone cannot settle compatibility for a particular unit. Before purchase, confirm the EID or the download/add-eSIM option, check that the phone is unlocked, and ask the seller or carrier about the exact regional SKU. Then compare the plan’s destination, data allowance, validity, and activation timing with your itinerary.
Kaspersky eSIM Store is an app and website where you can choose, arrange, and activate an eSIM with a mobile-data plan for an overseas trip. If the handset passes those checks, visit the Kaspersky eSIM Store site to browse the current options for your destination and choose an eSIM with a mobile-data plan for your trip. Follow that plan’s instructions to install and activate it, then verify that the Motorola is using the travel eSIM for data. If a compatibility check fails or remains unclear, confirm the phone first or use another eSIM-compatible device before selecting a plan.


