Travel connectivity guide
Motorola G53J 5G eSIM: Compatibility & Setup
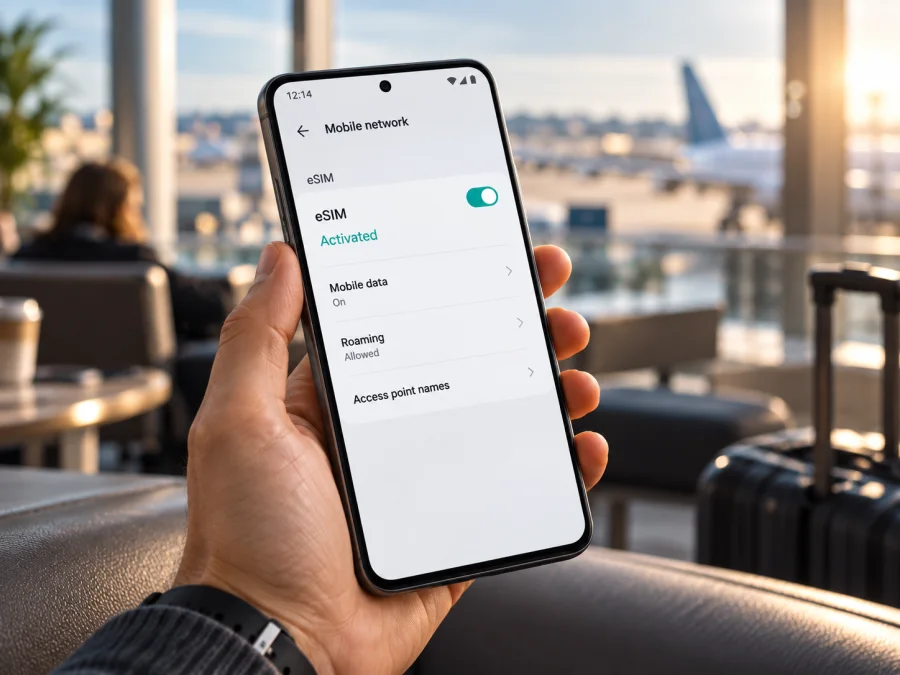
Motorola G53J 5G eSIM: compatibility and setup guide
The Japan-market Motorola G53J 5G supports eSIM alongside a physical nano-SIM. Motorola Japan’s support specifications for moto g53j 5g list “nanoSIM/eSIM” and one nano-SIM slot; the same page distinguishes the G53J from the moto g53y 5G. This is a model-specific confirmation, not a promise that every phone sold as a Moto G53, or every carrier-branded variant, has the same eSIM hardware and software. Motorola’s specification page was checked on November 2, 2026.
If your handset is the G53J 5G intended for Japan, eSIM should be available. Before buying a travel plan, confirm the exact model and check the phone itself for an EID or an eSIM download option. Imported units, carrier firmware, later software changes, and device locks can affect whether a profile can be added or used on a particular network.
Does the Motorola G53J 5G support eSIM?
Yes: Motorola Japan’s official specification for this exact model lists eSIM with nanoSIM. It describes the arrangement as one physical nano-SIM slot with dual-SIM dual-standby operation. In practical terms, this can let you keep a physical SIM in the tray and add an eSIM profile, subject to the software build and the plan provider’s requirements. The phone does not need a second physical SIM slot for the eSIM function.
There is an important naming distinction. Motorola G53J 5G is the exact product name in this guide. Motorola’s Japan specification page also mentions moto g53y 5G in its shared specifications, but the names are not interchangeable: the page identifies different RAM configurations for the J and Y models. A specification for the G53J cannot by itself confirm eSIM support on a G53Y, a base Moto G53, or another G53 variant sold in a different country. Check the name on the box, in Settings > About phone, and on the seller’s listing. If those disagree, use the full model number and ask Motorola or the seller about that unit.
| Item | What is confirmed for the named model |
|---|---|
| Device covered | Motorola G53J 5G, Japan-market model |
| eSIM | Listed by Motorola Japan as supported |
| Physical SIM | One nano-SIM slot |
| SIM arrangement | nanoSIM/eSIM; dual-SIM dual-standby is listed |
| Android version in the manufacturer specification | Android 13 at the time of the specification page |
| Regional caveat | Other G53 names, sales markets, carrier firmware, and software builds may differ |
| Best check before purchase | Confirm the exact unit, EID/eSIM menu, unlock status, and plan compatibility |
What eSIM support means for travel
An eSIM is a digital SIM profile that the phone downloads and stores, rather than a removable plastic card. A travel data eSIM can be useful for maps, ride-hailing, messaging, email, and other internet-based services while abroad. It does not automatically replace your home number. Many travel data plans provide mobile data only and do not include a standard phone number, voice service, or SMS; read the specific plan terms before you rely on those features.
The phone’s eSIM support is only one part of compatibility. It must be unlocked, the eSIM must be offered for your destination, and the local network and profile must support the device. 5G in the name does not guarantee 5G service in every country.
Check this exact phone before buying a plan
Use the device itself as the final check. A product listing or the presence of “5G” in a name is not enough. Ideally, confirm both an EID and the menu that adds a downloaded SIM profile. An EID is a long identifier associated with the phone’s eSIM hardware; treat it as private device information and share it only with an official support channel when specifically requested.
- Confirm the model name. Open Settings > About phone and compare the displayed model with the box and receipt. Make sure the handset is the G53J 5G, not simply a similarly named G53 variant.
- Look for an EID. Open the Phone app and enter
*#06#. On a compatible configuration, the identifier screen may show an EID alongside other device identifiers. You can also look in Settings > About phone or the SIM-status screen; Android labels vary. Do not post the EID publicly. - Check the eSIM setup menu. Open Settings > Network & internet > SIM cards (some builds may say SIM preferences or Mobile network) and look for an option such as Download a SIM, Add eSIM, or Download a SIM instead? Do not complete an installation just to test the menu.
- Check the SIM status and lock. Confirm a physical SIM is recognized if you use one. Contact the original carrier or seller if the phone may be network-locked; an eSIM menu does not remove a carrier restriction.
- Check the plan’s requirements. Verify that its destination, device requirements, validity period, data amount, activation timing, and any roaming setting fit your itinerary. If the provider requires an EID or IMEI check, use its official checker or support process.
A visible EID indicates eSIM hardware; a download menu confirms that the current software exposes setup. If either is missing, restart, check for updates, and ask Motorola support about your exact model and region. Similar G53 names can have different configurations.
Compatibility checklist
Before selecting a travel plan, confirm each item:
- [ ] Settings show Motorola G53J 5G or the matching model number for your unit.
- [ ] An EID is displayed or the system offers an eSIM download/add option.
- [ ] The phone is not locked to a carrier that prevents adding another provider’s profile.
- [ ] Android is updated and the phone has a working Wi-Fi connection for setup.
- [ ] Your destination and travel dates are covered by the plan you are considering.
- [ ] You understand whether the plan is data-only and when its validity starts.
- [ ] You know whether data roaming must be enabled for the travel eSIM.
For another device, or if the regional identity of your handset is unclear, check your device’s eSIM compatibility before choosing a plan. This check is especially useful for imported or carrier-sold phones where the model name alone may not establish the configuration.
Add and activate an eSIM
Motorola’s G53J 5G guide puts SIM management under Settings > Network & internet > SIM cards. Menu labels may vary by update. Follow the plan provider’s instructions for its QR code, activation code, and timing.
Before you start
- Connect to reliable Wi-Fi. You need internet access to download the eSIM profile.
- Keep the QR code or activation details available on another screen or printed page if you plan to scan them with this phone.
- Check that the plan is intended for the country or region you will visit and that you are within any stated installation or activation window.
- Avoid deleting or resetting a profile as a troubleshooting shortcut. A QR code may be one-time use, and removing a profile may require the provider to issue a replacement.
Android setup steps
- Open Settings > Network & internet > SIM cards. If you do not see that exact path, search Settings for “SIM” or “eSIM.”
- Tap Add eSIM, Download a SIM, or the closest available option. Follow the on-screen prompts. If you received a provider QR code, choose the QR scanner when prompted and scan it from a separate display. Keep the code private.
- If QR setup is unavailable, use a manual activation code only if the plan provider supplied one. Enter the details exactly as given; do not guess an SM-DP+ address or activation code.
- Wait for the profile to download and appear in the SIM list. Give it a clear label such as “Travel” so you can distinguish it from your home SIM.
- Turn the eSIM on when you are ready to use it. Select it as the mobile-data SIM if you want travel data to use that profile. Keep your home SIM available for calls or messages if desired, and check its roaming settings to avoid unexpected charges.
- Follow the plan’s timing instructions. Installing a profile and starting its validity period are not always the same event. Some plans start when the eSIM first connects to a supported network; others use a different activation rule.
- Once abroad, turn on mobile data for the travel eSIM. If the plan instructions require it, enable Data roaming for that eSIM only. Keep roaming off for your home line unless you intentionally want to use its roaming service.
- Wait for the phone to register on a local network. If the plan permits manual network selection and automatic selection fails, choose a listed network only as directed by the provider.
For a fuller Android walkthrough, see the Android eSIM installation instructions. The iOS eSIM instructions are for Apple devices and do not describe the G53J menus, but they may help a travel companion using an iPhone.
Scan a QR code from another display or printed material. If it is only on the G53J, use the provider’s manual method or display it on a second device. Keep the code private.
Use the travel eSIM for mobile data
When the profile is installed, decide which SIM should handle each function. On a dual-SIM phone, the home SIM can remain enabled while the travel eSIM handles mobile data, but the available combination depends on the software and carrier. The menu may show a preferred SIM for calls, texts, and data, or a dual-SIM usage profile. Motorola’s guide places these controls in the SIM settings.
For an overseas trip, a common arrangement is:
- Mobile data: travel eSIM, once you reach its supported destination or when its terms say to activate it.
- Calls and SMS: home SIM if you need your existing number and have checked its roaming costs; internet calling apps can use data over the travel eSIM.
- Data roaming: follow the travel-plan instructions for the travel profile. Roaming for a travel eSIM may be required even though it is a prepaid plan. Keep the home SIM’s data roaming setting separate.
- Automatic data switching: turn this off if your phone offers it and you want to prevent data from unexpectedly switching to the home SIM.
If advance installation is allowed, do it over reliable Wi-Fi and check whether installation starts the validity period. At your destination, enable the profile, select it for data, and allow time for network registration.
Practical travel scenarios
Keep your home number reachable. Leave the home SIM enabled for calls or SMS, set the travel eSIM as the data line, and check home roaming charges. Test the arrangement before departure.
Avoid home data roaming. Assign mobile data to the travel eSIM and disable roaming data for the home SIM. Voice or SMS on the home line may still incur charges.
Visit several countries. Confirm that the chosen plan includes each destination; a single-country plan may not work across a border. Recheck details if your route changes.
Use a hotspot. Whether tethering is allowed depends on the plan terms and local network. Check before relying on it.
Kaspersky eSIM Store is an app and website where you can choose, arrange, and activate an eSIM with a mobile-data plan for an international trip. The service does not make the phone compatible by itself: first verify your unit, then compare the destination and current plan conditions shown for your trip. You can browse destinations and current plan options once you know where you are going.
Common problems and what to check
The eSIM option is missing
Confirm the model number and installed software version. Search Settings for “SIM” and check Network & internet. Restart the phone and install available system updates, then check again. If no EID or eSIM menu appears, ask Motorola support or the seller to confirm the precise regional SKU. Do not rely on a generic G53 compatibility list. A carrier lock or carrier-specific firmware may also affect which profiles can be installed.
The QR code will not scan
Increase screen brightness on the second device, clean the G53J camera lens, and hold the code steady at a moderate distance. Make sure the entire QR code is visible and not cropped, blurred, or enlarged beyond recognition. Check whether it has already been used or expired. If the provider supplies manual activation details, use those instead. Avoid repeatedly attempting installation if the provider limits activation attempts.
The profile downloads but will not activate
Confirm that the plan is valid for the current country and that the activation window has not passed. Check that the eSIM is enabled in the SIM list, airplane mode is off, and the phone has a stable internet connection during profile setup. Verify the provider’s instructions about whether activation starts before travel or on arrival. If the phone displays an activation error, save the wording or screenshot for the provider’s support team, but cover personal identifiers.
The eSIM is active, but there is no signal
Make sure you are in a place with cellular coverage, restart the phone, and confirm that the travel profile is selected for mobile data. Check the plan’s destination coverage and network selection guidance. If automatic network selection fails and the provider authorizes manual selection, try the permitted network options. Network bands, local service, and temporary outages can affect availability; an eSIM cannot create coverage where the local network has none.
There is signal but no internet
Check that mobile data is assigned to the travel eSIM, not the home SIM. Confirm data roaming is enabled for the travel profile if required, and that the plan has remaining data and has not expired. Turn Wi-Fi off briefly to test cellular data. If the provider supplied an access point name (APN), compare it with the phone’s mobile-network settings and enter it exactly as given; do not change unrelated APN values. Restart after changes.
The home SIM is using data unexpectedly
Return to Settings > Network & internet > SIM cards and verify the preferred data SIM. Disable automatic data switching if available. Turn off mobile data for the home SIM or its data-roaming setting if you do not intend to roam on it. Confirm the change after restarting, because a profile update or SIM swap can reset preferences.
The eSIM seems to disappear after a reset
Check the SIM list before trying to install it again. A network reset or software reset can affect saved settings; a factory reset or deleting the eSIM may remove the profile. Contact the plan provider before erasing or reinstalling anything, especially if the QR code may be one-time use. Motorola’s help advises that an erased eSIM may need to be restored by the provider. Removing a profile does not necessarily cancel the plan or stop its validity period.
Do not share QR codes, EID, IMEI, or account details publicly. Provide identifiers only through official support channels.
Frequently asked questions
Can I use a physical SIM and an eSIM at the same time?
Yes, Motorola Japan lists nanoSIM/eSIM and dual-SIM dual-standby. The active combination can depend on software and carrier settings.
Is Motorola G53J 5G the same as Moto G53 5G?
No. Motorola lists G53J and G53Y separately, and other markets may have different configurations. Check the exact model number, EID, and eSIM menu.
Does seeing 5G prove that eSIM will work abroad?
No. 5G capability does not prove eSIM availability, carrier unlocking, plan compatibility, or destination coverage.
Does a travel eSIM include calls and text messages?
Not necessarily. Many travel eSIMs are data-only. Check the plan terms; internet calling apps are not a standard phone number or SMS service.
Should I install the eSIM before I leave?
If allowed, install over Wi-Fi after checking the activation rules. Installation and validity start are not always the same event.
Can I delete the profile when I return?
Check with the provider first. Deleting may remove the profile, and a one-time QR code may not work again.
Before you travel: verify, then choose
For the Japan-market Motorola G53J 5G, Motorola’s official specification lists eSIM support. Check your model number, EID, eSIM menu, and carrier-unlock status before purchase.
Choose a plan whose destination, data amount, validity period, activation timing, and roaming instructions suit your trip. Kaspersky eSIM Store lets you review available destinations and current details on its site or app. Conditions can change, so check them before arranging a plan.


