Travel connectivity guide
Motorola Moto G54 256GB eSIM Compatibility
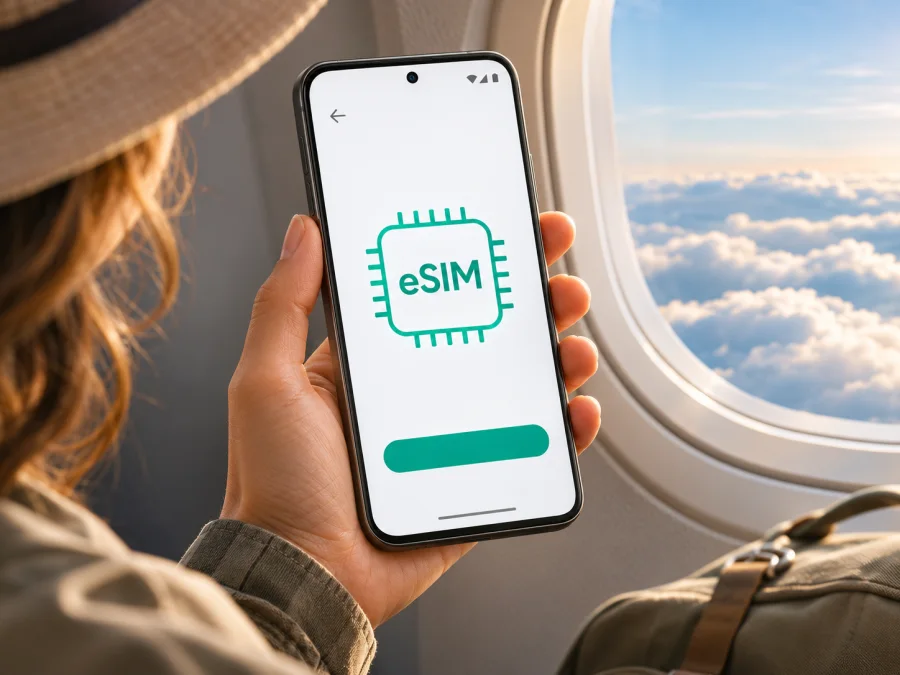
Motorola Moto G54 256GB eSIM: compatibility and setup guide
Does Motorola Moto G54 256GB support eSIM?
Possibly, but the 256GB storage label alone cannot confirm eSIM support. Motorola’s official specifications differ between regional versions of the Moto G54 family: some list a nano-SIM plus eSIM, while others list two physical nano-SIM cards. Motorola’s setup help also describes eSIM as available only on phones that support it. So the practical answer for your individual Motorola Moto G54 256GB is: use eSIM only if your exact phone shows an EID or an eSIM download/add option in its system settings, and check the regional model details with Motorola or the seller if those indicators are missing.
Do not infer eSIM support from the phone’s storage capacity, 5G connectivity, Android version, or the fact that a similar Moto G54 is sold with eSIM elsewhere. The wording “Motorola Moto G54 256GB” does not state the country of sale, model code, SIM tray configuration, or carrier customization. Those details can change which SIM hardware and software features are present.
| Item | What can be established for this name |
|---|---|
| Device named in this guide | Motorola Moto G54 256GB |
| Storage in the supplied device name | 256GB; this does not identify the SIM configuration |
| eSIM status | Regional-variant dependent; verify on the individual phone |
| Physical SIM possibilities | Regional Motorola specifications describe different arrangements, including dual nano-SIM and nano-SIM plus eSIM |
| Reliable device-level checks | Look for an EID and an option to add, download, or set up an eSIM |
| Before buying a travel plan | Confirm eSIM support and that the phone is unlocked for use with another provider |
Why regional versions matter
A model name can cover several market configurations. The listed storage may be the same even when the SIM hardware differs. Motorola’s official regional information for Moto G54 variants illustrates this: a specification page for one market lists two nano-SIM cards, whereas another regional specification lists one nano-SIM and one eSIM. The relevant distinction is the exact unit, not a broad claim about every phone called Moto G54.
Retailer listings may shorten product names or combine data from multiple regions. An online listing that says “dual SIM” may mean two physical SIM cards, one physical SIM and one eSIM, or different configurations sold under one page. Ask for the manufacturer model or SKU code printed on the box or shown in About phone, then compare it with Motorola’s support details for the country where the phone was originally sold. If the seller cannot identify the SIM configuration, treat eSIM support as unconfirmed until you can inspect the handset.
Carrier customizations also matter. A carrier-supplied handset may be locked to that carrier or may have a reduced feature set. A phone can have eSIM hardware and still reject a profile from another provider because it is network-locked, the carrier does not support the required activation method, or the software build has a restriction. Check the device’s unlock status with the carrier or original seller; an EID confirms an eSIM-capable component, but does not confirm that every plan or provider will work.
Check your exact phone before you buy
Use more than one indicator if possible. Menus can move between Android releases and Motorola software versions, and labels may differ by language. A missing menu alone is not proof that the hardware lacks eSIM, but it is a reason to stop and verify the model code before purchasing a plan.
1. Look for an EID
An EID is an identifier associated with the embedded SIM component. On many Android phones, you can check it by opening Settings → About phone → Device identifiers or a similarly named status page. Another common check is to open the phone dialler and enter *#06#; if this handset supports eSIM, an EID may appear alongside the IMEI numbers. Do not share a screenshot of these identifiers publicly. They are device identifiers, not ordinary troubleshooting information.
2. Look for an eSIM control
On Motorola’s eSIM-capable Moto G54 instructions, the path is described under Settings → Network & internet → SIMs & mobile network, where an option to download and set up an eSIM may appear. On your software version, look for wording such as Add eSIM, Download a SIM, Set up an eSIM, or Add mobile plan. Use Settings search for “eSIM” or “SIM” if the exact path differs.
The setup option may only become available after you connect to Wi-Fi, update the phone, or open the SIM settings page. If the menu still does not appear, do not assume a QR code can force an installation. A QR code contains or retrieves a carrier profile; it cannot turn an unsupported physical-SIM-only phone into an eSIM device.
3. Confirm the network lock and plan requirements
Check that the phone is unlocked and that the eSIM provider supports the handset’s model and country variant. A plan can have its own activation requirements, supported networks, coverage area, and data validity rules. A device being able to install an eSIM does not guarantee that it can connect to every partner network in every destination. Confirm destination coverage and compatible network bands for your route when those details are available from the provider.
Use this quick checklist:
- [ ] The phone is the exact Motorola Moto G54 256GB variant you intend to use.
- [ ] An EID appears in the phone’s identifiers, or Motorola confirms eSIM support for the exact SKU.
- [ ] An eSIM add or download option appears in SIM settings.
- [ ] The phone is not carrier-locked against the provider you plan to use.
- [ ] The plan supports the device and your destination, and its data and validity conditions fit the trip.
- [ ] You have stable Wi-Fi available for installation if the profile needs to be downloaded.
For a quick second check against your handset’s model and settings, check your device before choosing a plan.
Before installation: prepare the phone and the plan
If your phone passes the checks above, prepare it while you still have reliable internet access. Keep Android up to date, charge the battery, and connect to Wi-Fi. Read the plan’s installation instructions and note whether it uses a QR code, an in-app installation flow, or manual activation details. Follow the instructions attached to your specific plan: activation steps and the point at which a plan starts counting down can vary.
The Kaspersky eSIM Store app and website help you choose, arrange, and activate an eSIM with a mobile data plan for an international trip. Before selecting a destination plan, make sure your particular Motorola Moto G54 256GB supports eSIM and is unlocked. Then review the plan’s destination, data allowance, validity period, activation conditions, and any restrictions shown at checkout.
Install and activate an eSIM on Android
The exact wording depends on the software version and on the plan’s activation method. Motorola’s eSIM help for supported Moto G54 versions describes downloading and setting up a profile through the SIM settings. For general steps, see the Android eSIM installation instructions. The iOS guide is included for completeness if you are helping someone with a different device: iOS eSIM installation instructions.
Option A: scan a QR code
- Connect the Motorola Moto G54 256GB to Wi-Fi. Keep the QR code visible on another screen or printed page; the phone cannot scan a code displayed only on its own screen.
- Open Settings → Network & internet → SIMs & mobile network. If your phone uses different labels, search Settings for “eSIM” or “SIM”.
- Choose the option to add, download, or set up an eSIM. Confirm that you want to download a mobile plan if Android presents a confirmation screen.
- Scan the QR code supplied for your plan and follow the on-screen prompts. If scanning is unavailable, check whether the plan provides manual activation details and use them only as instructed.
- Wait for the profile to download and finish setup. Keep Wi-Fi connected until Android confirms completion. Do not scan the same code repeatedly if the first attempt is still processing.
- Give the line a clear label such as “Travel data” so you can distinguish it from your physical SIM. Avoid putting private travel details in a label visible on lock-screen notifications.
- If prompted to choose defaults, keep your existing number for calls and SMS if you want to continue using it, and select the travel eSIM for mobile data when its plan is ready to use.
Option B: install from an app or manual details
Some plans can be installed through an app rather than a printed or emailed QR code. Open the provider’s official app and follow its installation flow while connected to Wi-Fi. Approve Android’s request to add the cellular plan only after checking the displayed plan information. If manual details are supplied, enter the SM-DP+ address and activation code exactly as provided; these values are unique to the profile and should not be guessed or copied from an unrelated guide.
The profile can install successfully before it is ready to use for data. Read the plan’s instructions for when to turn the line on and when the validity period starts. Some plans activate at installation, while others start under different conditions, such as first connection to a supported network. Do not assume the timer begins only when you reach your destination.
Choose the travel eSIM for mobile data
After the profile appears in SIM settings, open its details and enable it when the plan’s instructions say to do so. Set the travel eSIM as the mobile-data SIM. If you want to keep your home number available, leave the physical SIM enabled for calls or texts as appropriate, but check with your home provider about roaming charges. Disable data roaming on the home SIM if you do not want it to use mobile data abroad.
Some travel plans require data roaming to be enabled on the travel eSIM to connect to a partner network. Enable roaming only for the correct line and according to the plan instructions. This setting is separate for each SIM on many Android versions. Check the line name carefully before changing it. A roaming toggle does not itself create coverage or make an unsupported phone compatible.
Using Motorola Moto G54 256GB on a trip
A travel eSIM is most useful when you plan the data connection before you need it. If the phone is compatible, you can install the profile at home over Wi-Fi, then switch mobile data to the travel eSIM when the plan is due to start. Alternatively, install it after arrival using airport or hotel Wi-Fi if the plan allows that and the QR or in-app details are accessible. Keep the installation instructions available offline in case your connection is limited.
For a trip through one country, compare plans for that destination and choose based on how long you will stay and how much data you expect to use. For a multi-country itinerary, verify that the plan covers every country on your route; a country-specific plan may not work across a border. Review maps, transport details, and reservations before leaving Wi-Fi, and download offline essentials as a backup. Do not assume that mobile data is available on aircraft, ships, or in remote areas.
If you need your usual number for calls or two-factor messages, check whether your home SIM can remain active without using expensive data roaming. Calls and SMS are not automatically included in a travel data eSIM; check the specific plan conditions. Internet calling and messaging apps can work over data, subject to their own account and service requirements.
For a short visit, you may use little data if you rely on downloaded maps and hotel Wi-Fi. For navigation, video calls, social media uploads, or hotspot sharing, data use can grow quickly. Estimate your needs based on the activities you expect, check the plan’s allowance and validity, and monitor Android’s mobile data usage during the trip. Background app updates, cloud photo backups, and video autoplay can use data without an obvious prompt. Consider pausing automatic backups or restricting background data on the travel line if you need to conserve an allowance.
Troubleshooting: when an eSIM will not install or connect
There is no “Add eSIM” option
First confirm the exact SKU and check for an EID. Restart the phone, install available system updates, reconnect to Wi-Fi, and search the Settings app for eSIM. If neither the EID nor eSIM control appears, ask Motorola or the original seller whether that regional variant includes eSIM hardware. Do not buy a plan on the assumption that a QR code will add the missing capability.
The QR code will not scan or the download fails
Check that the screen displaying the code is bright, the code is not cropped, and the phone has a stable Wi-Fi connection. Confirm that the code belongs to the plan you purchased and has not already been used or expired. If a camera scan does not work, start the process from SIM settings rather than the regular camera app. Use manual details only when they were issued for your plan. If the profile may have been partially installed, avoid repeated attempts and contact the plan’s support channel with the error message.
The eSIM installed but has no signal
Check that the travel line is switched on and that the phone is in an area where the plan is expected to work. Confirm the destination and activation timing in the plan details. Turn airplane mode on briefly and off, then restart if needed. If automatic network selection fails, use manual selection only if the plan provider instructs you which supported network to choose. A plan may need data roaming enabled on its own line; verify the line label before switching the setting.
There is signal, but mobile data does not work
Open SIM settings and ensure the travel eSIM is selected for mobile data. Check that mobile data is enabled, the plan is active, and any required APN is entered exactly as provided. Temporarily disable the home SIM’s data roaming to avoid accidental usage. If the phone has dual-SIM controls, verify that the two lines have not been set to a mode that disables the travel line. Then test with a basic webpage, with Wi-Fi turned off.
Internet is slow or unstable
The phone asks for an unlock code or rejects the profile
A carrier lock can prevent another provider’s eSIM from being used. Contact the carrier that supplied the phone to confirm its unlock status. If the phone is unlocked, check that the plan’s activation method matches the device and that the profile was issued for this handset. Do not repeatedly enter guessed codes or delete a profile that may still be recoverable.
Frequently asked questions
Does every Motorola Moto G54 256GB have eSIM?
No blanket answer is reliable from the storage label. Motorola’s official regional information describes Moto G54 configurations with different SIM arrangements. Check the EID, the eSIM control in settings, and the support information for your exact model code.
Does 256GB storage mean the phone has an eSIM?
No. Storage capacity describes internal storage, not the SIM hardware. Two phones with the same storage can have different regional SIM configurations.
Is an EID enough to prove that a travel plan will work?
It indicates eSIM capability, but compatibility also depends on the phone being unlocked, the plan’s supported devices and networks, local availability, activation rules, and destination coverage. Check those conditions before purchase.
Can I keep my physical SIM active?
If the handset and software support the required dual-SIM configuration, you may be able to keep a physical SIM active while using the eSIM for data. Available combinations differ by model variant and settings. Choose the data line deliberately and check roaming terms with your home carrier.
Does installing the profile mean my plan is already active?
Not always. Installation, profile activation, the start of a plan’s validity, and first network connection are distinct steps. Follow the conditions shown for the plan you selected rather than relying on a general rule.
Will the travel eSIM provide a phone number?
A travel data eSIM is intended for mobile data and may not include a regular phone number, voice calls, or SMS. Check the plan description. Messaging and internet calls may work through apps over an active data connection.
Can I move the eSIM to another phone later?
Do not assume so. Some profiles cannot be transferred or reinstalled after removal. Read the profile and plan rules before switching phones or deleting the eSIM, and contact support if the device must be replaced during a trip.
Final check before choosing a plan
For the Motorola Moto G54 256GB, treat eSIM support as unconfirmed until the exact handset shows an EID or an eSIM add/download control, or Motorola confirms it for that model code and market. Regional configurations can differ, and the storage amount does not settle the question. Also confirm that the phone is unlocked and that the plan supports your route and use case.
Once compatibility is clear, use the Kaspersky eSIM Store app or website to review available destination options, compare the displayed data allowance, validity and activation conditions, and choose an eSIM plan that fits your trip. Install it over reliable Wi-Fi, select the correct line for mobile data, and follow the plan’s instructions for activation and roaming. A short check before purchase can prevent arriving abroad with a plan that your particular phone cannot install.


