Travel connectivity guide
Motorola Razr 40 Ultra 12GB RAM eSIM
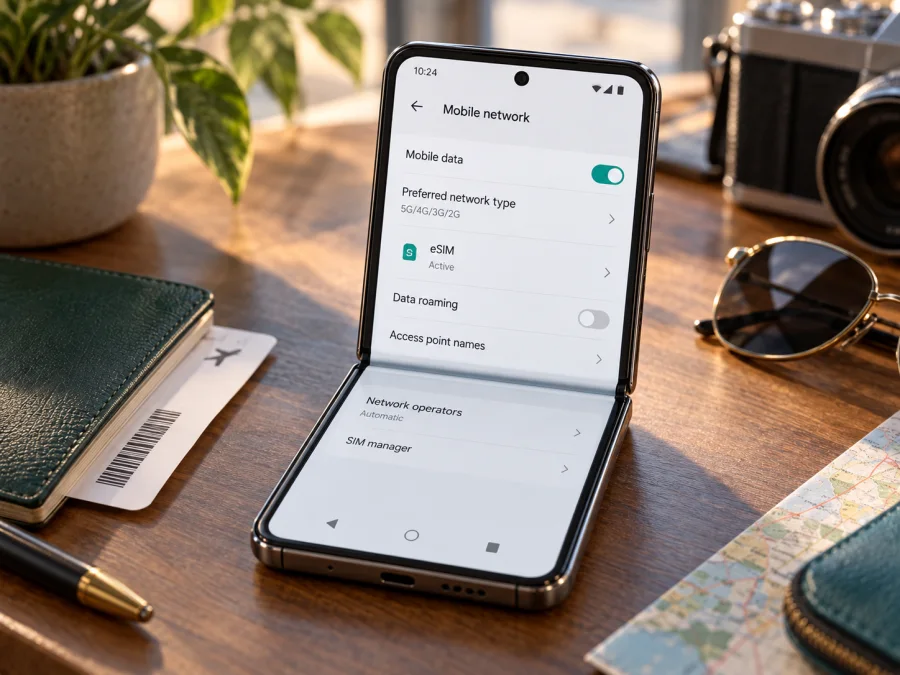
Motorola Razr 40 Ultra 12GB RAM eSIM: compatibility and setup
Short answer: Motorola lists eSIM support for the Razr 40 Ultra, and its support guide describes how to download an eSIM profile. The specific Motorola Razr 40 Ultra 12GB RAM you own should therefore be treated as eSIM-capable only after you confirm that its own settings show an EID or an option to add an eSIM. Memory capacity alone does not identify the radio or regional configuration. A phone imported from another market, supplied with carrier software, or sold under a related market name may behave differently. The mobile operator or eSIM plan provider must also support activation for that device.
This guide explains how to check the handset in front of you, install a travel eSIM, choose it for mobile data, and troubleshoot common setup issues. Menu wording can differ by Android version, language, and software build, so follow the closest matching labels shown on your phone.
Does Motorola Razr 40 Ultra 12GB RAM support eSIM?
Motorola’s official Razr 40 Ultra product specifications include eSIM alongside a nano-SIM, and Motorola’s support instructions provide an eSIM setup path for this family. That is a positive answer for supported configurations: yes, the model family has eSIM capability. It is not a guarantee that every unit called Motorola Razr 40 Ultra 12GB RAM has an enabled eSIM function in every country or on every carrier.
The 12GB RAM detail identifies the memory configuration, but not necessarily the market-specific model number, firmware, SIM tray arrangement, or carrier policy. Before relying on eSIM, check the actual phone rather than inferring support from the product name, the box, or another owner’s experience. Motorola’s support wording also tells users to confirm details with their carrier. In practice, eSIM activation depends on three things: the phone has eSIM hardware and software enabled, the device is not restricted by a carrier lock, and the provider issuing the eSIM supports the handset and its network profile.
| Item | What to know |
|---|---|
| Exact variant in this guide | Motorola Razr 40 Ultra 12GB RAM |
| Manufacturer’s model-family information | Motorola’s Razr 40 Ultra specifications list eSIM and nano-SIM |
| Quickest device check | Look for an EID in About phone or an option to add/download an eSIM in SIM settings |
| Regional and operator caveat | Hardware, firmware, menu labels, carrier provisioning, and activation policy may differ |
| Travel use | A compatible travel eSIM can be selected for mobile data while your usual line remains available, subject to plan and device settings |
Why the exact market version matters
A model name does not identify every regional configuration. Manufacturers may ship different SIM arrangements, network bands, firmware, and carrier options by market. A retailer or operator can also customize or restrict a device. “Dual SIM” alone does not prove that a phone supports eSIM: it can describe different physical and digital SIM combinations.
The 12GB RAM detail identifies memory, not the model number, sales region, unlocked status, or eSIM software. Ask the seller for the full SKU and original market, especially for an imported or operator-supplied phone. Confirm that it is unlocked and can download third-party travel eSIM profiles. Geographic availability of a plan is separate from the phone’s ability to install it; both the exact handset and destination must be supported.
Check compatibility before buying a plan
Use these checks in order. They take only a few minutes and can prevent buying a plan that you cannot install.
- Find the EID. Open Settings and look under About phone, Status, or SIM status for an EID (Embedded Identity Document). The exact location varies. You can also check whether the phone displays an EID when you open the device’s SIM information. An EID is a strong sign that the handset has eSIM capability, but you should still confirm that the eSIM function is available and that the plan issuer supports it.
- Look for the eSIM control. Open Settings → Network & internet → SIMs & mobile network or the closest equivalent. Look for Download a SIM, Add eSIM, Download a new eSIM, or a similar option. Motorola’s support article describes a download-and-setup option in the SIM settings. If the option is absent, do not assume that a reset or QR code will make it appear; verify the precise model with Motorola or the seller.
- Check the carrier lock. If the phone was sold by an operator, confirm that it is unlocked for use with another provider. A SIM lock can prevent a travel profile from registering even when the eSIM menu is present.
- Check the software. Install available official Android and carrier configuration updates while you have reliable Wi-Fi. Restart the phone and recheck the SIM menu. Updates can change menu labels or correct setup issues, but they cannot add eSIM support to a configuration that lacks it.
- Confirm plan compatibility. Check that the chosen eSIM plan supports the Motorola Razr 40 Ultra configuration, the destination, and the intended use. A plan’s coverage area and the device’s supported radio bands are separate questions.
- Keep a second connection for setup. Have Wi-Fi or another working internet connection available to download the profile. Do not remove a working physical SIM as a first troubleshooting step.
For a general device check, use Check whether your device is compatible. If any of these checks is uncertain, verify the model number and eSIM status with the seller, Motorola support, and the plan provider before you pay.
What the EID does and does not tell you
The EID identifies embedded SIM hardware; it is not a phone number or activation code. Finding an EID strongly suggests eSIM capability, but does not guarantee that a carrier or travel plan will activate the phone. Check Settings → About phone → SIM status and the eSIM setup flow. On some builds, *#06# displays device identifiers. If there is no EID and no add-eSIM control, confirm the exact model and market with Motorola or the seller. Avoid sharing the EID publicly.
Install and activate an eSIM
Before beginning, make sure you have the plan’s installation instructions, a stable Wi-Fi connection, enough battery, and access to the QR code or manual activation details. Some profiles can only be installed once, so do not delete a profile to retry unless the plan provider tells you to. If the plan was purchased for later use, read its activation and validity rules first: installation and the start of the validity period are not always the same event.
Motorola’s guide gives the general route as Settings → Network & internet → SIMs & mobile network, followed by the option to download and set up an eSIM. Labels may vary between software releases. For a visual walkthrough, see the Android eSIM installation instructions or the iPhone eSIM installation instructions; the iPhone guide is useful only if you are comparing steps for another device, since this handset runs Android.
- Connect to Wi-Fi. Keep the phone online while it downloads the eSIM profile. If you are already abroad, use a trusted Wi-Fi connection or another active data line.
- Open the SIM settings. Go to Settings → Network & internet → SIMs & mobile network. Depending on the software, the section may be called Mobile network or SIM cards.
- Choose the add or download option. Tap Download a SIM, Add eSIM, or the closest equivalent. If a setup screen asks whether you want to download an eSIM, continue only when you are ready to install the plan.
- Scan the provider’s QR code. Use the phone’s built-in eSIM setup flow. If scanning is unavailable, choose manual entry and enter the activation details supplied with the plan. Do not photograph or forward activation details unnecessarily.
- Confirm the profile details. Review any displayed plan label and accept the download. Keep the screen open until the phone reports that the profile has been added. A profile may take a short time to download.
- Name the line. Give the new profile a clear label such as “Travel” or the destination name, so you can distinguish it from your main SIM.
- Set the preferred line for mobile data. In SIM settings, select the new eSIM under Mobile data or SIM for mobile data when you are ready to use the travel plan. Keep your primary line selected for calls or messages if that is what you want.
- Check roaming instructions. Some travel plans require data roaming to be enabled for the travel eSIM. Follow the plan’s instructions and enable roaming only for the intended line. If your usual SIM remains active, review its roaming setting separately to avoid unexpected charges.
- Wait for network registration. If activation is meant to start at the destination, the profile may show as installed but not yet connected at home. Once you reach a supported destination, turn off airplane mode, allow the phone a few minutes to register, and check the plan’s activation rules.
- Test a simple connection. Open a web page or a messaging app after confirming that the travel eSIM is the selected data line. If the plan has a balance or usage page, check that it records the connection.
If you use an Android version with slightly different labels, search Settings for SIM, eSIM, or mobile network. Do not select Erase eSIMs as a reset step: removing a downloaded profile may make it impossible to restore without help from the provider.
Use the eSIM for mobile data while travelling
You can often install the profile before departure over Wi-Fi, then select it for mobile data when the plan should begin. Whether validity starts at purchase, installation, or first network connection depends on the plan, so read its conditions. In SIM settings, choose the travel eSIM for data and keep your usual SIM for calls or messages if desired. Turn off automatic data switching if you do not want fallback to your home line. Check the home operator’s roaming terms separately.
Travel eSIM plans are generally for mobile data. Unless the plan says otherwise, do not expect a regular number, voice calls, or SMS. Internet calling and messaging apps can work over data. For a multi-country route, confirm every destination, the data allowance, validity period, hotspot rules, and activation timing. Coverage and speed depend on the local network, supported bands, location, and congestion; no plan guarantees a signal everywhere.
Kaspersky eSIM Store is an app and website where you can choose, arrange, and activate an eSIM with a mobile data plan for an international trip. After confirming the handset, choose an eSIM plan for your trip and review the destination, data amount, validity, and conditions.
Practical scenarios
- Before departure: Check EID, unlock status, and plan compatibility. Install over Wi-Fi if permitted, and save the instructions offline. Keep the profile unused until the plan’s start condition is met.
- At arrival: Disable airplane mode, enable the travel profile, select it for data, and enable roaming for that line only if required. Allow time to register, then test a webpage.
- Keeping your home number: Leave the main line active if supported, but select the travel eSIM for data. Review voice, messaging, and automatic data switching; charges from your home operator may still apply.
- Crossing borders: Verify that each country is included and that the plan remains valid throughout the route. A working connection in one country does not confirm service in the next.
Common problems and checks
There is no “Add eSIM” option
Search Settings for eSIM and SIM, install official updates, and restart once. Confirm the exact model number and sales market with the seller or Motorola. The unit may have a different regional setup or carrier restriction. RAM alone cannot establish compatibility; do not buy a plan until the phone is confirmed.
The QR code will not scan or the profile will not download
Use the system eSIM setup screen, increase the brightness of the displayed code, and keep the phone steady. If the code is on the same phone, use manual activation if offered. Ensure Wi-Fi works and follow the provider’s retry guidance; some codes can only be used once. If an error says the code is invalid or used, contact the eSIM provider rather than deleting profiles or repeatedly retrying.
The profile is installed but has no service
Check that the plan is active and includes your current country. Enable the profile and select it for mobile data. Turn on data roaming for that eSIM only if the plan requires it. Toggle airplane mode or restart, then allow the phone time to register. If service remains unavailable, check the provider’s network instructions and whether the regional handset supports the local bands.
Data uses the wrong SIM or apps do not load
Set the travel eSIM as the data line and turn off automatic switching if you do not want fallback to the home SIM. Confirm mobile data is on and that the plan has remaining data and validity. Turn Wi-Fi off briefly to test cellular service. Only change APN settings when the provider supplies exact values.
The eSIM is slow, cannot transfer, or was deleted
Signal, buildings, congestion, local coverage, and radio bands affect speed; a 5G-capable phone may use 4G where 5G is unavailable. Many profiles cannot be transferred by copying them to another phone. Motorola advises erasing an eSIM only when support instructs you to; ask the plan provider about reissue or transfer options.
Frequently asked questions
Does the 12GB RAM version have eSIM?
Motorola’s specifications list eSIM for the Razr 40 Ultra family. Verify the individual 12GB RAM handset with its EID or add-eSIM setting, since RAM does not identify region, firmware, or carrier configuration.
Can I use an eSIM with a physical SIM?
Motorola lists eSIM and nano-SIM for supported configurations. The available dual-SIM arrangement and simultaneous line use depend on the exact software and operator support; check SIM settings before relying on a combination.
Can I install before travelling, and when does the plan start?
Installation over Wi-Fi is often possible, but validity may start at purchase, installation, or first connection. Read the selected plan’s rules before adding the profile.
Does a travel eSIM replace my number, and is roaming required?
A travel data plan generally does not replace your number or include voice and SMS. Some plans require data roaming for the travel line. Follow its instructions and check the home SIM separately for unexpected charges.
What if I cannot find an EID or eSIM menu?
Confirm the exact model and market with Motorola or the retailer. Treat compatibility as unverified until the phone and plan are confirmed; do not rely on the product name alone.
Does installation guarantee coverage everywhere?
No. The plan must cover the destination and local network conditions affect service. An installed profile does not guarantee a signal in every place.
Final check before choosing a travel eSIM
For the Motorola Razr 40 Ultra 12GB RAM, Motorola’s published model-family information supports eSIM use, but the final check belongs to the exact handset and plan. Find the EID, locate the add-eSIM option, confirm that the device is unlocked, and verify that the plan provider supports your regional version and destination. Once those details match, install the profile over Wi-Fi, select it for mobile data when appropriate, and review roaming settings for both SIMs.
Use the device compatibility check before purchase, then choose a plan whose destination, allowance, validity, and conditions fit your route. Kaspersky eSIM Store lets you do this through its app and website, where you can choose, arrange, and activate an eSIM with a mobile data plan for an international trip. Keep the setup details available, and contact the plan provider if activation or network registration does not follow its instructions.


