Travel connectivity guide
Motorola Razr 40 Ultra 256GB eSIM Guide
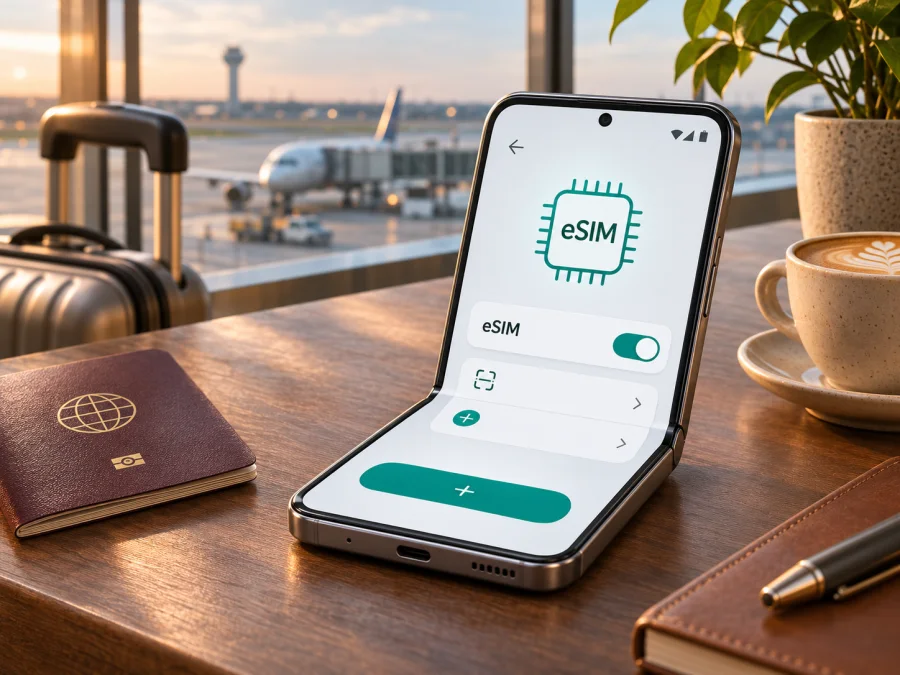
Motorola Razr 40 Ultra 256GB eSIM: compatibility and travel setup
The Motorola Razr 40 Ultra 256GB may support eSIM, but the storage size alone cannot confirm that the individual phone has an active eSIM capability. Motorola’s support information for the Razr 40 Ultra describes eSIM setup while qualifying that a phone might support it and advising users to check with their carrier. Motorola’s regional specification pages also show that the model name can cover different memory and SIM configurations. Treat your own handset’s EID and Settings menu as the final compatibility check before choosing a travel plan.
This guide explains how to check your exact device, install an eSIM when the option is available, select it for travel data and troubleshoot common setup issues. It does not assume that all Razr 40 Ultra 256GB units use the same regional hardware, firmware or carrier configuration.
Quick answer
Can Motorola Razr 40 Ultra 256GB use eSIM? Some versions of the Razr 40 Ultra support eSIM alongside a physical nano-SIM, and Motorola publishes setup instructions for the model. However, the manufacturer’s wording is conditional, and a 256GB label does not identify the device’s sales market or exact SKU. Confirm that your particular phone exposes an EID and an option to add or download an eSIM. A compatible model can still be restricted by carrier lock, local firmware, carrier eligibility or the service provider issuing the eSIM.
The strongest practical evidence is a combination of checks: an EID shown in the phone’s settings or by dialing *#06#, and an eSIM-related menu under SIM settings. A displayed EID is a good sign, but it does not prove that every carrier or travel eSIM will activate. If the EID is absent or the add-eSIM control is missing, ask Motorola or the seller to confirm support for the full model/SKU and country of sale before purchasing a plan.
Motorola’s support article “Using an eSIM or SIM card on the motorola razr 40 ultra” was checked on 3 November 2026. It describes the eSIM setup route and explicitly makes support dependent on the phone and carrier. Motorola’s German specification page lists a 256 GB Razr 40 Ultra configuration with 8 GB RAM, while other regional support pages list different storage configurations. These are official manufacturer statements; they do not establish that every 256GB handset sold worldwide has identical SIM hardware.
At a glance
| Item | What to know |
|---|---|
| Exact device in this guide | Motorola Razr 40 Ultra 256GB |
| eSIM answer | Supported by some Razr 40 Ultra versions; verify the individual 256GB handset |
| Physical SIM | Motorola describes eSIM in addition to a physical SIM on supported versions; the physical tray is a nano-SIM tray |
| Regional differences | Memory, SIM configuration, firmware and carrier eligibility may vary by country and model/SKU |
| Check on the phone | Look for an EID and an option to add, download or set up an eSIM |
| Travel use | Select the travel eSIM as the mobile-data line and confirm its destination, validity and activation conditions |
| Before purchase | Check device compatibility and carrier lock status before paying for a plan |
The table is a decision aid, not a promise of support for a particular second-hand or imported unit. “256GB” describes storage capacity. It is not a complete model number and does not tell you whether eSIM is enabled on your phone.
What the 256GB variant tells you—and what it does not
Motorola’s German specifications list a Razr 40 Ultra with 256 GB internal storage and 8 GB RAM. Other regional pages describe configurations with different storage and memory, so the family name does not identify every hardware or software detail. “256GB” identifies storage capacity; it does not establish eSIM support or the phone’s full model/SKU.
Motorola’s support instructions explain how to set up eSIM on the Razr 40 Ultra, but qualify that the phone might support it and direct users to check with their carrier. This confirms that eSIM is available on some versions, not that every 256GB retail unit has the same SIM hardware or firmware. The accurate general answer is conditionally supported; verify the exact handset.
Keep three questions separate: does the phone have eSIM capability, is it unlocked and enabled for the intended provider, and does the plan cover the destination? A positive answer to one does not settle the others. Imported or carrier-branded phones deserve an extra check of model number, sales market and software build.
Check this exact phone before buying
Use the handset itself rather than relying only on a shop listing or a compatibility article for a similarly named Razr. Keep the phone updated and make the checks while connected to Wi-Fi if possible.
- Find the full model identifier. Open Settings > About phone and note the model number, software version and country or carrier branding shown on the device. If the phone is not yet in your hands, request a photo of this screen and of the retail label. Do not publish or share your full IMEI or EID publicly.
- Look for an EID. In Settings, open About phone and then the device/SIM details if that option is available. On many Android phones, dialing
*#06#also displays identifiers; check for a value labelled EID. Menu labels can vary with Android version and regional firmware. An EID is the identifier used for the embedded SIM, so its presence is strong evidence of eSIM capability. - Check the SIM menu. On the Razr 40 Ultra, Motorola’s support instructions give the path Settings > Network & internet > SIMs & mobile network. Look for a control such as Download a SIM, Set up an eSIM or Add eSIM. Wording can differ after software updates or localization.
- Check eligibility with the provider. If the EID and menu are present, ask the mobile operator or travel eSIM provider whether this exact model/SKU is accepted and whether the phone must be unlocked. A visible menu does not guarantee that a particular provider can activate a profile.
- Check the status before committing. Confirm that the handset is not carrier-locked and that the eSIM feature is not blocked by a work profile, parental controls or carrier firmware. Ask the seller or carrier to resolve any uncertainty before purchase.
Compatibility checklist
- [ ] The full model number and original sales market are known.
- [ ] Settings or the identifier screen shows an EID.
- [ ] The SIM settings show an option to add or download an eSIM.
- [ ] The phone is unlocked for another provider’s profile.
- [ ] The chosen eSIM service accepts this device and installation method.
- [ ] The plan covers the destination and trip dates.
- [ ] You know whether activation starts at installation, first connection or another stated time.
Check whether your device is compatible before selecting a plan. If the phone lacks an EID or an add-eSIM option, do not assume that a QR code can add the missing capability. Contact Motorola with the full SKU and ask the seller about a return or another compatible phone if necessary.
When you’re ready to prepare a trip
Once the compatibility checks pass, browse Kaspersky eSIM Store to review current destination and regional options. This is the Store homepage for checking available plans; it is not a country-specific tariff page. Compare the destination, data allowance, validity period, activation terms and supported installation method with your itinerary. Kaspersky eSIM Store is an app and website that helps travelers choose, arrange and activate an eSIM plan for mobile data abroad. Network access itself depends on the plan, local network availability and the device.
Install an eSIM on the Razr 40 Ultra
Install while you have reliable Wi-Fi and enough battery. Read the eSIM provider’s instructions first: some profiles are installed from a QR code, while others can be downloaded through an app or a manual activation code. A QR code is generally single-use, so keep the purchase email or account details available until setup is complete. Do not scan a code repeatedly if the first attempt appears to stall; check the profile list first to avoid creating confusion or using a one-time code.
- Prepare the profile. Check that the plan is for the right destination and the phone is unlocked. Keep the QR code visible on another screen, or use the provider’s app/manual activation method.
- Open SIM settings. On supported versions, go to Settings > Network & internet > SIMs & mobile network and choose Download a new eSIM, Set up an eSIM or the closest option shown.
- Connect to Wi-Fi and follow the prompts. Approve the profile download and wait for it to finish. Avoid scanning a one-time QR repeatedly; check the installed profiles if setup seems stalled.
- Name the line. Use a clear label such as “Travel data” or the destination name.
- Select it for data. Set the travel eSIM as the mobile-data line when ready. Keep home-line data roaming off unless you intend to use your home operator’s roaming service.
- Follow roaming instructions. Some travel eSIMs require data roaming on that line. Check that the selected line is the travel profile before enabling it.
- Confirm connection. At the destination, disable airplane mode, enable the travel line and allow it to register. Check the plan’s APN instructions if data does not work.
For platform guidance, see the Android eSIM installation instructions or the iOS eSIM installation instructions. The Razr runs Android, so use the Android steps for this phone.
Keep both SIMs under control
A supported Razr may let you keep a physical SIM and an eSIM in the device. The exact simultaneous-use options depend on the software and network configuration. Before travel, decide which line should handle mobile data and which should remain available for calls or messages. If you keep the home SIM active, disable its data roaming unless you deliberately intend to use your home operator’s roaming service. Check the line name at the top of the screen before changing mobile-data settings.
A data-only travel plan does not automatically provide a new phone number or conventional voice calls and SMS. Keep your regular number available if you need it and understand your home plan’s roaming charges. Internet messaging and voice apps can work over the travel data connection when their accounts and settings are already configured.
Use the eSIM for mobile data on a trip
Install before departure only if the plan’s activation rules allow it. Validity may begin at installation or at first network connection, depending on the plan. Save setup details offline and note the allowance, validity and coverage. At arrival, enable the travel eSIM, select it for mobile data and enable data roaming only if its instructions require it. A compatible phone cannot guarantee signal everywhere; coverage and speed depend on local networks and conditions.
For a multi-country route, confirm that every destination and stopover is covered. A country plan may not include neighboring states, while regional plans have their own allowances and validity terms. Track usage because video, cloud backup and hotspot use can consume data quickly. Download maps and large files over Wi-Fi and review Android’s data-usage screen. Avoid deleting a working profile during a temporary outage; first check line selection, coverage, roaming, APN and account status. Motorola notes that restoring an erased eSIM may require the service provider.
If both a physical SIM and eSIM are available, choose which line handles mobile data. You can keep the home SIM for calls if useful, but check its roaming charges and turn off its mobile data or data roaming if you do not intend to use it. A travel plan may be data-only, so check its conditions before expecting a phone number, conventional calls or SMS.
Common problems and what to check
There is no EID or eSIM option
Restart, update the phone and check Settings > About phone and Network & internet > SIMs & mobile network again. If the EID and menu are still absent, ask Motorola or the seller whether the exact SKU and regional firmware support eSIM. A carrier can confirm activation eligibility, but cannot add missing hardware support.
The QR code will not scan or download
Use stable Wi-Fi, raise the brightness on the screen showing the code and verify it has not already been used. If installation fails, check the provider’s manual setup option or ask whether the profile needs replacement. Do not share the activation code.
The profile appears, but data does not work
Make sure the travel profile is enabled and selected for mobile data. Check the plan’s coverage and start date, then enable data roaming or enter an APN only if its instructions require it. Restart and allow the phone to register. If advised, try manual network selection using the provider’s supported network list.
The phone is locked or the eSIM was erased
Ask the original operator or seller to confirm unlock status before buying another plan. If a profile was deleted, do not assume the QR code can be reused: Motorola notes that restoration may require the provider. Check its account or support instructions before resetting the phone.
Practical travel examples
Short city break: Verify the EID and setup menu at home, match the plan validity to your dates and select the eSIM for data on arrival.
Longer stay: Estimate navigation, messaging and browsing use; download offline maps and watch usage. Video and tethering use data faster than basic browsing.
Multi-country route: Check every country and stopover against the plan’s coverage and validity. Do not assume a country plan includes nearby destinations.
Second-hand or imported phone: Check the model code, EID and unlock status before buying a plan. The 256GB name alone does not establish regional eSIM eligibility.
FAQ
Does the 256GB version definitely support eSIM?
There is no universal guarantee for every regional SKU. Motorola documents eSIM setup for the family and a 256 GB configuration; check your handset’s EID and setup menu, then confirm provider eligibility.
Can I keep a physical SIM and travel eSIM installed together?
The manufacturer describes eSIM alongside a physical SIM on supported versions. Whether both lines can remain active in your particular configuration depends on regional hardware, firmware and carrier rules. Check SIM settings after installation, and choose deliberately which line handles mobile data.
Do I need to remove my regular SIM before installing an eSIM?
Usually not when the phone supports both, but follow the provider’s instructions and confirm the available SIM configuration in Settings. You can often leave the physical SIM installed and select the travel eSIM for data. The available dual-SIM behavior may differ by market and software.
Will the travel eSIM give me a local phone number?
Do not assume so. Travel eSIM plans may be data-only and may not include a conventional phone number, calls or SMS. Check the actual plan details. Internet messaging and calls through apps can use mobile data when configured.
Should I install the eSIM before the flight?
That depends on the provider’s activation rules and installation method. Installing on Wi-Fi before departure can make setup easier, but some plans begin their validity at installation. Check the terms first; if activation begins on first connection, pre-installation may be convenient, while an installation-triggered plan may need to wait.
What if the EID appears but the add-eSIM menu does not?
Update the phone and check all SIM-related menus again. Then confirm regional firmware and carrier restrictions with Motorola or the seller. The EID suggests eSIM hardware is present, but a missing menu can still indicate a software, market or operator limitation that should be resolved before purchase.
Final check before you choose a plan
For Motorola Razr 40 Ultra 256GB, treat eSIM as possible but dependent on the exact regional handset. Confirm the full model code, find the EID, locate the eSIM setup control and check that the phone is unlocked. Then verify that the eSIM provider accepts the device and that the plan covers every destination for the dates you need. Check whether validity starts at installation or first connection, and decide which SIM will handle mobile data.
After these checks, use Kaspersky eSIM Store to browse the current available destinations and plans, compare data allowance and validity, and follow the installation guidance for Android. The homepage is a general place to review what is currently available; the specific plan terms determine where and when it can be used. A few minutes spent checking the handset and plan before departure can make activation much more predictable.


