Travel connectivity guide
Motorola Razr 40 Ultra 8GB RAM eSIM Guide
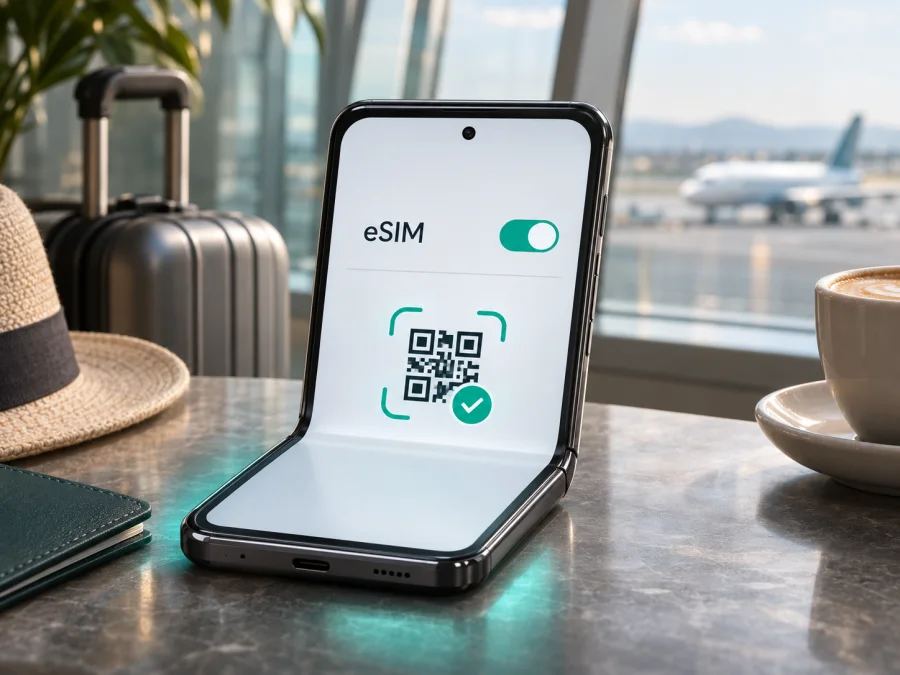
Motorola Razr 40 Ultra 8GB RAM eSIM: compatibility and setup
The Motorola Razr 40 Ultra 8GB RAM is listed with eSIM support in Motorola’s official specification for an 8 GB RAM configuration. Motorola’s support guidance also qualifies that an individual phone “might” support eSIM and advises checking with the carrier. The practical answer is therefore: this documented configuration can support eSIM, but confirm the specific handset’s regional version, firmware and operator status before choosing a travel plan. The RAM amount alone does not guarantee that every unit sold under the same model name has the eSIM option enabled.
This guide explains how to check the phone itself, install a profile, select it for mobile data and troubleshoot common setup problems. It focuses on the exact Motorola Razr 40 Ultra 8GB RAM configuration; other Razr models and memory variants should be checked separately.
Does the Motorola Razr 40 Ultra 8GB RAM support eSIM?
Motorola’s published specification for an 8 GB RAM version identifies a nano-SIM and eSIM combination. The manufacturer’s Razr 40 Ultra support page describes downloading and setting up an eSIM in Android settings, while using conditional wording because support depends on the handset and carrier. These official details support a qualified yes for the documented 8 GB configuration, rather than a universal promise for every phone labelled Razr 40 Ultra.
| Item | What to know |
|---|---|
| Device covered here | Motorola Razr 40 Ultra 8GB RAM |
| eSIM status | Supported on Motorola’s documented 8 GB configuration; verify the individual unit |
| Physical SIM | Motorola lists nano-SIM alongside eSIM for a published configuration |
| Setup path shown by Motorola | Settings > Network & internet > SIMs & mobile network; wording can vary by software version |
| What can affect availability | Market variant, carrier provisioning or lock, firmware, and local service support |
| Before buying a travel plan | Confirm an EID or an add/download eSIM control on this phone, then verify it is unlocked |
The name “Motorola Razr 40 Ultra 8GB RAM” does not state the country or sales channel of the handset. Motorola’s specification pages show that regional product configurations exist, and the company notes that some device capabilities are available only in certain regions. A listed eSIM feature is good evidence, but a phone imported from another market, supplied by an operator, refurbished, or running a different software build may expose a different SIM menu. Carrier rules can also affect whether a profile can be downloaded or used.
Do not infer eSIM availability from the foldable design, 5G badge, memory size, or the presence of a physical SIM tray. Nor does a working physical SIM prove that eSIM is active. The decisive check is on the phone you will travel with: look for its EID and a system option to add or download an eSIM. If both are absent, ask Motorola support or the seller to confirm the exact model/region code and the carrier status before paying for an eSIM plan.
Check this exact phone before purchase
Use these checks on the handset in hand, if possible. Menu labels may vary slightly across Android versions and regional firmware.
- Look for an EID. Open Settings > About phone and inspect device or SIM details. You can also use Settings search for “EID”. An EID (embedded identity document) is the identifier associated with the eSIM hardware. If the phone displays an EID, note that as evidence of eSIM capability; do not share the full number publicly.
- Check the SIM settings. Open Settings > Network & internet > SIMs & mobile network. Look for Download a SIM, Add eSIM, Set up an eSIM, or a similarly named option. Motorola documents a download-and-setup option in this area for the Razr 40 Ultra.
- Confirm with the seller or carrier. Give them the complete model or regional code from Settings > About phone or the box label. Ask whether this unit can install a third-party travel eSIM and whether it is network-unlocked. A carrier-branded menu can still allow eSIM, but a network lock may prevent use of another provider’s profile.
- Check software and access. Install available system updates while connected to Wi-Fi, then check the SIM menu again. The option may be hidden or unavailable under a restricted user profile; use the phone’s owner profile when checking dual-SIM settings.
- Keep a fallback. If you cannot inspect the phone before purchase, make the seller’s eSIM and unlock confirmation part of your buying decision. A model family name alone is not a reliable substitute for checking the individual unit.
For a quick cross-check before choosing a plan, check whether your device is compatible. This guide’s result applies only after the phone itself confirms eSIM access and is not operator-locked for the intended profile.
Regional versions, carrier status and what the answer means
The model name can cover phones sold in different markets with different software, SIM configurations or carrier policies. Motorola documents eSIM plus nano-SIM for an 8 GB RAM variant, while its support guidance says the phone might support eSIM and advises checking with the carrier. Together, these support a qualified yes, with verification required on the exact unit.
The 8GB RAM label does not identify the sales region or confirm that eSIM is enabled on an individual phone. Imported or carrier-supplied units may use different software, SIM settings or network bands, and a carrier lock can prevent a profile from another provider from working. Successful installation also does not guarantee service in every destination.
Check three things independently: whether this handset exposes eSIM through an EID or add/download control; whether it is unlocked and accepts the provider’s profile; and whether the plan covers the destination and dates. If the EID or setup option is missing, pause and confirm the complete model code with the seller or Motorola. If present, still review the plan’s device requirements and destination conditions.
Before installing an eSIM
Prepare the activation details and a stable internet connection, usually Wi-Fi. If scanning a QR code, display it on another screen or use the provider’s manual method. Use only the code issued for your purchase.
Compatibility checklist
- [ ] The phone is the Motorola Razr 40 Ultra 8GB RAM unit you intend to use, and its EID or add-eSIM control is visible.
- [ ] The device is not carrier-locked, or the relevant carrier confirms that the travel profile is allowed.
- [ ] Android is up to date and the phone can connect to Wi-Fi during profile download.
- [ ] The eSIM plan covers the destination or route and its validity matches your travel dates.
- [ ] You know when the plan’s validity starts; installation and first network connection are not always the same event.
- [ ] The QR code or activation information is available and has not already been used, if the provider restricts reuse.
- [ ] Your existing SIM remains available for calls or texts if you need it, and you know which line will use mobile data.
For travel mobile data, Kaspersky eSIM Store is an app and website where you can choose, arrange and activate an eSIM plan for a trip abroad. Check current destinations and plan conditions on the Kaspersky eSIM Store website after you have confirmed that this particular phone supports eSIM. The available destination and terms can change, so review the plan details for your own itinerary before proceeding.
How to install and activate eSIM on Motorola Razr 40 Ultra 8GB RAM
Motorola’s documented setup route is in Android’s network and SIM settings. Labels vary by software build. Follow the profile issuer’s QR, in-app or manual activation instructions if they differ from these general steps.
- Connect to Wi-Fi. Keep the phone online while it downloads the eSIM profile. Do not rely on the travel eSIM itself for this initial connection.
- Open the SIM controls. Go to Settings > Network & internet > SIMs & mobile network. If that path differs, search Settings for “SIM” or “eSIM”.
- Start adding a profile. Tap Download a SIM, Add eSIM, or the equivalent control. Confirm any prompt that asks to download or set up a SIM.
- Scan or enter the activation details. Use the provider’s QR code when offered. If the code is on this same phone, use the provider’s manual entry method or display the QR code on another device. Do not photograph or post the code publicly.
- Wait for the profile to download. Keep the phone connected and avoid closing the setup screen. When Android asks, give the profile a clear name such as “Travel data” so you can distinguish it from your regular SIM.
- Turn on the eSIM line. In the SIM settings, enable the new profile if it is not already active. If the provider says to install it before departure and activate it at the destination, follow those timing instructions; do not assume that installing a profile starts or delays validity.
- Choose the mobile-data SIM. In the SIM controls, set the travel eSIM as the preferred line for mobile data when you want to use it. Keep calls and messages assigned to your usual line if needed, and review that line’s roaming settings to avoid unintended charges.
- At the destination, enable data as instructed. Turn on mobile data for the travel profile and, if the plan requires it, enable data roaming for that eSIM. Data roaming on a travel profile is distinct from using your home SIM abroad, but check both lines carefully.
- Test a simple connection. Turn Wi-Fi off briefly and open a basic webpage or messaging app. If there is no connection, restore Wi-Fi and work through the troubleshooting checks below before deleting anything.
Motorola’s Android eSIM instructions provide a general Android reference. The iOS eSIM instructions are included for travelers who are also setting up a separate iPhone; they do not describe the Razr’s Android menus.
Installation is not always the same as activation
Installation downloads the profile; enabling the line lets the phone use it. The plan may begin on installation or first connection, depending on its terms. Check the start event and any installation deadline before setup. Keep the purchase confirmation and support details. Transfer and reinstall rules vary, so do not delete a working profile unless the issuer tells you to; its code may not work a second time.
Use the eSIM for mobile data on a trip
When supported by the specific unit and carrier, the Motorola Razr 40 Ultra 8GB RAM can use a physical SIM and eSIM together. In Settings > Network & internet > SIMs & mobile network, select the travel eSIM for mobile data. You can keep the home SIM for calls or verification texts, but check its roaming terms: two profiles do not prevent charges on the home line. Turning that line off also stops incoming calls and SMS until it is re-enabled.
If the travel plan requires data roaming, switch it on for the travel eSIM only. Verify the selected data line after restarting the phone, because a preferred line may change after a profile is disabled or the SIM configuration is edited. Also check that mobile data is enabled, airplane mode is off, and the selected plan covers the country you are currently in. On a multi-country trip, the plan may cover some legs but not others.
A mobile-data travel eSIM can support maps, transport apps, messaging, email and browsing. Do not assume it includes a normal number, voice calls or SMS unless the plan explicitly says so; internet calling apps use data. Hotspot access also depends on plan terms. Monitor data use, since video, app updates, photo backup and cloud sync can use an allowance quickly. Download maps over Wi-Fi and use Android’s data-saving controls if needed.
Common problems and practical checks
There is no “Add eSIM” option
Search Settings for “eSIM”, “EID” and “SIM”. Confirm you are using the owner profile rather than a guest or restricted user account, restart the phone, and install available system updates over Wi-Fi. If the EID is also missing, ask Motorola or the seller to identify the exact regional model and confirm eSIM capability. If the EID exists but the add option is absent, ask support whether the installed firmware or carrier configuration restricts it. Do not purchase on the assumption that a menu can be unlocked later.
The QR code cannot be scanned
Make sure the full code is visible, bright and in focus. Use another screen if the code is on the Razr itself. If it still fails, check whether it has expired or was already used and ask the provider about manual activation.
The profile will not download
Check Wi-Fi, date and time, and confirm the code belongs to this purchase and has not been used. A carrier lock, regional restriction or temporary provider issue may block installation. Note the error and contact the profile issuer before resetting network settings.
The eSIM installed but shows no service
Confirm the eSIM line is enabled, airplane mode is off, and mobile data uses the travel profile. Check destination eligibility and whether data roaming is required. Try another location, toggle airplane mode, or restart; use automatic network selection first. A correctly installed plan may still lack service outside its destination or before its activation conditions are met.
Data is not working although signal bars appear
Signal bars do not confirm an active data session. Check that mobile data is enabled for the eSIM, it is the preferred line, and the plan has data and remains valid. Enter an APN only if the provider gives one. Turn off Wi-Fi for the test and check whether data restrictions or private DNS affect the result.
The home SIM is using data or roaming
Return to the SIM manager and confirm the travel eSIM is selected for mobile data. Check the home line’s roaming toggle and your home operator’s billing terms. If you do not need the home line, disabling it can prevent it from connecting, but it also stops incoming calls and texts. Review the active line after any restart or SIM change.
The eSIM stopped working after changing settings
Check that the profile has not been switched off and that mobile data still points to it. Re-enable the line and restart the phone. Avoid deleting the eSIM or using Erase eSIMs as a first step: removal may not cancel the plan, and restoring a deleted profile may require the issuer’s help. Motorola advises contacting the carrier for eSIM recovery or service questions. If the profile disappeared after a reset, contact its provider with the order details.
FAQ
Is eSIM guaranteed on every Motorola Razr 40 Ultra 8GB RAM?
Motorola documents eSIM and nano-SIM for an 8 GB configuration, but advises checking carrier support. Verify EID and the add-eSIM option on the exact handset.
Does seeing an EID prove that a travel eSIM will work?
It indicates eSIM capability, but does not confirm the phone is unlocked, the provider accepts it, or the plan covers your destination. Check each separately.
Can I keep my physical SIM active?
Compatible units can use eSIM alongside a physical SIM. Choose the data line in Android settings and check home-line roaming charges; behavior depends on software and carrier.
Should I install the eSIM before travel?
Yes, if the plan permits it and Wi-Fi is available. Check when validity begins; installation and first use may be separate events.
Can I move the profile to another phone later?
Do not assume that it can be transferred. Some profiles are restricted to the first device or have specific reinstallation rules. Check with the profile issuer before deleting or moving it, especially while abroad.
Does a travel eSIM replace my normal phone service?
Usually a travel data plan is intended for mobile internet, not as a replacement phone number. Keep your regular line or another voice option if you need calls and SMS, and review the exact plan description for included services.
Final check before your trip
For the Motorola Razr 40 Ultra 8GB RAM, Motorola’s published 8 GB specification supports a qualified “yes” for eSIM, while Motorola’s own support guidance makes clear that the individual phone and carrier must be checked. Confirm an EID or add-eSIM control on your handset, verify that it is unlocked, and make sure Android can download the profile. Then review the destination, activation timing, data allowance and roaming instructions for the plan you choose.
Once those checks are complete, select the travel eSIM for mobile data when appropriate and keep your home SIM settings under control. If the device check is uncertain, resolve it with the seller or Motorola before arranging a plan. When you are ready to plan, use the Kaspersky eSIM Store website or app to choose, arrange and activate an eSIM plan for mobile internet on your trip abroad, and check the current plan conditions for your route.


