Travel connectivity guide
Motorola Razr 60 Ultra 256GB eSIM Guide
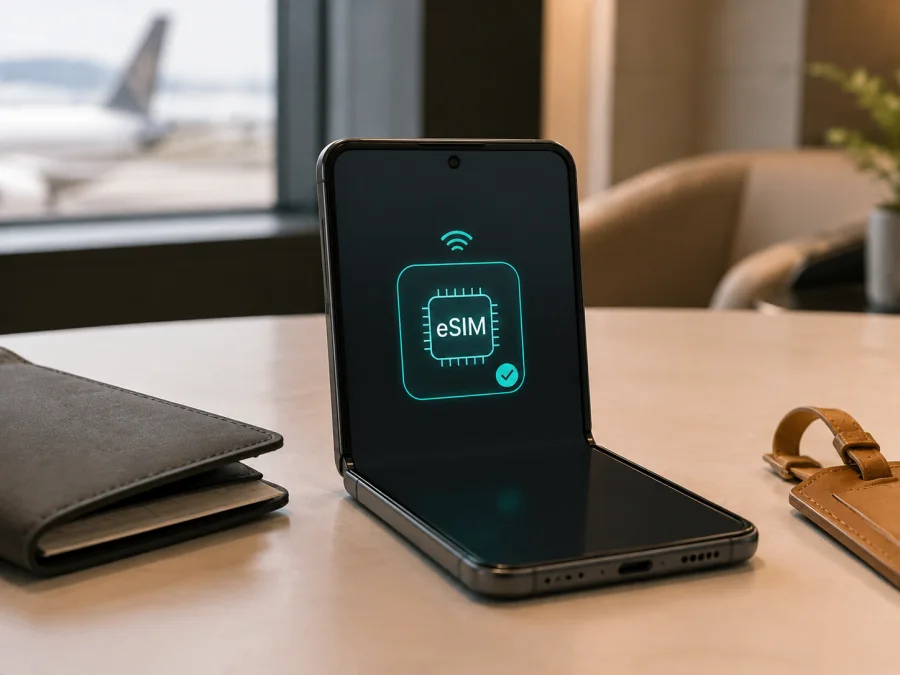
Motorola Razr 60 Ultra 256GB eSIM: compatibility and setup
If you are preparing for an international trip, an eSIM can let you use mobile data without removing your physical SIM. For the exact Motorola Razr 60 Ultra 256GB, the short answer is: the model family supports eSIM according to Motorola’s current support documentation, but the final result depends on the regional version, carrier, and software on your particular phone. Check the phone for an EID and an eSIM setup option before buying a travel eSIM tariff.
The 256GB label identifies storage, not every part of the radio configuration. Retail units with the same name can have different model codes, carrier restrictions, SIM trays, or firmware. Motorola lists the Motorola Razr 60 Ultra 256GB device family’s SIM configuration as eSIM plus a physical SIM, while its guidance says support can depend on the phone and carrier. Let the device check make the decision.
Quick answer: does Motorola Razr 60 Ultra 256GB support eSIM?
Usually, yes. Motorola’s current documentation for this device family lists eSIM alongside a physical SIM and describes how to download and set up a new eSIM. It also uses qualified wording and advises contacting the carrier for details. That means it is not accurate to promise compatibility for every unit sold under the same name without checking its configuration.
For your exact phone, look for both of these signs:
- EID or EID - eSIM under Settings > About phone > Device details.
- Download new SIM, Download and set up an eSIM, or similar wording under Settings > Network & internet > SIMs & mobile network.
If both are present, the phone has the embedded-SIM capability exposed by its current software and can normally accept a compatible profile, subject to the tariff and carrier conditions. If neither appears, do not assume that a QR code will work. The unit may be a regional or carrier-specific version without eSIM enabled, or the menu may be different after a software change. Confirm the model code with the seller or carrier before purchasing.
An eSIM is a digital SIM profile stored in the phone’s built-in SIM hardware. A travel eSIM tariff normally supplies mobile data for a selected country, region, or route. It does not automatically replace your regular number and normally does not include ordinary calls or SMS unless the tariff says so.
What Motorola’s specification means for the 256GB version
Motorola’s current specification names eSIM + physical SIM, and its user guide explains where to find the EID and start eSIM setup. Motorola also notes that specifications may vary by market and that carrier support matters. The 256GB label describes storage, not every part of the regional configuration, so the EID and eSIM menu on your Motorola Razr 60 Ultra 256GB remain the decisive checks.
Compatibility at a glance
| Item | What to expect | Why it matters |
|---|---|---|
| Device variant | Motorola Razr 60 Ultra 256GB | Preserve the complete storage variant when checking a listing or asking for help. |
| Network class | Motorola lists 5G and 4G/LTE for the model family | The chosen travel tariff still needs compatible destination access. |
| SIM arrangement | eSIM plus physical SIM is listed for the family | An eligible unit can use a travel profile alongside a regular SIM. |
| EID | Find it in Device details | It is the clearest on-device sign that eSIM hardware is present. |
| Setup entry | Find it in SIMs & mobile network | It confirms that the current software exposes eSIM installation. |
| Regional status | May vary by market, carrier, model code, or firmware | One marketing name does not guarantee identical SIM features everywhere. |
| Typical travel use | Mobile data on a selected eSIM profile | Calls and SMS remain on the primary line unless the tariff says otherwise. |
Check your device before buying a travel eSIM tariff
Perform this check before buying so you can ask the seller questions if needed. It prevents paying for a profile the phone cannot download.
Checklist for Motorola Razr 60 Ultra 256GB
- [ ] Connect the phone to Wi-Fi.
- [ ] Open Settings > About phone > Device details.
- [ ] Find EID, EID - eSIM, or equivalent wording.
- [ ] Open Settings > Network & internet > SIMs & mobile network.
- [ ] Find the command to download or add an eSIM.
- [ ] Confirm the phone is not carrier-locked in a way that blocks another profile.
- [ ] Confirm the exact model code, not just the shop’s storage label.
- [ ] Install a normal system update if one is offered, then check again.
- [ ] Match the tariff’s country or region to the full itinerary.
- [ ] Read the tariff’s data allowance, validity period, activation timing, and top-up rules.
For a direct route back to this decision, Check your device before completing an order. If the check fails, verify the regional configuration instead of relying on the generic model name.
How to verify the EID
- Unlock the phone.
- Open Settings.
- Tap About phone.
- Open Device details.
- Find EID or EID - eSIM.
The EID is a device identifier for the embedded SIM component, not the IMEI or the QR code used to install a tariff. Do not post it publicly; if support asks for it, use the secure channel provided.
How to verify the eSIM menu
- Open Settings.
- Tap Network & internet.
- Tap SIMs & mobile network.
- Look for Download new SIM, Download and set up an eSIM, or a comparable command.
Menu names can vary by Android version, language, and software build. Search Settings for “eSIM” if the path differs. If there is no EID or search result, ask the seller or carrier about the market version.
Choose the right eSIM for your trip
After the phone passes the check, match the tariff to the journey rather than choosing only by the headline data amount. A short city break, a work trip, and a multi-country route create different needs.
First, check the coverage area. A country tariff may fit a single-country visit; a regional tariff may be more convenient when you cross borders. The tariff’s destination coverage is separate from the phone’s eSIM capability. The phone can support eSIM while a particular tariff does not cover the place you are visiting.
Estimate use of maps, messages, email, video calls, hotspot sharing, cloud backups, and streaming. Turn off automatic downloads and unnecessary background data if you want to preserve the allowance. Storage capacity does not increase mobile-data volume.
Check when validity begins. Some plans start when the profile first connects to an eligible network; others have different rules. Install over reliable Wi-Fi, but follow the tariff conditions before enabling mobile data.
Kaspersky eSIM Store is an app and website where you can choose, arrange, and activate an eSIM with a suitable tariff for mobile internet during an overseas trip. It helps you review a destination and tariff and use the profile on a compatible phone. It is not a mobile operator, network owner, or mobile internet provider. Actual service conditions depend on the selected tariff and destination networks.
How to install an eSIM on Motorola Razr 60 Ultra 256GB
Prepare a compatible phone, an internet connection, the QR code or in-app installation flow, and any confirmation code required by the tariff. Keep a QR code on another screen if you plan to scan it with the phone’s camera.
For platform guidance, see the Android installation instructions. The iOS installation instructions help when configuring an iPhone; the steps below apply to this Motorola Android phone.
Installation steps
- Connect to Wi-Fi. Keep the connection available while the profile downloads.
- Open Settings. Start from system settings and use only the QR code supplied with the selected tariff.
- Open Network & internet. Enter the mobile-network controls.
- Open SIMs & mobile network. Review existing lines before adding the travel profile.
- Choose the eSIM download option. Tap Download new SIM, Download and set up an eSIM, or the closest wording.
- Scan the QR code. Point the camera at the supplied code.
- Confirm the profile. Review the destination or plan label and approve the download.
- Wait for installation. Keep Wi-Fi available and do not close the setup screen.
- Name the line. Use a label such as “Travel data”.
- Choose a data line. Set the travel eSIM as mobile data when you are ready to use it.
If the QR code cannot be scanned, increase the display brightness, clean the camera lens, and use another screen or a manual method if supplied. Do not repeatedly scan a one-time code after the profile has installed.
Activate the profile after arrival
Installation places the profile on the phone; activation and first network registration follow the tariff’s conditions. Do not assume every plan can be installed in advance and connected later.
Before departure, install over trusted Wi-Fi, confirm that the profile is present, and leave the travel line disabled if the tariff permits it. Do not delete an inactive profile because a one-time QR code may not restore it.
When you arrive:
- Open Settings > Network & internet > SIMs & mobile network.
- Select the travel eSIM.
- Turn on the eSIM line.
- Select it for Mobile data.
- Turn on Data roaming for this eSIM if the tariff instructions require it.
- Keep the primary SIM for calls or messages if needed.
- Turn off automatic data switching unless you have checked its effect.
- Wait for registration, then test a simple webpage or messaging service.
Data roaming on the travel profile can be required even when you are not using your home operator’s roaming package. Enable it only for this line and review the primary line’s controls separately.
Practical travel scenarios
Airport arrival
Install before leaving home, then enable the travel eSIM after landing when the plan’s conditions are met. Make it the data line while keeping the primary line available for calls if permitted.
Multi-country route
Check that the tariff includes every country on the itinerary. At a border, allow time for registration; a phone setting cannot extend destination coverage.
Troubleshooting eSIM problems
The eSIM option is missing
Check Device details for an EID and search Settings for “eSIM” or “Download new SIM”. Restart and install an offered system update. If the EID and setup option remain absent, confirm the model code with the seller or carrier; 256GB storage is not proof of eSIM support.
The QR code will not scan
Check brightness, camera focus, and the code’s source. Make sure it belongs to the selected tariff and has not already been used; use another screen or manual activation if available.
The profile will not download
Reconnect to stable Wi-Fi, confirm the tariff is available and within its activation period, and check for a carrier lock. Ask support about the exact error and model code rather than deleting the profile or trying unrelated codes.
The profile is installed but there is no data
Verify that the travel eSIM is on and selected for mobile data. Check destination, validity, and allowance; enable data roaming if required, turn off airplane mode, restart, and wait for registration.
The primary SIM is using data
Open the SIM manager and set the travel eSIM as the mobile-data SIM. Disable automatic switching and review the primary line’s data and roaming controls; a signal icon does not prove which line carries data.
Calls or SMS do not work
Many travel eSIM tariffs are for mobile data and do not include a regular number, voice service, or SMS. Use calling and messaging apps over data, or keep the primary SIM for ordinary calls and texts.
Frequently asked questions
Is Motorola Razr 60 Ultra 256GB eSIM compatible?
Motorola’s current documentation lists eSIM plus a physical SIM for this device family, so the platform supports eSIM. Market and carrier qualifications still apply. Verify the EID and eSIM menu on your exact Motorola Razr 60 Ultra 256GB before buying.
Will it work in every country?
The phone’s eSIM capability and the tariff’s destination coverage are separate. The selected tariff must include the country or region, and registration depends on local availability and its conditions.
Where can I get help?
Check compatibility, Wi-Fi, the selected data line, data roaming, and tariff conditions first. Then contact purchase support with the exact error, country, profile name, and model code. Ask the seller or carrier about a missing EID or menu.
Final device check before your trip
Use this sequence immediately before buying or activating a travel eSIM tariff:
- Confirm the full device name: Motorola Razr 60 Ultra 256GB, including the model code where available.
- Find the EID under Settings > About phone > Device details.
- Find the eSIM command under Settings > Network & internet > SIMs & mobile network.
- Check for a carrier restriction and match the tariff’s country or region to the itinerary.
- Review data volume, validity, activation timing, and any data-roaming requirement.
- Install over Wi-Fi, label the profile, and after arrival choose it for mobile data and test a connection.
If any check fails, verify the regional version first. Kaspersky eSIM Store can help you choose, arrange, and activate an eSIM with a suitable mobile-data tariff for an overseas trip through its app or website; it does not replace the compatibility check or operate the network. Once the phone, destination, and tariff match, choose the eSIM for your trip and travel with a clear setup plan.


