Travel connectivity guide
Motorola Razr+ eSIM: Compatibility & Setup
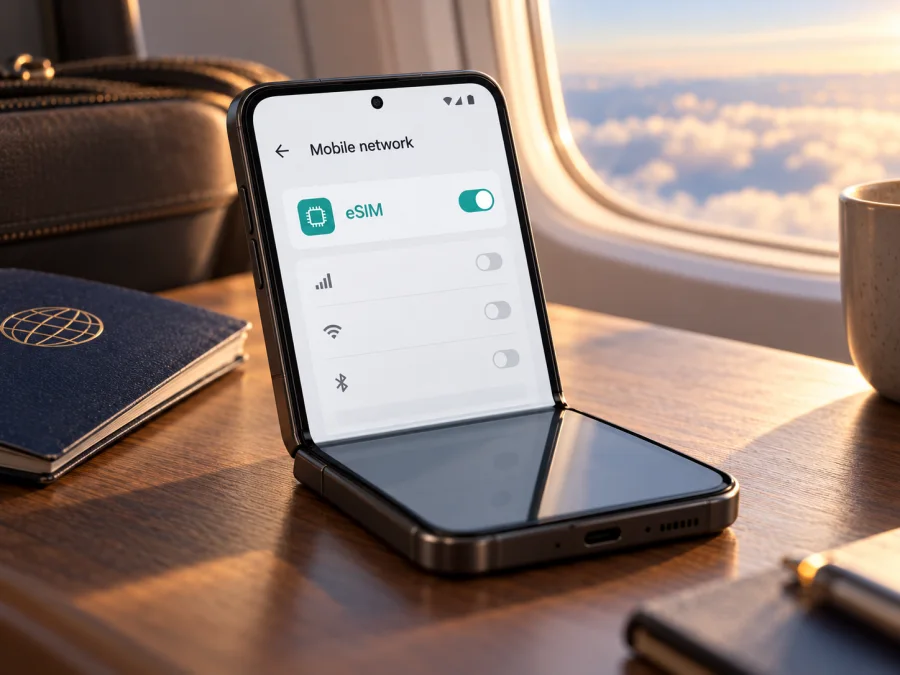
Motorola Razr+ eSIM: compatibility, setup, and travel data
The short answer is sometimes, depending on the exact Motorola Razr+ generation, regional variant, carrier, and software. Motorola’s US support pages document eSIM on several Razr+ generations, but the name “Motorola Razr+” alone does not identify one model year or sales market. Motorola’s newer help guidance also says that a phone might support eSIM and advises checking the device and carrier. Before choosing a travel plan, verify the phone in your hand: look for an EID and an option to add or download an eSIM. If neither is present, ask Motorola or the seller to confirm the precise model code and market version.
This guide covers compatibility, setup, travel data, and common fixes. Menu labels vary by software and market.
At a glance
| Check | What to know |
|---|---|
| Device name supplied | Motorola Razr+ |
| Direct compatibility answer | eSIM is documented for multiple Razr+ generations, but the generic name is not enough to confirm a specific unit |
| Physical SIM | Supported alongside eSIM on several official US model specifications; the tray and SIM configuration can differ by market |
| Best on-device evidence | An EID in About phone or Device details, plus an eSIM setup option under SIM/mobile network settings |
| Carrier requirement | The device must be unlocked or accepted by the relevant carrier, and the carrier or eSIM service must support the model and activation method |
| Travel use | A compatible travel eSIM can be selected for mobile data while your usual SIM remains available for other services |
| Before purchase | Check the exact variant, EID/eSIM menu, carrier lock, destination, data allowance, validity, and activation conditions |
Does Motorola Razr+ support eSIM?
Motorola’s official support information confirms eSIM capability for several named Razr+ versions. Its US specification pages list “eSIM + physical SIM” for the motorola razr+ (2023) and razr+ 2025, and the 2024 specification page also lists eSIM alongside a physical SIM. Motorola’s support material for the current 2026 Razr+ gives an eSIM setup path, while phrasing support conditionally and recommending that users check with their carrier. Together, these sources show that eSIM is available on a number of Razr+ versions; they do not prove that every device sold in every country under the broad name Motorola Razr+ has it.
| Version described in Motorola support material | What the official material indicates | What this means for your phone |
|---|---|---|
| motorola razr+ (2023), US specifications | eSIM + physical SIM is listed | A US-spec unit is documented as eSIM-capable; confirm carrier eligibility and that the phone has not been modified or restricted |
| motorola razr+ 2024, US specifications | eSIM + physical SIM is listed | eSIM is documented for this version, subject to carrier and account support |
| motorola razr+ 2025, US specifications | eSIM + physical SIM is listed | eSIM is documented for this version; Motorola notes that specifications may vary by market |
| motorola razr+ 2026, US support guidance | Instructions explain adding an eSIM, but say the phone might support it | Check the device’s EID/menu and exact market variant instead of treating the guide as a guarantee for every retail unit |
| A Razr+ with no year or country identified | The family name does not specify its full hardware and carrier configuration | Do not infer compatibility from the name, appearance, or a different year’s specification |
Practical conclusion: Motorola Razr+ is a family with eSIM documented on multiple variants, not a guarantee for an unidentified handset. Regional model codes, SIM arrangements, software, carrier profiles, and network approvals can differ. A carrier-branded phone may be locked or restricted even when the eSIM menu appears. Ask the seller or carrier to check the exact model number and IMEI. Neither 5G nor a physical SIM tray proves eSIM capability.
Check your exact phone before buying
Run these checks on the handset you plan to travel with.
- Find the model number and region. Open Settings > About phone and note the model name, model number, and software version. Compare them with the invoice, box label, or Motorola support page for your country. Do not post the full IMEI publicly.
- Look for an EID. In Settings > About phone > Device details, look for EID or eSIM ID. Some software versions put device identifiers under About phone > SIM status or another device-details screen. An EID is a strong sign that the handset includes an eSIM component, though carrier activation still has to be supported.
- Look for eSIM controls. Open Settings > Network & internet > SIMs & mobile network. Depending on the software, look for Download new SIM, Add eSIM, Set up an eSIM, or a similar option. On older releases the heading may be SIM cards. Do not reset the phone merely to make a menu appear.
- Check the lock and carrier. Ask the original carrier whether the handset is unlocked and eligible for an additional eSIM. A physical SIM working normally does not establish that a second carrier’s eSIM will work.
- Confirm the intended eSIM service. Check that it supports Android installation on this model and the destination you are visiting. A device can support eSIM in general while a particular carrier or QR-code flow does not support that model or account.
- Use the compatibility check before selecting a tariff. If the phone’s identifiers or menus are unclear, contact Motorola or the seller with the exact model number and ask for written confirmation.
If the EID is present but the setup option is missing, update the phone, restart, and check again. If both are missing, a QR code cannot add eSIM hardware; ask Motorola about the market-specific SKU. A US page for another year is not conclusive for an imported handset.
Why Razr+ versions can differ
“Motorola Razr+” spans multiple releases and does not identify the hardware by itself. Regional model codes, software, and SIM arrangements can differ; Motorola notes that specifications may vary by market. Confirm the model number and original sales market. Carrier policy is a separate factor: a branded phone may have a lock or activation restriction, and one country’s support does not guarantee compatibility with every operator there.
Check these details together, then Check your device before choosing a tariff:
- Hardware identity: exact model code, generation, and original sales market.
- eSIM evidence: EID and a visible eSIM setup control.
- Network eligibility: unlocked status, supported radio bands, and carrier approval for the exact model.
- Profile method: QR code, in-app installation, or manual activation details accepted by the phone.
- Plan conditions: supported destination, validity start, data allowance, and whether roaming must be enabled for that eSIM.
Even with eSIM enabled, service depends on destination networks, coverage, and plan terms. eSIM support does not guarantee signal everywhere or compatibility with every service.
Install and activate an eSIM
When possible, install over stable Wi-Fi before departure. Keep the QR code on another screen or printed, and do not delete a profile or reuse a one-time code without checking the provider’s instructions.
- Prepare the phone. Connect to Wi-Fi, charge the battery, install available official system updates, and confirm that the device is unlocked. Make sure you have account access to the service that issued the eSIM.
- Open SIM settings. On many recent Razr+ versions, go to Settings > Network & internet > SIMs & mobile network. Select Download new SIM, Add eSIM, or the equivalent option. On an earlier build, the SIM section may use a different label.
- Choose the installation method. Scan the supplied QR code, follow the in-app installation prompt, or enter the activation details manually if the eSIM service provides them. Use only the code issued for your order and phone.
- Follow the on-screen steps. Allow the phone to download and add the mobile plan. Name the new profile something recognizable, such as “Travel data,” so you can distinguish it from your regular line.
- Set the preferred SIMs. If you have a physical SIM and an eSIM, choose which line handles mobile data. Keep calls and texts on your usual SIM if you need them, and select the travel profile for data when its plan is meant to be used. The precise dual-SIM controls depend on the software and market.
- Activate at the right time. Follow the plan’s validity rules. Some plans begin their validity when installed or activated; others begin when the eSIM first connects to a supported network. Check the plan details before installation if timing matters.
- Test without removing the profile. At the destination, enable the travel eSIM, select it for mobile data, and allow it to register. If the plan instructions require data roaming on that eSIM, turn it on for that line only. Confirm that data works before disabling Wi-Fi.
For Motorola’s current screen labels, follow its on-device instructions and model-specific support guidance. You can also use the Android eSIM installation guide or, if you are setting up a different Apple device, the iOS installation guide. The Motorola Razr+ runs Android, so the Android guide is the relevant one for this phone.
A travel eSIM is not automatically a replacement for your regular line. Many plans are data-only; confirm calling and SMS terms. Messaging apps can use data, subject to your accounts and local availability.
Use the Razr+ for mobile data while travelling
Before the trip, decide whether you want the travel eSIM to be the phone’s data line immediately or only after arrival. If your home SIM remains active, review its roaming terms so that the phone does not use it for data by mistake. You can generally keep your regular number available for incoming messages or calls while assigning data to the travel profile, but simultaneous line features vary by model, carrier, and region.
A simple arrival routine:
- Open Settings > Network & internet > SIMs & mobile network and make sure the travel eSIM is enabled.
- Set the travel eSIM as the preferred line for Mobile data. Check the selected line again after a restart or a SIM setting change.
- Turn on Data roaming for the travel eSIM only if its instructions require it. Roaming can be part of how a travel eSIM accesses a local partner network; it does not by itself define the price. Your plan’s terms determine what data is included.
- Leave automatic network selection enabled first. If the phone does not connect, use manual network selection only when the eSIM instructions or support team recommends a listed network.
- Turn off data roaming on the home SIM if you want to avoid using your home carrier’s roaming data. Check with that carrier about potential voice, SMS, and background-data charges.
- Check the signal and test a basic webpage or messaging app. If it fails, use the troubleshooting steps below before deleting the profile.
For a single-country trip, check that destination’s plan. On a multi-country route, confirm every country is included. Estimate data for maps, messaging, browsing, calls, and hotspot use; download offline material on Wi-Fi and review validity and top-up conditions.
Kaspersky eSIM Store is an app and website where you can choose, arrange, and activate an eSIM with a data plan for an international trip. Check the plan’s destination, amount of data, validity, and activation conditions before you select it. The eSIM is generally for data unless the plan says otherwise; it does not automatically include a phone number, and coverage depends on the local network.
Common problems and checks
“Add eSIM” or “Download new SIM” is missing
Check the EID and model number under About phone. Install available official updates, restart, and check the SIM menu again. Confirm that the phone is not a market variant without eSIM or a carrier version with the feature disabled. If there is no EID, ask Motorola or the seller to identify the hardware by model code. A factory reset is not a sensible first troubleshooting step and may erase data without adding eSIM capability.
The QR code will not scan or the profile will not download
Use a reliable Wi-Fi connection and increase screen brightness on the device displaying the QR code. Keep the code flat and fully visible. If scanning fails, use manual installation only with supplied details. Check whether the code expired or was used, and ask the issuer to confirm its status.
The profile installs but shows no service
Confirm that the destination is covered by the selected plan and that the plan validity has started. Make sure the travel profile is switched on and selected for mobile data. If instructed, enable data roaming on that profile. Restart once, then allow time for network registration. If the plan offers a supported network list, try a listed network according to the provider’s guidance.
The phone uses the wrong SIM for data
Reopen SIM settings and verify the default mobile-data line. Some Android builds can switch the data SIM automatically when one line has weak reception; disable automatic switching if the option exists and it conflicts with your plan. Confirm that the travel eSIM is selected after calls, updates, or a reboot.
Data works intermittently or is slow
Check signal, selected network, remaining data, and plan speed conditions. Try another location or briefly toggle airplane mode, then wait for registration. Change APN values only with exact provider instructions. 5G capability does not guarantee 5G access on every plan or network.
The eSIM is installed but the usual SIM cannot connect
Review which line is enabled for calls, texts, and data. Check the home operator’s roaming and dual-SIM restrictions. If your regular line was disabled during setup, enable it again as needed. Do not erase either profile unless the relevant carrier or support team tells you to; removing a profile may require a new activation code.
You cannot transfer the eSIM to another phone
Many eSIM profiles are device-bound or can be installed only once. Check the issuer’s transfer and replacement terms before changing phones, resetting the Razr+, or trading it in. Do not delete a working profile as a test. A new device may require a new profile or reissue from the service provider.
Frequently asked questions
Can every Motorola Razr+ use eSIM?
No universal answer follows from the name alone. Motorola lists eSIM on several year-specific US Razr+ specifications and provides setup guidance for newer versions, but actual availability depends on the model, market, firmware, and carrier. Check the exact phone for an EID and an eSIM setup option.
Is an EID enough to guarantee activation?
An EID is strong evidence that the device has eSIM hardware, but it does not guarantee that a specific carrier or plan will activate. The phone must also be eligible, compatible with the profile method, and able to use a supported network at the destination.
Can I keep my physical SIM active while using eSIM?
Some Razr+ specifications list both. If supported on your variant, Android may let you assign calls, texts, and data separately. Check SIM settings and roaming charges.
Should I install the eSIM before travelling?
Often it is convenient to install over Wi-Fi before departure, but follow the plan’s activation and validity rules. If the plan starts as soon as it is installed, wait until the appropriate time or choose a plan with a suitable start condition. Keep the installation details until the line works.
Does a travel eSIM include calls and text messages?
Usually a travel data eSIM is for mobile internet only. Read the selected plan’s conditions rather than assuming it includes a phone number, voice service, or SMS. Messaging and voice apps can work over data when their accounts and destination network permit.
Do I need data roaming on the travel eSIM?
Some travel profiles require data roaming to connect to a local partner network. Follow the instructions for the specific plan and enable the setting on that eSIM only when required. Keep roaming settings for your regular SIM aligned with your home operator’s terms.
What if the phone was bought abroad?
Use the model number and original market to find matching Motorola guidance. Check EID, setup menu, unlock status, and destination compatibility; a US specification does not confirm a different SKU.
Before you go: confirm the phone and plan
The Motorola Razr+ family includes versions for which Motorola documents eSIM, but the input name does not specify the year, model code, country, or carrier. Check the exact handset’s EID and eSIM menu, verify it is unlocked and accepted by the eSIM service, and confirm that the plan covers your destination and trip dates. If any check is uncertain, ask Motorola, the seller, or the service provider to confirm the exact model before paying.
Once compatibility is clear, choose a travel data plan based on where you are going, how long you will be away, and how much data you expect to use. Review the plan conditions and keep your home SIM’s roaming settings in mind. You can browse current destinations and plan details on the Kaspersky eSIM Store website; this is the store homepage for browsing, not a country-specific tariff. Install and activate the eSIM according to its instructions, select it as the data line when appropriate, and check that it connects after arrival.


