Travel connectivity guide
Nelson eSIM: Mobile Internet in New Zealand
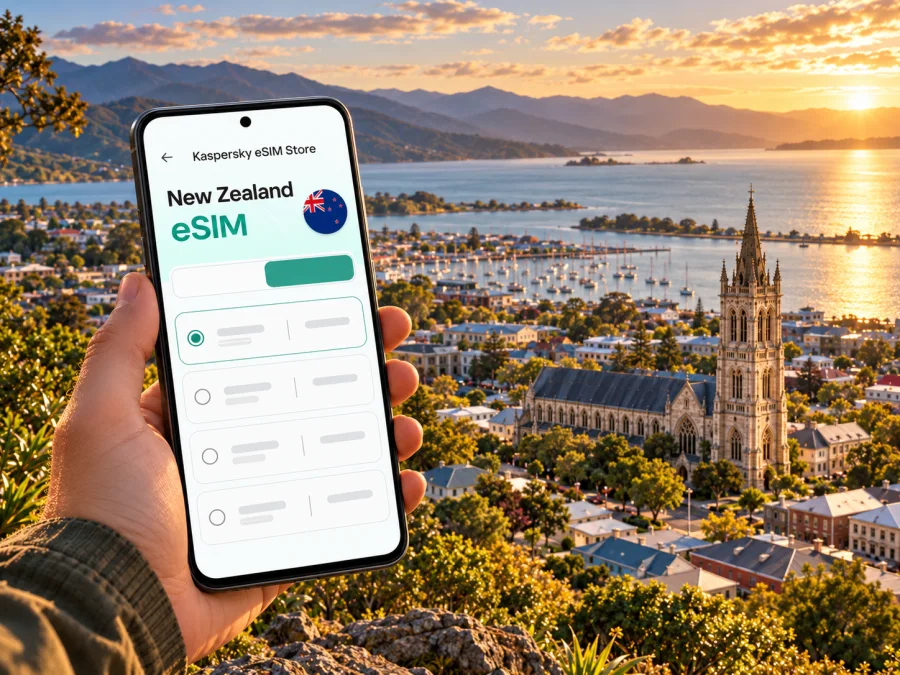
Nelson eSIM: mobile connection and internet for a South Island visit
Nelson is a compact city at the top of New Zealand’s South Island, set beside Tasman Bay and framed by hills. A trip here can move quickly from the cathedral and cafés in the centre to the beach at Tāhunanui, a flight at Nelson Airport, or a longer road journey toward Abel Tasman. Mobile data helps with the practical links between those places: checking a bus, confirming a pickup, following a map, or telling someone that your plan has changed.
An eSIM can be a useful way to arrange mobile data for a visit to Nelson, provided your exact phone model supports eSIM and the selected plan is valid for New Zealand. The city name alone does not identify the local network used by a plan, guarantee signal in every area, or confirm that a regional variant of a device is compatible. Check the plan terms, device details and route conditions before you rely on it.
What to plan for in Nelson
Nelson is the main urban centre of the Nelson Tasman region, but it is not a large metropolitan grid. The central area around Trafalgar Street, the cathedral and the Maitai River is walkable for many visitor errands. Other parts of a trip are more spread out: Tāhunanui and its beach lie beyond the centre, the airport is in a separate part of the city, and Richmond is a neighbouring town to the south. The road trip beyond Nelson can take you to coastal settlements, national parks and smaller communities where service may differ from the city.
That mix makes a simple travel setup more useful than a complicated one. Before leaving accommodation, save the address of your next stop, check whether a bus or rental car is part of the journey, and keep the relevant map available offline if your phone supports it. Mobile data is best treated as a practical tool that can help while service is available, not as a substitute for route preparation.
| Situation | What mobile data can help you do | What to prepare in advance |
|---|---|---|
| Arrival at Nelson Airport | Check directions, contact your accommodation, review a bus or pickup plan | Save the address and confirm your arrival time with the host |
| Walk around the centre | Open a map, look up opening hours, message a travel companion | Keep a map area or important addresses available offline |
| Trip to Tāhunanui | Check the route and coordinate a meeting point | Confirm your bus stop or parking plan before setting out |
| Work or a short business visit | Join scheduled online tasks where the connection allows | Download documents and confirm a backup Wi-Fi option |
| Day trip outside the city | Recheck directions and update someone about your progress | Download maps and do not assume consistent signal on remote roads or tracks |
The table describes useful tasks, not a promise that every service or site will load everywhere. Coverage depends on the plan’s partner network, local conditions, terrain, the device and network settings. If a connection matters for a pickup, check it before departure and keep a non-data option such as a written address or agreed meeting point.
Arriving at Nelson Airport
Nelson Airport is a domestic airport. Its current direct-destination information lists flights to other New Zealand destinations, including Auckland, Wellington and Christchurch, as well as regional routes. If you arrive on an international itinerary, your transfer into Nelson may include a connection through another New Zealand airport. Check your ticket and onward arrangements rather than assuming that an overseas flight lands directly in Nelson.
The airport is outside the central city. Nelson’s eBus Route 4 connects The Brook, the Nelson city centre, Tāhunanui and the airport. The airport currently describes the service as running every half-hour from 7 a.m. to 7 p.m., seven days a week. Timetables, fares, service changes and disruptions can change, so check the current operator information for your travel date before building a tight connection around a bus. If you arrive outside operating hours, have a taxi, rideshare, rental-car or pre-arranged pickup plan ready; availability and cost depend on the time and provider.
A mobile connection can help you check the current route, identify the stop and contact your accommodation after landing. Before you board, make sure you know whether you need a Bee Card or can pay another accepted way, and confirm the current payment rules. Do not rely on airport Wi-Fi or mobile data being available at the exact moment you need it: have the address and the first leg of your journey saved on the phone.
Getting around the centre, the beach and nearby districts
Nelson’s central landmarks make good reference points when you are learning the layout. Trafalgar Street runs through the centre, and the cathedral at Church Hill sits above the inner city. The Maitai River and its bridges provide another easy orientation line. For a short first walk, choose a destination, note the nearest main street and keep a return route in mind. A map can help with turns, but street signs and local directions remain useful if the phone battery is low or the map has not loaded.
The council’s central walking routes include short walks beginning at Millers Acre near the corner of Halifax and Trafalgar Streets. One route follows the river and reaches the marina; another loops across inner-city bridges and past Queens Gardens. These are urban walks, but a phone’s battery can still matter for photos, maps and messages. Start with enough charge, carry a power bank if you plan to be out for hours, and download map details before leaving Wi-Fi.
Tāhunanui is a separate beach-side part of Nelson rather than an extension of the central shopping streets. Route 4 links the city centre and Tāhunanui on its way to the airport; other services may connect with Stoke and Richmond. Check the direction and the current route map, because a stop name that looks close on a map may still be on the opposite side of a busy road or a different branch of the route. For a beach visit, decide on a meeting point that everyone can identify, such as a named entrance or a visible landmark, instead of relying only on a live map pin.
Richmond is a separate town in the adjoining Tasman District. Visitors moving between Nelson and Richmond may use buses that serve both places, but the right route depends on the stop and time. Use the current eBus timetable or trip-planning information; do not assume that every bus continues through to the same destination. If you are driving, use the route appropriate to your accommodation and check current road conditions before a longer trip.
For a walk or drive beyond the built-up area, the balance changes. A mobile map is convenient, but trails, valleys, hills and stretches of road can have weaker or interrupted service. Download the route and any navigation details in advance, tell someone your general itinerary when appropriate, and follow local safety information. A plan that works in central Nelson may not work in the same way on a remote track or coastal road.
Choosing a New Zealand eSIM for a Nelson trip
Kaspersky eSIM Store is an app and website where you can choose, arrange and activate an eSIM with a suitable mobile-data plan for an overseas trip. The service does not operate New Zealand mobile networks. A plan’s actual coverage, supported network, data allowance, validity period, activation conditions and price are determined by the plan details shown at the time you choose it.
For a Nelson visit, read the New Zealand plan information closely. Confirm that the destination is New Zealand and look for any stated network or coverage details. If the description does not identify a specific network or explain a detail you need, do not infer it from the city name; review the plan’s terms or contact support before purchase. Availability of a plan in a destination does not mean every valley, building, road or national-park area has signal.
Review current eSIM options for a trip to New Zealand and compare the information displayed for each plan before making a choice. The page is for New Zealand, not a Nelson-only local tariff. Your decision should be based on your route and expected data use, not on an assumption that a country-wide page guarantees a particular experience in every part of Nelson Tasman.
Check the exact device, not just the brand
An eSIM-ready brand name is not enough to establish compatibility. Support can vary by model, country or region of sale, carrier lock status and software configuration. A device sold under a familiar model family may have different capabilities in another market. The New Zealand location of the trip does not change the phone’s hardware variant, and selecting a New Zealand plan does not make an unsupported device compatible.
Before you choose a plan, check the exact model number in the device settings or manufacturer documentation. Confirm that the device supports eSIM, is not restricted by a carrier lock, and can use the relevant mobile bands and network configuration where applicable. If the specification is unclear, ask the manufacturer or your home carrier. Check compatibility for the exact device using the eSIM compatibility check before purchase.
A few practical checks:
- Identify the full model or model number, not only the product name.
- Confirm eSIM support for the regional variant you own.
- Check whether the phone is unlocked for use with another provider’s profile.
- Update the operating system while you still have a reliable connection and time to troubleshoot.
- Make sure you can access the email, account or QR code needed to install the profile.
- Keep the original SIM active if you need its number for calls or account verification.
If the exact model cannot be verified, treat compatibility as unresolved and do not buy on the strength of a general model-family list. You can still prepare the rest of your trip: save maps, confirm airport transport, note your accommodation details and identify Wi-Fi options. If the device does not support eSIM, consider a physical SIM or another connection method that is confirmed to work with your phone and circumstances.
Install before departure, activate with care
When the phone is compatible, installing an eSIM before travel can reduce the number of tasks after a flight. Follow the instructions supplied for your device and the plan. You generally need an internet connection during setup and access to the eSIM profile or QR code, but the precise requirements and the point at which validity begins can differ. Read the plan’s activation terms before scanning or enabling the profile.
For device-specific steps, follow the Android eSIM installation instructions or the iPhone eSIM installation instructions. Use the guidance that matches your device and software version. Do not delete an installed profile as a troubleshooting shortcut unless the instructions or support team tells you to do so; some profiles may not be reusable after removal.
A simple setup sequence
- Check compatibility. Confirm eSIM support and that the device is unlocked for the selected plan.
- Read the plan conditions. Check the destination, included data, validity and activation trigger.
- Connect to reliable Wi-Fi. Keep the phone charged and open the installation steps for your operating system.
- Add the eSIM profile. Scan the QR code or use the supplied manual details, following the on-screen prompts.
- Label the profile. Use a name such as “New Zealand travel” so you can distinguish it from your regular line.
- Choose the data line. Set the travel profile as the mobile-data line when you intend to use it, based on the plan instructions.
- Wait for registration. Activation or network registration can take a few minutes; follow the plan’s steps if it does not connect.
- Keep data roaming settings aligned with the instructions. Some travel plans require roaming to be enabled on their eSIM profile. Check the plan details before switching it on.
- Test without removing anything. Confirm the selected line and data setting, then open a simple page or messaging service when appropriate.
If you prefer to wait until arrival before using the plan, install only if the plan terms allow it and leave the profile’s data use set according to those instructions. Validity may begin on purchase, installation, first connection or another stated event; never assume which trigger applies. Keep a copy of the instructions accessible offline in case you need to review them after landing.
Common questions
Does a New Zealand eSIM guarantee coverage throughout Nelson?
No. A country-level plan does not guarantee signal in every building, road, valley or outdoor area. Actual service depends on the plan’s network arrangements, local coverage, terrain, device and conditions. Check the plan information and prepare offline navigation for trips beyond the urban area.
Can I use an eSIM at Nelson Airport?
You can use a compatible eSIM there if its plan supports service in New Zealand and the phone connects to an available network. The specific network and coverage are plan-dependent. Install and configure the profile according to its instructions, and keep your airport address and transfer details available offline as a backup.
Is Nelson Airport an international arrival point?
Nelson Airport’s direct-destination list describes domestic New Zealand routes. If travelling from overseas, check the full itinerary for the airport where you enter New Zealand and how you will connect onward to Nelson.
Does the eSIM include ordinary calls and texts?
Do not assume that it does. Many travel eSIM plans are for mobile data; use the selected plan’s terms to confirm whether calls, SMS or a local number are included. Internet messaging and voice apps can work over data when the service and connection allow, but they are not the same as a conventional mobile number.
What if my phone has an eSIM option but cannot connect?
Check that the profile is installed, selected for mobile data and configured as the plan instructions require. Confirm that airplane mode is off and that the phone is not locked to another provider. Wait briefly for registration, then follow the plan’s troubleshooting steps or contact support. Do not delete the eSIM profile unless instructed.
Prepare your connection for Nelson
Before your trip, check that your device is compatible, read the conditions for the plan you select and set up the eSIM when you have reliable internet access. Kaspersky eSIM Store is an app and website for choosing, arranging and activating an eSIM with a suitable mobile-data plan for an overseas journey. Explore the current New Zealand options and choose only after checking the details that apply to your device and itinerary. Save your maps and arrival information, then enjoy Nelson with a practical connection plan and a useful offline backup.


