Travel connectivity guide
OnePlus 12 512GB eSIM: Compatibility & Setup
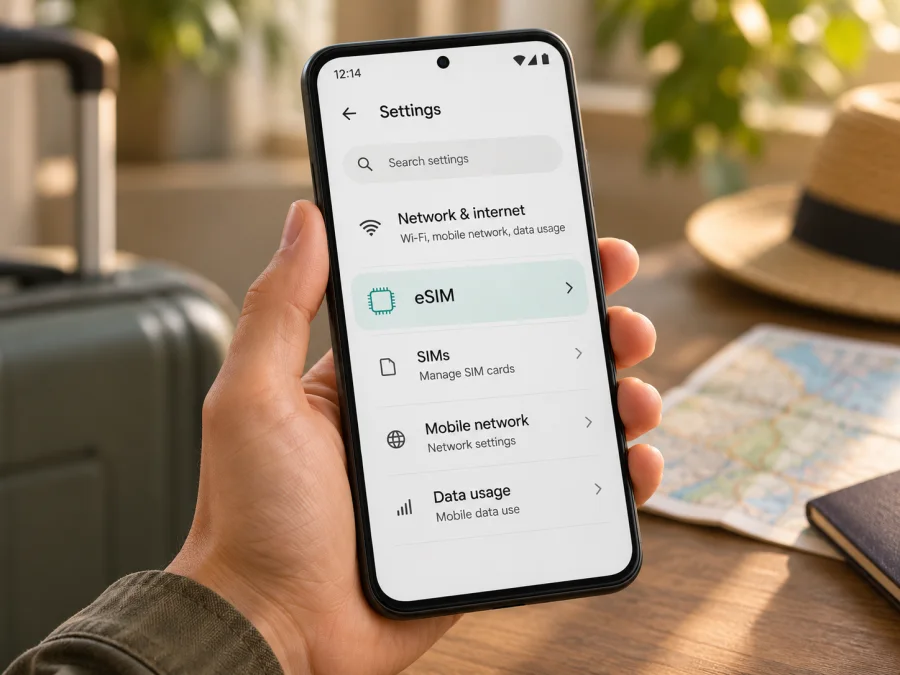
OnePlus 12 512GB eSIM: compatibility and setup guide
Short answer: eSIM support cannot be confirmed from “OnePlus 12 512GB” alone. OnePlus publishes different specifications for different markets: its India specification page explicitly says that eSIM is not supported, while the Australia page has an eSIM entry and notes that feature availability can depend on local carriers. The storage size does not identify which regional version you have. Check the exact model and the phone itself before choosing a travel plan.
This guide focuses on the exact OnePlus 12 512GB configuration named in the question. It does not treat the OnePlus 12R, another OnePlus model, or a different storage configuration as interchangeable. The 512GB capacity is useful for identifying the storage tier, but it does not establish eSIM capability. A phone sold as OnePlus 12 with 512GB could still have a market-specific hardware or software configuration.
OnePlus 12 512GB at a glance
| Item | What can be confirmed |
|---|---|
| Device in this guide | OnePlus 12 512GB |
| Device type | Android smartphone |
| Storage tier | 512GB is an official configuration in some regional OnePlus listings |
| eSIM verdict | Depends on the regional variant and carrier; the name and storage capacity are not enough to confirm support |
| India-market specification | OnePlus lists eSIM as not supported and describes a dual nano-SIM slot |
| Australia-market specification | OnePlus includes eSIM in the connectivity section, with a local-carrier availability caveat |
| Best personal check | Look for an EID and an active “Add eSIM” option in Settings, then verify the exact model with OnePlus or the seller |
The table is a practical summary, not a promise that every phone purchased in a named country has the same configuration. Imported stock, carrier-customized software, replacement devices and updates can make the situation less straightforward. Use the model code, purchase region, current software and the settings on your own phone together.
Why the regional version matters
The OnePlus 12 is sold in markets with different SIM arrangements and carrier support. The official India specifications for the OnePlus 12 16GB RAM + 512GB configuration say “eSIM: Not supported.” Do not assume that an Indian 512GB handset can install a travel eSIM.
OnePlus’s Australia specifications include an eSIM entry and note that feature availability may vary with local carriers. This shows regional differences, but does not guarantee that every handset labeled “OnePlus 12 512GB” can use every eSIM service. If you bought the phone elsewhere, check the official specifications for that market and the model code printed in Settings or on the box.
Storage capacity is not the deciding factor. A 512GB device can be an Indian-market variant without eSIM. A generic Android menu or a search result about another OnePlus model does not prove that your particular phone can install an eSIM. Do not rely on a listing that omits the region or model number.
The operator and plan matter too. A device may support eSIM but reject a profile because the handset, firmware, activation method or plan is incompatible. Confirm both that the phone can store an eSIM and that the plan can connect on a supported network at your destination.
For an imported phone, ask the seller for its model number, original market and confirmation that eSIM is enabled. A menu screenshot alone is not conclusive; check for an EID and a working add-profile option.
Check compatibility on your own phone
Use these checks before buying or installing a travel eSIM. Menu names may vary slightly between OxygenOS releases and regional firmware.
- Find the model number. Open Settings → About device and note the model code and software build. Compare them with OnePlus specifications for the phone’s original market.
- Look for an EID. Search Settings for “EID,” or check About device → Status / SIM status. An EID identifies the embedded SIM capability. Keep it private; if none appears, confirm with OnePlus or the seller.
- Check Mobile network. Look for Add eSIM or Download a SIM. A missing option, or one that opens an error, does not confirm support.
- Check the add flow. Open it far enough to see whether the phone reaches the QR or activation-code screen. Do not scan a purchased code just to test, and do not delete profiles.
- Confirm unlock and software status. Ask the original carrier whether the phone is unlocked, install official updates over Wi-Fi and restart. Avoid unofficial firmware or conversion methods.
- Check the plan. Confirm Android support, destination, validity start, roaming requirements and any network-selection instructions.
A simple decision checklist
- You know the model code and original market.
- Settings show an EID and a working Add eSIM option.
- The phone is unlocked for the intended provider.
- The plan covers the destination and matches the phone’s installation method.
- You have Wi-Fi for setup and saved the activation instructions.
If one of the first two checks fails, verify before purchase. A physical SIM, home-operator roaming or Wi-Fi may be a fallback; keep your current service until the alternative works.
An EID and an IMEI are different identifiers: the IMEI identifies the handset, while the EID is associated with its embedded SIM. You may be asked for the model code or EID when contacting support, but share those details only through an official support channel. If your settings show an IMEI but no EID, that alone does not establish eSIM capability. A successful profile download is a stronger practical check, but complete activation can still depend on the carrier, plan and destination network.
Use Check your device compatibility to continue to the compatibility check on the page. If information conflicts—for example, a listing advertises eSIM but the phone has no EID—treat the phone’s settings and written confirmation from the seller or manufacturer as essential. Do not pay for a profile on the assumption that a future update will add support.
Choosing a travel eSIM after compatibility is confirmed
Once compatibility is confirmed, match the plan to the itinerary. Check destination, data allowance, validity, supported network, activation timing, hotspot rules and fair-use limits. A multi-country route may need a regional plan; availability depends on the local network and plan terms.
Estimate your use: maps and messaging require less data than video, cloud backups or tethering. Download offline content before departure and check whether top-ups or hotspot use are included rather than assuming they are.
Check when validity starts. It may begin at installation, first connection or another activation event. Follow the plan’s instructions if installing before travel; ask support if timing is unclear before scanning the QR code.
Kaspersky eSIM Store is an app and website where you can choose, arrange and activate an eSIM with a mobile-data plan for an international trip. It is not the mobile operator or the network itself. Before proceeding, review the destination, allowance, validity and any plan-specific network details shown for your chosen option. Browse current travel eSIM options and check the available plans for your destination; the homepage is a general starting point, not a country-specific tariff page.
Install an eSIM on OnePlus 12 512GB
Proceed only after the model passes the checks above and you have the activation details for the plan. Keep the phone connected to Wi-Fi during setup. Have the QR code available on another screen or printed copy; the phone cannot scan a code displayed on its own screen unless the provider also offers a manual installation method. Install the profile once, and keep the activation email or instructions until the eSIM connects.
Before you start
- Confirm Add eSIM appears on the exact phone and that the handset is unlocked.
- Check whether the plan should be installed now or closer to departure.
- Keep a working internet connection during download; the eSIM needs connectivity to retrieve its profile.
- Make sure the QR code has not already been used if the provider permits only one installation.
- Keep your primary SIM active if you still need its number for calls or verification messages.
- Read whether the travel profile should be set as the default mobile-data SIM and whether data roaming should be enabled for it.
Step-by-step setup
- Open Mobile network settings. On the OnePlus 12, open Settings → Mobile network. If your menu differs, use Settings search for “SIM” or “eSIM.”
- Choose the add option. Tap Add eSIM or the closest equivalent. If it is missing, stop and re-check the model code and region instead of continuing with a QR code.
- Choose QR-code installation. Use the phone camera or the built-in eSIM scanner to scan the code supplied for your plan. If the provider supplies a manual activation code and your software supports it, enter it exactly as provided.
- Confirm the download. Review the plan name shown by the phone and approve downloading the profile. A prompt may warn that the profile can only be installed once. Follow the instructions from the plan provider.
- Wait for installation. Keep the phone powered on and connected to Wi-Fi while the profile downloads. Do not scan the same QR repeatedly if the first attempt appears slow; check whether a profile was added before trying again.
- Label the profile. Give it a clear name such as “Travel data” so you can distinguish it from your home SIM. Avoid labels that expose sensitive account or travel details on the lock screen.
- Choose mobile data settings. If you are not ready to use the plan, leave the travel eSIM switched off or keep your home SIM as the data line, depending on the controls available. When you are ready, set the travel eSIM as the mobile-data SIM.
- Follow the plan’s roaming instructions. If the provider requires data roaming for its profile, enable roaming for that eSIM only. Roaming charges on your home SIM can be separate, so check that its data line and roaming setting are appropriate.
- Connect at the destination. Turn on the travel profile when instructed, wait a few minutes for network registration, and check that mobile data works. If automatic network selection fails, use the plan’s instructions for selecting a supported network manually.
The available labels and menu order can differ by OxygenOS version and regional firmware. For a general Android walkthrough, see Android eSIM installation instructions. The iOS guide is included for travelers setting up a separate Apple device: iOS eSIM installation instructions. Use the specific activation email or in-app instructions for the plan when their steps differ from a general guide.
Use the eSIM for mobile data while travelling
An installed eSIM is not automatically the selected data line. Decide which SIM should handle data, calls and messages, and check roaming settings. Dual-SIM options depend on the phone’s region and carrier.
At your destination, use a short checklist:
- Turn on the travel eSIM at the time specified by the plan.
- Select it as the mobile-data SIM in Settings → Mobile network.
- Enable data roaming for that profile only if its instructions require it.
- Leave the home line configured according to your needs and your home operator’s roaming terms.
- Wait for the network name or signal indicator to appear, then open a simple webpage with Wi-Fi turned off to check mobile data.
- Check the plan’s usage display or provider app after the first session.
If you keep your usual number active for verification messages, assign data to the travel eSIM and check home-carrier charges. Calls, messages and background data can incur different fees. Turn off the home line only if you will not need its number.
For a multi-country trip, confirm every stop is covered. At a border, allow registration and follow the plan’s network instructions before switching manually. Do not assume one profile covers the entire route.
Background apps can use data. Pause photo backups and large downloads, set an Android data warning, and check usage with the plan provider. A data eSIM does not add a conventional phone number, calls or SMS unless the plan explicitly includes them.
Common problems and what to check
“Add eSIM” is missing
Check the model code against the official specifications for its original market, install official updates and restart. If the menu is still missing, ask OnePlus or the seller to confirm compatibility. The India-market specifications explicitly say eSIM is not supported.
The phone has a menu but no EID
Do not buy based on the menu label alone. Check status settings and the regional specification; if no EID appears, ask OnePlus or the seller to confirm that the exact handset can download profiles.
The QR code will not scan
Increase screen brightness, avoid glare and show the code on another device. Use manual activation only if the provider supplies it. An expired or previously used code may need provider support; do not share it publicly.
The profile will not download
Check Wi-Fi, automatic date and time, and restart once. Confirm the phone is unlocked and the profile is intended for it. Ask the provider about a used code before deleting anything; removal may not restore a one-time QR code.
The profile installed but there is no service
Check that it is enabled, selected for data, in its validity period and at a covered destination. Follow roaming and network-selection instructions; briefly toggle airplane mode or restart and wait for registration. Installation alone does not guarantee local network access.
Mobile data does not load
Turn off Wi-Fi, select the eSIM for mobile data and confirm the plan has started and has data remaining. Enter APN details only if supplied by the provider. Test a webpage and check the provider’s usage information.
The home SIM has unexpected roaming use
Check the selected data SIM and roaming controls for both profiles. Disable home-SIM data roaming if needed; calls and messages may still have charges under your home plan.
Activation appears to be taking a long time
Do not delete or re-scan immediately. Check the plan’s start conditions and local signal. If it still fails after the expected wait, contact support with model code, country and the error message; never post an EID or QR code publicly.
FAQ
Does OnePlus 12 512GB support eSIM?
It depends on region. OnePlus says the India version does not support eSIM; its Australia listing includes eSIM with a carrier caveat. Check model code, EID and Settings before buying.
Is 512GB the eSIM version?
Storage alone does not identify eSIM capability. Ask for the model code and original market.
If I see “Add eSIM,” is the phone compatible?
Not necessarily. Look for an EID, check the add flow and confirm the exact model with OnePlus or the seller.
Can I use a travel eSIM and my physical SIM together?
Possibly, depending on the regional configuration and active SIM combination. Check Settings and both operators’ terms before travel.
Do I need to enable data roaming?
Follow the plan’s instructions. If roaming is needed, enable it for the travel profile and keep home-SIM settings separate.
Can an eSIM plan make ordinary calls or send SMS?
Only if the plan expressly includes them. Check the terms; data plans can use internet-based calling and messaging apps.
What should I do if my version does not support eSIM?
Consider a compatible physical SIM, home-operator roaming or Wi-Fi. If buying a phone for eSIM travel, confirm its region and test for EID before purchase.
Final check before your trip
For OnePlus 12 512GB, the safe answer is conditional: eSIM support is not universal across all regional versions, and 512GB does not settle the question. OnePlus explicitly marks eSIM unsupported on its India listing, while its Australia listing includes an eSIM entry and a carrier-availability caveat. Confirm your model code, look for an EID, make sure the Add eSIM flow is present, and verify that the handset is unlocked and accepted by the chosen plan.
Once the phone is confirmed, compare the plan’s destination, data allowance, validity, activation timing and network instructions. Install over Wi-Fi, select the travel eSIM as the mobile-data line when appropriate, and enable roaming only as directed for that profile. Kaspersky eSIM Store can help you choose, arrange and activate an eSIM data plan for an overseas trip; check the current destination options and plan terms before you travel. If your handset does not pass the compatibility checks, arrange a physical SIM, home-operator roaming option or Wi-Fi fallback instead of assuming the eSIM will work.


