Travel connectivity guide
Oppo Find X9 Ultra 256GB eSIM Guide
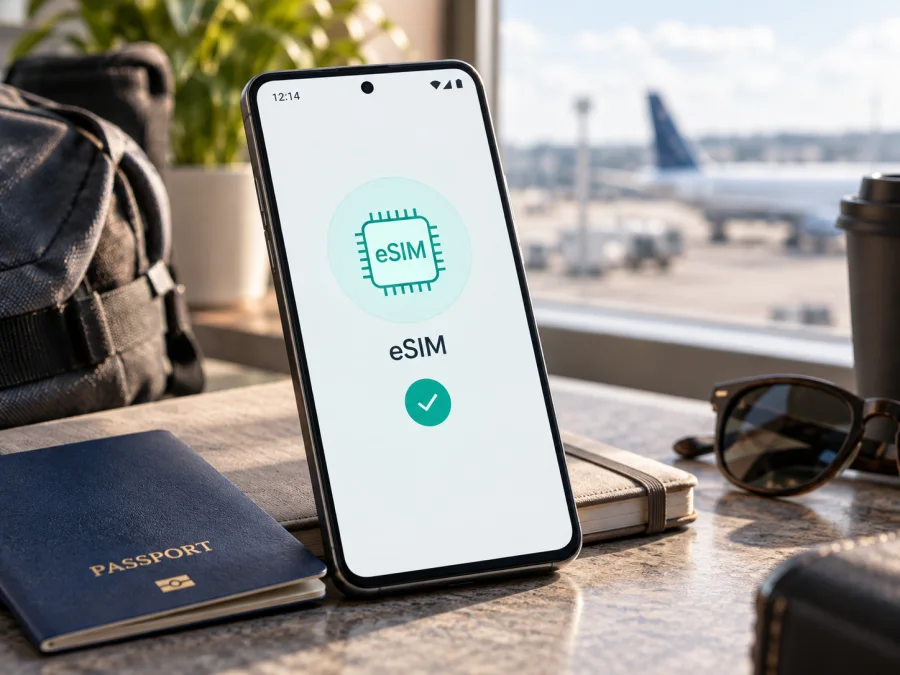
Oppo Find X9 Ultra 256GB eSIM: compatibility and setup
If you are checking whether Oppo Find X9 Ultra 256GB can use a travel eSIM, the safest answer is conditional: eSIM is not confirmed for this exact 256GB variant, while other regional Find X9 Ultra versions do list eSIM. Before choosing a plan, look for an EID and an option such as Manage eSIM or Add eSIM in mobile-network settings. If both are missing, a software update or QR code will not add the feature.
This matters for a trip. An eSIM profile is downloaded into a compatible device; it is not a physical card for a dual-SIM tray. Kaspersky eSIM Store is an app and website that helps you choose, arrange and activate an eSIM with a suitable mobile-data plan for an overseas trip. It does not act as a mobile operator, own partner networks or provide radio coverage. Plan conditions vary.
Quick answer for Oppo Find X9 Ultra 256GB
The exact answer for Oppo Find X9 Ultra 256GB depends on the unit you have. In the official mainland-China specification, OPPO lists a 12GB + 256GB configuration under the Find X9 Ultra and describes the SIM type as Nano-SIM and Nano-USIM. That page does not list eSIM for the standard phone. By contrast, OPPO’s official Portugal specification marks eSIM as compatible for a regional Find X9 Ultra configuration, and OPPO Japan describes a 12GB/512GB model with SIM1 nanoSIM plus SIM2 nanoSIM/eSIM. Those are useful signs that the family can include eSIM, but they do not prove that a 256GB import has the same hardware or software.
For this reason, treat eSIM on the requested 256GB device as not verified until the handset shows an EID and an eSIM-management control. A visible “5G” indicator, two SIM slots, NFC or a large amount of storage says nothing by itself about eSIM support. The final check should be made on the exact handset, with its regional software and current ColorOS build, before paying for a plan.
Specification and regional interpretation
| Item | What to understand for this page |
|---|---|
| Exact device | Oppo Find X9 Ultra 256GB |
| Official 256GB reference | OPPO’s mainland-China page lists 12GB + 256GB for the standard Find X9 Ultra, model code PMA110 |
| SIM information on that reference | Nano-SIM and Nano-USIM are listed; eSIM is not listed on the standard specification |
| Regional eSIM evidence | OPPO Portugal lists eSIM as compatible for its Find X9 Ultra specification; OPPO Japan lists nanoSIM + nanoSIM/eSIM for a 12GB/512GB model |
| Meaning of the evidence | The Find X9 Ultra family is not uniform across markets; a 512GB regional unit is not proof for a 256GB unit |
| Practical decision | Confirm EID and the eSIM menu on the exact phone before selecting a travel plan |
What to check before buying an eSIM plan
Check the device first and the destination plan second. A plan can be valid for your country and still fail to install if the phone has no eSIM capability, is operator-locked or uses a regional build without the necessary menu.
Compatibility checklist
- [ ] The phone is exactly Oppo Find X9 Ultra 256GB, not a 512GB, satellite or other regional variant substituted by the seller.
- [ ] The model code and country of sale are known.
- [ ] Settings > Mobile network contains an eSIM, Manage eSIM or Add eSIM control.
- [ ] The phone displays an EID in its device or SIM information.
- [ ] The phone is not locked to an operator, and ColorOS is updated through normal device settings.
- [ ] You have Wi-Fi or another working internet connection for the initial download.
- [ ] The destination, coverage area, data amount and validity of the selected plan fit the trip.
- [ ] You understand when the plan starts, whether data roaming is required, and that the eSIM generally provides data rather than a phone number, calls or SMS.
The most important two checks are EID and the eSIM menu. If a shop offers to “activate” a plan without either of these signs, pause the purchase. Kaspersky eSIM Store can help you select and activate a travel eSIM flow, but it cannot add eSIM hardware to an incompatible phone or remove an operator lock.
<a id="kesim-device-compatibility"></a>
How to verify EID and the eSIM menu
Use the following sequence on the phone you actually plan to take abroad. Names can vary with language, ColorOS version and market, so search Settings for eSIM, EID or SIM if the first path looks different.
- Open Settings.
- Open Mobile network, Mobile service or the similarly named SIM section.
- Look for Manage eSIM, Add eSIM, Download a SIM or a plus sign for a new mobile plan.
- Open About device or Status information and search for EID. Some phones show it under SIM status, while others reveal it after you open the eSIM manager.
- Compare the result with the model code shown on the box, invoice or device information screen.
- Restart the phone and repeat the check if the phone was recently updated or restored.
An EID identifies the embedded SIM component; it is not an IMEI, serial number, phone number or QR code. Do not post it publicly. If only physical SIM slots and no EID appear, treat the unit as incompatible. Do not rely on diagnostic codes, unofficial firmware or third-party apps. If an EID and manager are present, confirm that the menu permits profile download in your market.
Check your device before you select a plan for your destination.
How to install and activate an eSIM when the phone is compatible
Only follow these steps after the compatibility check has passed and you have received the plan details. Keep the QR code private, use stable Wi-Fi and do not delete an existing profile unless you understand the plan’s re-download and refund rules.
1. Prepare the phone
Charge the phone, connect it to Wi-Fi, install available official updates and make sure the device is unlocked. If the standard 256GB version has no eSIM menu, stop rather than trying to force the next step.
2. Open the mobile-network settings
Go to Settings > Mobile network and choose Manage eSIM, Add eSIM or Download a SIM. The exact wording may differ. If the menu is absent, use the EID check again; do not assume that a physical SIM icon is an eSIM control.
3. Scan or enter the activation details
Choose to add a mobile plan and scan the QR code supplied after your order, or enter manual activation details if provided. Display the QR code on another screen or print it. If it is on the same phone, use manual entry or a second device. Never send the QR code to an unknown person for “remote activation.”
For platform guidance, use the Android installation instructions and the iOS installation instructions. The iOS link is for Apple devices; the Android guide is relevant for this Oppo phone.
4. Download and select the profile
Confirm the plan name and destination, then allow the profile to download. Label it “Travel data” and select it for mobile data. Keep automatic data switching off while testing. Downloading a profile and connecting to a network are separate events.
5. Activate roaming and test
Travel profiles often need data roaming because the phone connects to a partner network. Enable roaming for the travel eSIM only when the plan requires it, and keep it off for the primary SIM if you want to avoid accidental charges. With Wi-Fi off, open a lightweight webpage and follow the plan’s stated activation rule.
Using eSIM for mobile internet during a trip
The usual travel setup is dual-line: keep the primary line for calls or messages and reserve the eSIM for data. This does not automatically prevent the primary line from roaming, so review every mobile-data and roaming toggle.
Scenario 1: install before leaving
This is convenient when the phone is confirmed compatible and the plan permits advance installation. Use home Wi-Fi, scan the QR code, label the profile and leave it disabled if validity should start on arrival. After landing, enable the eSIM, enable data roaming for that profile if required, and test with Wi-Fi off.
Scenario 2: install after arrival
If the plan starts on installation, or you prefer to confirm the destination first, use airport or hotel Wi-Fi. Do not erase your only working SIM before you are online. Once installed, wait for network registration and check the data-line and roaming settings.
Scenario 3: keep your home number reachable
Keep the physical SIM enabled only for the functions you need. Calls or SMS may incur home-operator roaming charges. Set the travel eSIM as the data line and disable automatic switching. Use messaging apps over data; a travel eSIM is not automatically a replacement phone number.
Check that the plan covers every destination and transit area. A country-specific plan may stop at a border even when the phone works normally. Maps, photo backup, video, updates and hotspot use can consume data quickly, so review plan conditions and use offline maps where practical. A strong 5G icon does not guarantee a particular speed; performance depends on the local network, location, congestion, device bands and operator policy.
Common problems and practical checks
The phone has no eSIM option
Recheck the model code and country of sale. The official 256GB mainland-China specification lists physical Nano-SIM/Nano-USIM support without an eSIM entry, whereas other Find X9 Ultra markets list eSIM. If the EID and eSIM menu are both absent, treat the phone as incompatible for this purchase. A factory reset, a different QR code or a plan from another destination will not change the phone’s SIM hardware.
The QR code will not scan
Increase screen brightness, clean the camera lens and keep the code flat and fully visible. Use manual activation if provided, and check that the code has not already been used. Do not publish the QR code.
The profile will not download
Reconnect to reliable Wi-Fi, check date and time, restart the phone and try again. Confirm that airplane mode is off and storage is available. If the plan is limited to one installation, do not repeatedly delete and reinstall it. Contact support with the error text, model code, market and EID status.
The profile is installed but there is no service
Confirm that the profile is enabled and selected for mobile data. Check the destination, signal and whether roaming is required. Toggle airplane mode once, then restart if necessary. Return network selection to automatic unless the plan says otherwise. A downloaded profile is not the same as a registered connection.
Mobile data uses the wrong line
Set the travel eSIM as the data line and disable automatic switching. Check the primary SIM’s roaming setting separately. If needed, switch the physical SIM off for a controlled test, then restore your call and message settings.
The phone is locked or the operator blocks activation
Ask the seller or operator to confirm unlock status. An eSIM-capable phone can still refuse a profile when it is carrier-locked or when the operator has not enabled the service. Do not attempt unofficial unlocking. For an import, request confirmation for the exact market build rather than a general Find X9 Ultra statement.
FAQ
Does Oppo Find X9 Ultra 256GB definitely support eSIM?
No definitive universal claim can be made from the storage name alone. The official 256GB mainland-China specification does not list eSIM, while official regional specifications for other Find X9 Ultra configurations do. Verify EID and the eSIM-management menu on the exact handset before purchase.
Is the 256GB model the same as the 512GB eSIM model?
Not necessarily. Storage, model code, market, SIM hardware and firmware can differ. Treat a 512GB regional listing, a Japan model or a satellite version as separate evidence, not as a substitute for Oppo Find X9 Ultra 256GB.
Will a travel eSIM give me a phone number?
Usually not. Travel eSIMs in this context are for mobile internet. Calls and SMS are not included unless the selected plan expressly says they are. You can use messaging and calling apps over data, subject to their own account and service requirements.
What should I do if I am still unsure?
Ask the seller or OPPO support to confirm the exact model code, market and eSIM capability. Share the EID only through an appropriate support channel. If the handset does not show an EID or eSIM menu, choose a physical-SIM option or a confirmed compatible phone instead of buying a plan speculatively.
Conclusion
For Oppo Find X9 Ultra 256GB, eSIM support is a regional and variant question, not a feature that can be inferred from the Find X9 Ultra name or 256GB storage. The current official China specification for the 12GB + 256GB standard model lists physical Nano-SIM/Nano-USIM support and does not list eSIM. Official Portugal and Japan pages show that other Find X9 Ultra configurations can support eSIM, so the family is not uniform. Confirm the exact handset’s model code, EID and eSIM menu before choosing a plan.
Final device check and trip eSIM choice
Before you buy, verify that Oppo Find X9 Ultra 256GB itself shows an EID and an option to manage or add an eSIM. Confirm that the phone is unlocked, the firmware is current, Wi-Fi is available for installation and the selected plan covers your full route. Then choose an eSIM for the destination, review its data amount, validity and activation conditions in Kaspersky eSIM Store, install it using the appropriate guide, select it for mobile data and enable roaming only for that profile when required. If the EID or eSIM menu is missing, do not purchase the plan for this handset until the seller or official support confirms a compatible regional version.


