Travel connectivity guide
Samsung Galaxy S20 Ultra 512GB eSIM Compatibility
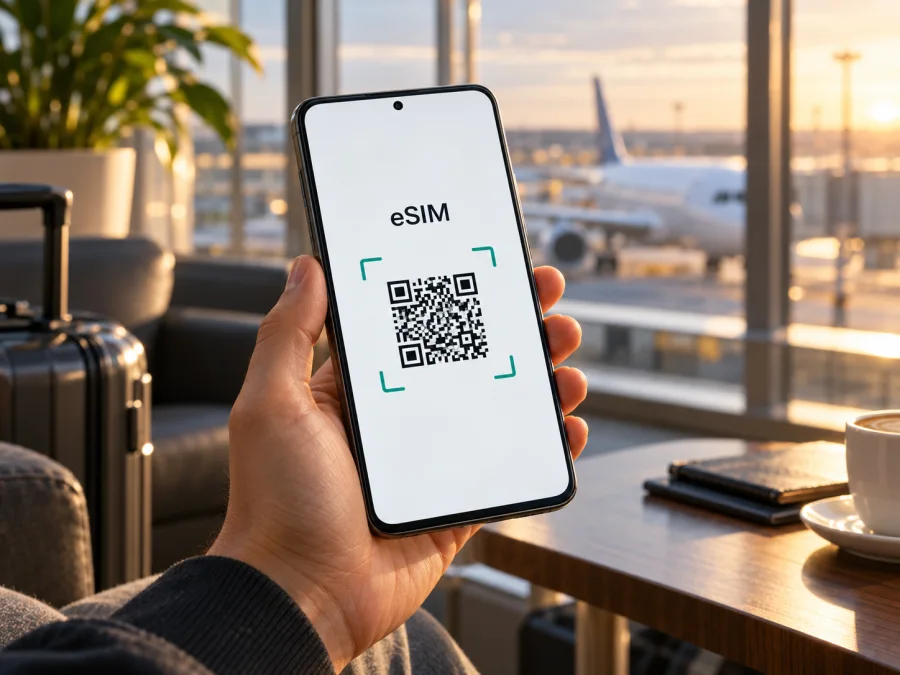
Samsung Galaxy S20 Ultra 512GB and eSIM: compatibility and setup guide
The Samsung Galaxy S20 Ultra 512GB can use eSIM on supported regional versions. Samsung lists the Galaxy S20 Ultra among Galaxy devices with eSIM, and its UK support information specifically marks the S20 Ultra as eSIM-capable. That does not confirm that every handset sold under this name has the feature enabled: Samsung says availability can depend on the country of origin, device model, software and carrier. The 512GB storage capacity alone does not identify the region or guarantee eSIM support.
Before choosing a travel plan, check the phone itself. Look for an EID in Settings or an Add eSIM option in SIM manager. If neither appears, do not assume that a software update or a plan purchase will add the missing capability. Confirm the exact model number and sales region with Samsung or the seller, and verify that the phone is unlocked. This guide explains those checks and what to do if the menus differ.
At a glance
| Item | What to know |
|---|---|
| Device named in this guide | Samsung Galaxy S20 Ultra 512GB |
| eSIM answer | Supported on compatible regional variants; confirm on the individual handset |
| Storage variant | 512GB identifies capacity, not the country version or eSIM status |
| Best first check | Settings → About phone → Status information for an EID |
| Setup menu | Settings → Connections → SIM manager → Add eSIM, when available |
| Travel use | Choose the eSIM for mobile data; keep your usual line settings under control |
| Before purchase | Check the EID or Add eSIM menu, regional version, carrier lock and plan destination |
What Samsung’s compatibility information confirms
Samsung’s current Galaxy eSIM guidance includes the Galaxy S20 series, including the S20 Ultra. Samsung UK’s S20 SIM specifications also list eSIM as supported for the S20 Ultra. These references establish that the model family has eSIM-capable versions; they do not make a promise about every handset imported or sold in every market.
Samsung’s support material explicitly cautions that eSIM may not be available depending on a device’s country of origin. Carrier support can also vary. In practice, the determining details are the full model code, regional firmware and the menus available on your specific phone. Two phones with the same retail name and storage capacity can have different regional configurations. A carrier-branded handset may also have restrictions that differ from an unlocked regional model.
The 512GB label refers to internal storage, not a separate eSIM edition. Do not infer support from storage size, 5G branding, a physical SIM tray or a generic seller description. Verify the device directly.
Regional and carrier variations
For a used, refurbished or imported phone, check the full model code under Settings → About phone and the original market of sale against Samsung’s local support information. A SIM tray does not prove eSIM support. Carrier lock is separate: an eSIM-capable handset may still reject another provider’s profile if locked or restricted. Confirm unlock status with the original carrier or seller.
Software also matters: menu names and features can change with One UI, Android and carrier customisation. Install official updates, restart and recheck SIM manager. An update may expose a supported feature, but cannot add eSIM to an unsupported configuration. If both EID and Add eSIM remain absent, confirm the model with Samsung before buying a plan.
Check your exact phone before you buy
Use the checklist below on the handset you intend to travel with. A result on another Galaxy S20 Ultra is not a substitute for checking yours.
- Find the model code. Open Settings → About phone and note the full model number. Keep the sales region or original carrier information if you have it.
- Look for an EID. Open Settings → About phone → Status information. Supported variants usually show an EID, a long identifier associated with the embedded SIM. The exact wording or menu path can vary. Samsung also notes that the EID may be printed on the device box.
- Check SIM manager. Go to Settings → Connections → SIM manager. Look for Add eSIM or an equivalent option. If it is present, open it only far enough to confirm the setup choices; you do not need to install a profile to test the menu.
- Check the software. Note the Android and One UI versions, install official updates offered for your device, restart and repeat the EID and menu checks.
- Check the lock status. Confirm with the original carrier or seller that the device is unlocked and allowed to add a different provider’s eSIM.
- Confirm with Samsung if results conflict. Provide the model code, country of purchase and software version. A missing menu can reflect a regional configuration or carrier restriction, so ask for device-specific confirmation.
If your paperwork lists a dual-SIM or DS model code, use it to identify the regional variant, then verify the phone itself. Regional naming can narrow the search, but the EID and setup menu are the practical checks before purchase.
An EID is a strong sign of eSIM capability, but also confirm that Add eSIM is available, the device is unlocked and the plan covers your destination. Menu names can vary, so verify more than one indicator when possible. Check your device before choosing a travel eSIM.
If you use *#06#, some software versions may show the EID; treat it as a secondary check. Do not share the identifier publicly.
How to add an eSIM on the S20 Ultra
Once you have confirmed that your particular phone supports eSIM and is unlocked, prepare a stable Wi‑Fi connection. Keep the QR code or manual activation details accessible on a second screen or printed page if you intend to scan it with the phone’s camera. Follow the activation instructions supplied with the specific plan; not every provider uses the same process.
- Check the plan details first. Confirm the destination or region, data allowance, validity period, when validity begins, and whether the plan requires activation at arrival. Confirm whether it is data-only and whether the provider expects data roaming to be switched on for that eSIM.
- Open SIM manager. On the phone, go to Settings → Connections → SIM manager → Add eSIM. If the option is missing, stop and revisit compatibility checks rather than repeatedly scanning a QR code.
- Choose the provider’s install method. Depending on the software and provider, you may be able to scan a QR code, download a pre-assigned plan, or enter activation information manually. Select the method included with your purchase.
- Scan or enter the activation details. Keep the screen bright and the QR code unobstructed. If using manual entry, copy the activation information exactly. A QR code is normally single-use; do not scan it on multiple phones unless the provider explicitly says that is supported.
- Wait for the profile to download. Leave Wi‑Fi connected and do not close the setup screen while the profile is being added. Follow any prompt to restart the phone.
- Name the line clearly. In SIM manager, use a label such as “Travel” so that you can distinguish it from your home SIM. Check that the new eSIM appears in the list and can be switched on.
- Set mobile data deliberately. Choose the travel eSIM as the mobile-data line when you want to use its allowance. Keep calls and messages assigned to your regular SIM if you need them, and review that line’s roaming settings with your home carrier.
- Apply the provider’s roaming instruction. Some travel data eSIMs require data roaming on for the eSIM to connect to a partner network. If so, enable roaming for the travel line only and verify the plan’s terms. The setting itself does not determine the price; the selected plan and the line using data do.
- Test at the right time. If the plan starts on installation, wait until you are ready to use it before installing. If it starts on first network connection or on a scheduled date, follow those terms. At the destination, enable the eSIM, select it for data and test a simple webpage.
See the Android eSIM installation instructions for a screen-by-screen walkthrough. The iOS eSIM installation instructions are for Apple devices; use the Android steps on this Samsung phone.
Prepare for a trip
A travel eSIM gives you a separate mobile-data line without replacing the physical SIM. A data-only plan usually has no regular phone number, voice minutes or SMS unless its terms say otherwise. Keep your usual number for services that depend on it, and check home-carrier charges for calls, texts and roaming.
Before departure, save the activation details, know which line will handle data and keep Wi‑Fi available for setup. If the provider offers scheduled activation, align it with the trip; validity and data-use start rules vary.
When you land, check the following in order:
- Turn off airplane mode and enable the travel eSIM in SIM manager.
- Select it for mobile data; keep the home SIM’s data roaming setting in mind.
- Enable roaming on the travel line only if the plan instructions require it.
- Wait for network registration and test a webpage. If data fails, restart or toggle airplane mode, then check the data line and any provider APN settings.
For a route through several countries, read the plan’s coverage description carefully. A country plan and a regional plan are different products; being geographically nearby does not prove that a destination is included. Check each stop, including layovers if you expect to use data there. Do not treat a coverage map or a phone’s list of available networks as proof that a particular tariff includes that place.
Kaspersky eSIM Store is an app and website where you can choose, complete and activate an eSIM plan for mobile data on an international trip. Browse available travel plans and check current terms; this is the general store homepage, not a country-specific tariff. Compare data allowance and validity with your expected use, download maps over Wi‑Fi when practical, and monitor remaining data in your profile or app.
Common problems and checks
“Add eSIM” is missing
Confirm the full model number and country of sale, install the latest official software offered to the phone, then restart and recheck About phone → Status information and Connections → SIM manager. If there is no EID and no Add eSIM option, the version may not support eSIM in its market or its carrier configuration may restrict it. Ask Samsung or the seller to confirm the exact model. Do not buy a plan on the assumption that a generic compatibility list covers every S20 Ultra 512GB.
The QR code will not scan
Use Add eSIM to scan, not the regular camera. Reduce glare and increase the QR display brightness. If the code is invalid or already used, contact the provider before deleting a profile or requesting another code.
The profile downloads, but the phone has no data
First confirm that the eSIM is switched on and selected as the mobile-data SIM. Check that your destination is included in the plan and that the plan is within its validity period. Follow the provider’s APN settings if supplied, and enable data roaming on the travel eSIM only if required. Then toggle airplane mode, restart and test again. If the phone connects to a network but still has no data, ask the plan provider to verify activation and network availability for the location.
The travel eSIM works, but the home SIM incurs roaming charges
Review which SIM is selected for mobile data and whether Data switching or a similar automatic switching feature is on. Turn off automatic switching if you do not want the phone to fall back to the home line. Check the home SIM’s roaming options with its carrier. Calls and SMS may still use the home line even when travel eSIM handles data, so decide how you want those services to work before leaving.
The phone says the plan cannot be added
Check the internet connection, date and time, available profile capacity and whether the code is expired or already used. If the error persists, share its wording and model code with the provider. Avoid resetting the phone or posting activation details publicly.
Data is slow or intermittent
Reception depends on local network conditions and location. Check destination coverage, try another location and use automatic network selection if available. A 5G phone does not guarantee 5G service on every plan. If the issue persists, contact the provider with your location and model.
Practical travel scenarios
- One destination: check the phone, choose a plan for that destination and stay length, then select the travel eSIM for data on arrival.
- Several countries: confirm every stop is included in the plan; label profiles and check the active data line at borders. A regional plan does not automatically cover every nearby country.
- Keep your home number: leave the home SIM enabled if needed, select the travel eSIM for data, and ask your usual operator about call or SMS fees abroad.
- Second-hand import: verify model code, EID, Add eSIM menu and carrier lock in person before buying a plan.
Frequently asked questions
Does Samsung Galaxy S20 Ultra 512GB support eSIM?
Samsung lists the Galaxy S20 Ultra among eSIM-capable Galaxy models, and Samsung UK specifies eSIM for the S20 Ultra. A particular 512GB handset is compatible only if its regional model and software expose eSIM. Check the EID and Add eSIM menu on that phone.
Does every 512GB version include eSIM?
No conclusion follows from storage capacity. Regional model, firmware and carrier configuration matter; confirm the model code and inspect the handset.
Can I use an eSIM and physical SIM together?
Samsung describes eSIM as part of Galaxy dual-SIM features, but combinations depend on device configuration and software. Check the options shown in SIM manager and confirm provider requirements.
Does a travel eSIM include a phone number?
Not necessarily. Many are data-only and do not include standard calls or SMS. Check the selected plan’s terms; messaging and internet calls can work through apps.
Should I install before travel?
That depends on when validity begins and the provider’s setup method. Install over Wi‑Fi if appropriate, but check whether installation itself starts the plan.
Will it work in every country?
No. The handset must support eSIM, be able to use the profile and have a plan that includes the destination. Local network conditions also apply.
Final checklist: confirm the phone, then choose a plan
Before you travel with the Samsung Galaxy S20 Ultra 512GB, check the EID and Add eSIM option on the specific handset, confirm its model code and regional version, and make sure it is not carrier-locked. Update the phone, keep a reliable internet connection for installation, and follow the plan’s instructions for when to install, activate and enable data roaming.
Then check that the selected eSIM plan includes every destination on your route, and compare its data allowance and validity with your travel needs. If the regional version remains uncertain, ask Samsung to confirm support from the model code before purchase. Once compatibility is clear, Kaspersky eSIM Store can help you choose, complete and activate a suitable travel data plan through its app or website. A short check before departure makes setup more predictable and helps keep your home SIM settings under control.


