Travel connectivity guide
Sony Xperia 10 III Lite 512GB eSIM
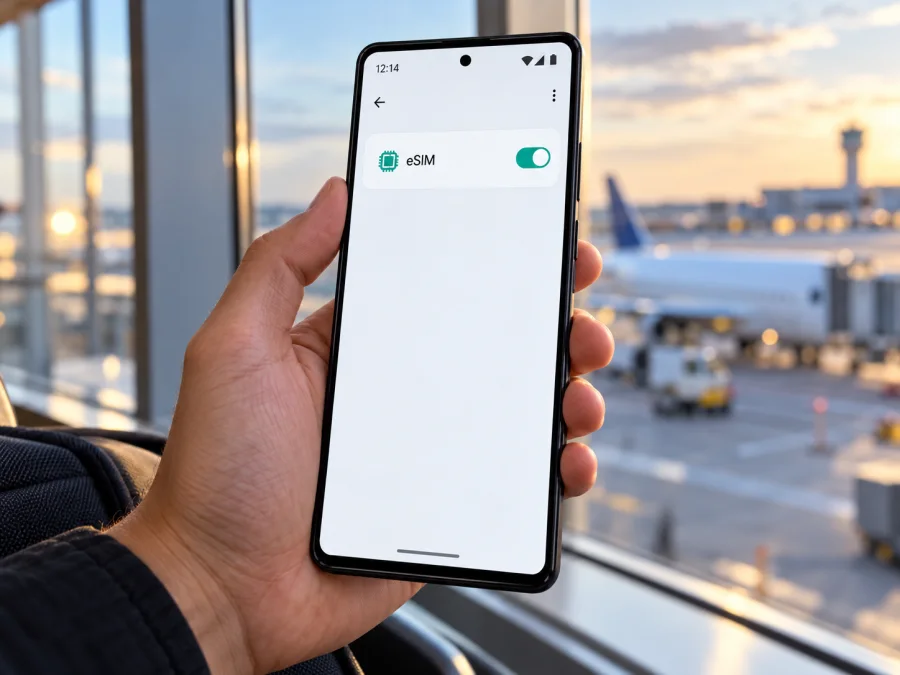
Sony Xperia 10 III Lite 512GB eSIM: compatibility and setup
Short answer: Sony’s Japanese specifications identify the Xperia 10 III Lite as model XQ-BT44 and explicitly list dual SIM with nanoSIM and eSIM. That is the Xperia 10 III Lite variant for which eSIM support is confirmed. The words “512GB” in the supplied device name need checking: Sony lists the XQ-BT44 with 64 GB of internal storage and microSD expansion up to 1 TB, not a 512 GB internal-storage configuration. A seller may be referring to a memory card or bundle. Check the model number and what the storage figure means before you buy a plan.
The name alone does not establish that every Xperia 10 III supports eSIM. Sony’s UK specification for the standard Xperia 10 III (XQ-BT52) lists nanoSIM and does not list eSIM. Confirm the exact model number and settings on your handset; a storage bundle or carrier plan cannot add eSIM hardware to a model that lacks it.
Compatibility at a glance
| Check | What Sony’s published information says | What to do |
|---|---|---|
| Device in this article | Sony Xperia 10 III Lite, model XQ-BT44 | Match this model number to the phone’s settings or packaging. |
| eSIM on XQ-BT44 | Sony’s Japanese product specification describes dual SIM as nanoSIM/eSIM. | Check that the actual handset exposes an eSIM setup option. |
| Standard Xperia 10 III | The UK XQ-BT52 specification lists nanoSIM and no eSIM. | Do not assume that “Xperia 10 III” and “Xperia 10 III Lite” have the same SIM features. |
| “512GB” | Sony lists 64 GB internal storage and microSD expansion up to 1 TB for XQ-BT44. | Ask the seller whether 512 GB refers to an included card, a bundle or another device configuration. |
| A travel eSIM plan | The phone must support eSIM, be unlocked for another provider, and work with the plan’s network and destination. | Verify the phone and plan before purchase. |
Sony’s public confirmation applies to the Japanese XQ-BT44. Whether a particular service accepts the phone, and whether it connects on a local network, still depends on the operator, destination and plan. Device support alone does not guarantee that every travel plan will work.
What the “512GB” name means
Keep the full requested name, Sony Xperia 10 III Lite 512GB, but treat the storage suffix as something to verify rather than a confirmed Sony hardware variant. Sony lists XQ-BT44 with 6 GB RAM, 64 GB built-in storage, and microSD expansion up to 1 TB. An expansion card does not change the phone’s model number or internal storage.
If a listing says 512GB, ask whether it means built-in storage or an included microSD card, and request the technical model number. The title could describe a bundle or contain a catalogue error. Storage is not evidence of eSIM support.
Use the model number rather than the retail title. Sony identifies the Japanese Xperia 10 III Lite as XQ-BT44 (nanoSIM/eSIM), while UK standard Xperia 10 III XQ-BT52 specifications list nanoSIM. Their SIM options are not interchangeable.
Check the actual phone before buying
Use the handset you plan to travel with. Open Settings → About phone and look for Model or Model number; labels vary by Android version. The retail box or seller may also show the code. Sony’s Japanese Xperia 10 III Lite is XQ-BT44. Verify any other code against support information for its sales market.
Look in Settings → Network & internet → SIMs for Add SIM, Download a SIM, Add eSIM or a plus sign. Wording and availability vary by Android version, region and carrier software. Do not proceed with profile installation until you are ready to use the plan.
You can also look for an EID, the identifier associated with an embedded SIM. Depending on the software, it may appear under Settings → About phone → SIM status or on the eSIM setup screen. Search Settings for “EID” if needed. An EID is different from the phone’s IMEI; avoid sharing either publicly.
If the menu and EID are absent, confirm the model, update Android, restart and check again. If eSIM still does not appear, ask Sony or the seller whether that regional configuration supports downloadable SIM profiles. A carrier lock can also restrict service.
What to confirm with the seller or carrier
Before paying for an eSIM plan, check these details:
- Exact model number: ask for the code shown in Android settings, not just “Xperia 10 III” in the listing title. XQ-BT44 is the model Sony associates with the Japanese Xperia 10 III Lite specification.
- Regional version: confirm the market for which the device was made and whether it is a Japan-market XQ-BT44 or another regional Xperia configuration. Commercial names may be similar across markets.
- eSIM menu and EID: ask the seller to confirm that the handset’s settings show an eSIM add/download option. If buying remotely, request a clear photo of the relevant settings screen with personal identifiers hidden.
- Network lock: establish whether the phone is unlocked and can use another provider’s SIM profile. eSIM capability does not remove an existing carrier restriction.
- Plan and destination: check that the eSIM plan is intended for your destination or route, supports the device’s network capabilities there, and has data, validity and activation conditions that suit your travel dates.
- Storage description: clarify whether 512GB means included microSD storage or built-in storage. Storage does not determine eSIM compatibility.
Use this eSIM compatibility check for your device as an additional step, then compare the result with the settings on the phone you actually own. Compatibility lists are a starting point; the handset’s model code, eSIM menu, EID and unlock status are the practical checks to complete before ordering a plan.
A travel eSIM plan is generally a way to use mobile data abroad. Unless the specific plan says otherwise, do not expect it to include a regular phone number, conventional voice calls or SMS. Internet calling and messaging apps can work over mobile data, subject to their own service requirements. Keep your usual SIM active for calls or texts if you need it, and check roaming charges with your home operator before traveling.
How to install an eSIM on Xperia 10 III Lite
The following steps apply only after you have confirmed that your particular phone supports eSIM, is not blocked by a carrier restriction and is compatible with the plan. Sony’s model-neutral Xperia setup guidance uses the SIM settings and an operator-provided QR code; exact screens and activation steps can vary by software and eSIM provider.
- Prepare the phone. Connect to reliable Wi-Fi, charge the battery, and install any available Android update before travel. Keep the eSIM instructions or QR code accessible on another screen or printed page. A phone cannot scan a QR code that is displayed only on its own screen unless the provider offers a manual entry method.
- Review the plan instructions. Check the destination, data allowance, validity period, when validity begins, and whether the provider expects installation before departure or after arrival. Some profiles can be installed ahead of time but should not be enabled for data until the intended point in the trip. Follow the provider’s terms; do not scan a one-time QR code repeatedly if the first attempt fails.
- Open SIM settings. On the Xperia, go to Settings → Network & internet → SIMs. If a physical SIM or another eSIM is present, tap the plus sign or Add SIM option. On some software versions the wording may differ. If no eSIM choice appears, stop and recheck the model and regional configuration rather than continuing with an unrelated menu.
- Add the profile. Choose the option to download or add an eSIM, then scan the QR code supplied for your plan. If scanning is unavailable, use the provider’s manual activation details only if the provider supplies them. Keep the QR code private because it may allow someone else to download the profile.
- Wait for installation. Let the phone download and register the profile. Keep the internet connection active and do not close the settings screen while it is working. When complete, give the new profile a recognizable label such as “Travel data” so it is easy to distinguish from your home SIM.
- Choose the data SIM. In the SIM settings, set the travel eSIM as the preferred line for mobile data when you want to use it. If you want your home number available, keep its SIM enabled for calls or messages and review that line’s roaming settings with your operator.
- Enable data roaming only if required. Some travel eSIM providers require data roaming on for their profile to connect. Turn it on for the travel eSIM only when the plan instructions say to do so. Check carefully that roaming is not enabled on your home SIM if that could incur charges.
- Test the connection. Once the plan should be active and you are in a supported destination, turn Wi-Fi off briefly and open a simple webpage. If it does not load, check the selected data SIM, signal, roaming instruction and any provider-specific access point settings before changing anything else.
For more detail, see the Android eSIM installation instructions. The iOS installation instructions describe the Apple setup flow and do not apply to this Xperia; they are included as a separate reference for people setting up a different device. If your screen differs from the steps above, use the instructions supplied with your particular plan or contact the plan provider for activation help.
Using the eSIM for mobile data on a trip
The eSIM profile and the active data line are separate choices. Installing a profile adds it to the phone; selecting it for mobile data tells the phone which connection to use. Before departure, you can install the plan while connected to Wi-Fi if its conditions allow early installation. Read when the plan’s validity starts: installation, first connection or arrival may trigger different plans in different ways. Do not rely on a general rule when the provider’s instructions specify a particular activation time.
At your destination, open Settings → Network & internet → SIMs, turn on the travel profile if it is disabled, and select it for mobile data. Check the provider’s guidance about data roaming. If the Xperia asks which SIM to use for calls, texts or data, choose according to how you intend to use each line. You may keep your home SIM for calls while the travel eSIM carries data, but home-operator roaming charges can still apply to calls or messages depending on your service and settings.
For a multi-country trip, confirm that the plan covers each destination; a regional label does not guarantee every territory is included. Check coverage, data, validity and activation rules. Keep the provider’s support details available in case you need help over Wi-Fi.
Kaspersky eSIM Store is an app and website where travelers can choose, arrange and activate an eSIM plan for mobile data abroad. Review the destination and plan conditions, then install the profile on a compatible, unlocked phone. Network access follows the plan’s terms and the relevant local operator.
Common issues and checks
The QR code will not scan
Increase brightness on the screen displaying the code, clean the camera lens, and keep the full QR code in view. Use another screen or printout. Check that the code is for this plan and has not already been used. If it fails, ask the provider about manual installation details.
There is no option to add an eSIM
Check Settings → About phone and confirm the model code. Look for an EID or search Settings for “SIM,” then restart after an update. If the option remains absent, ask Sony or the seller to verify the regional configuration. A plan cannot make an unsupported model eSIM-capable.
The profile installs but shows no service
Check that the plan covers your country and the profile is on. Select it for mobile data, turn off airplane mode, and follow the provider’s roaming instructions. Move to a stronger signal and restart if needed. If service does not return, contact the provider with your destination and model code. Do not post the QR code or EID.
The phone connects but data does not work
Confirm that the travel eSIM is selected for data and that the plan is valid and has data remaining. Follow any access point name (APN) instructions supplied by the provider. Turn Wi-Fi off briefly to test. Only reset network settings if the provider advises it; this can remove saved Wi-Fi and Bluetooth details.
Data is using the wrong SIM
In SIM settings, confirm the preferred data line; data may be selected separately from calls and texts. Check roaming settings for both profiles and ask your home operator about charges if you need that line abroad.
Activation timing is unclear
Check the plan’s validity and activation instructions; installation and validity start are not always the same event. Ask the provider if timing is unclear, especially before installing ahead of a flight. Keep setup instructions available offline.
FAQ
Does Sony Xperia 10 III Lite 512GB support eSIM?
Sony confirms eSIM for Japanese Xperia 10 III Lite XQ-BT44 (nanoSIM/eSIM). The listed internal storage is 64 GB with microSD expansion up to 1 TB, so confirm what “512GB” means in the seller’s listing. Check your model and eSIM settings before purchase.
Is every Xperia 10 III the same as the Lite version?
No. Sony lists eSIM for Japanese Lite XQ-BT44, while UK standard XQ-BT52 specifications list nanoSIM. Check the full model code, not just the family name.
Can I tell whether eSIM works by checking the EID?
An EID indicates an embedded SIM component, but also check the setup option and carrier restrictions. Menu paths vary; ask the seller or carrier if the model and settings are unclear.
Does a 512 GB card make the Xperia eSIM-compatible?
No. Storage and eSIM are unrelated. Sony lists XQ-BT44 with 64 GB internal storage and microSD support up to 1 TB. Clarify the seller’s storage description and check the phone’s model and eSIM menu.
Can I keep my regular SIM active while using a travel eSIM?
XQ-BT44 is described as dual SIM with nanoSIM/eSIM. Select the travel profile for data and check home-operator roaming charges. Do not assume a travel data plan includes a phone number, calls or SMS.
Will eSIM work in every destination?
No. The phone must be unlocked and the plan must cover the destination and work with the local network. Check plan conditions and coverage before purchase.
Before you travel
For the Sony Xperia 10 III Lite 512GB, start by confirming the complete phone model. Sony identifies XQ-BT44 as the Xperia 10 III Lite eSIM version and specifies 64 GB of internal storage with microSD expansion; the “512GB” description should be checked with the seller. Then look for the EID or eSIM add option in Settings, confirm that the phone is unlocked, and make sure the plan covers your destination and travel dates.
When those checks are complete, use Kaspersky eSIM Store’s app or website to choose, arrange and activate an eSIM plan for mobile data abroad. Read the plan conditions, install it using the Android steps above, and select the correct data line when you arrive. A quick compatibility check before purchase can help you avoid arriving with a plan that the specific regional phone cannot use.


