Travel connectivity guide
Sony Xperia Ace III 256GB eSIM Guide
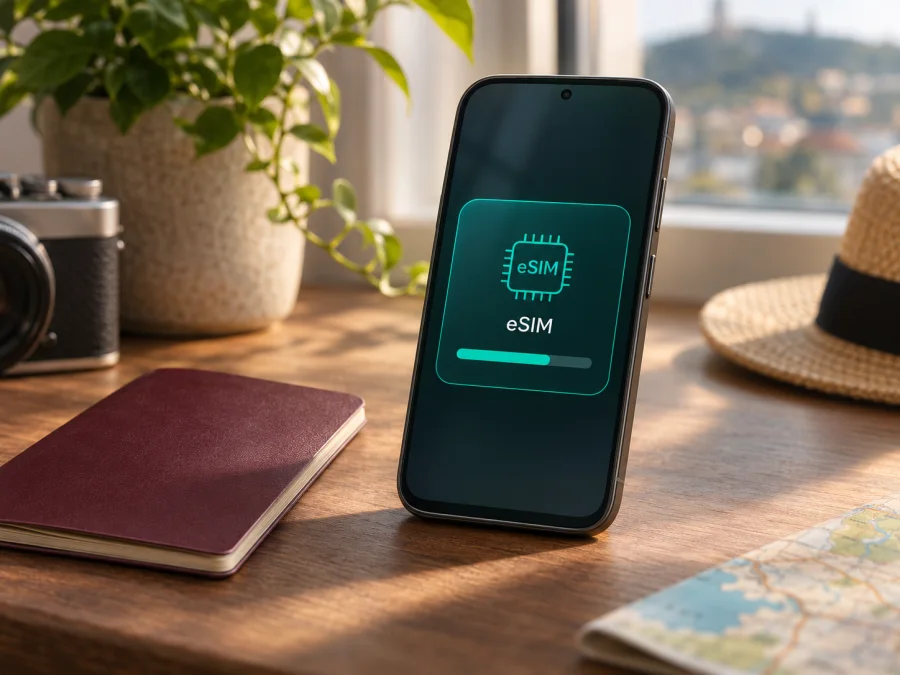
Sony Xperia Ace III 256GB and eSIM: compatibility and setup guide
Short answer: eSIM support cannot be confirmed for a device identified only as Sony Xperia Ace III 256GB. Sony’s Japanese carrier listings and carrier documentation describe 64GB Xperia Ace III variants, not a verified 256GB configuration. They also show that eSIM capability differs by carrier model: the au/UQ mobile SOG08 and Y!mobile A203SO support eSIM, while NTT Docomo’s SO-53C is listed with nano-SIM only. Treat “256GB” as an unverified seller or listing detail until you match the phone’s model number and storage in its own settings and documentation. Do not buy a travel eSIM on the strength of the family name alone.
Does Sony Xperia Ace III 256GB support eSIM?
There is no single safe yes-or-no answer for the exact name provided. Official product information currently available for the Japanese Xperia Ace III family identifies several carrier variants and lists 64GB internal storage. Sony’s specification page for the SOG08 gives “nanoSIM/eSIM”; NTT Docomo’s specification page for SO-53C lists nanoSIM and no dual-SIM configuration. Y!mobile’s A203SO product information lists “nanoSIM / eSIM” and its user manual explains how to download an eSIM profile.
The SO-53C is the Docomo version; SOG08 is the au/UQ mobile version; A203SO is the Y!mobile version. Their network bands, software menus, SIM configuration, and possible network lock can differ. Importing a phone does not turn a nano-SIM-only variant into an eSIM model.
The requested 256GB capacity is a separate uncertainty. Official listings located for these Xperia Ace III variants state 64GB built-in storage, with microSD expansion listed separately. A memory card adds storage for files; it does not change the phone’s built-in capacity or eSIM hardware. A marketplace title may combine an incorrect capacity, an included memory card, or a seller’s own description. Check the device itself before relying on it. If Settings → About phone shows a different model code or storage capacity, use the official documentation for that exact code and sales market.
| Check | What is documented | What it means for this listing |
|---|---|---|
| Product name | Xperia Ace III family, sold under carrier model codes in Japan | The family name alone does not identify the SIM configuration |
| Built-in storage | Official carrier product listings reviewed show 64GB | 256GB is not confirmed as an official built-in variant |
| SOG08 (au/UQ mobile) | nanoSIM and eSIM | eSIM is documented for this carrier variant; verify your exact handset and unlock status |
| A203SO (Y!mobile) | nanoSIM and eSIM | eSIM is documented for this carrier variant; menus may vary with Android version |
| SO-53C (NTT Docomo) | nanoSIM only; no dual-SIM configuration listed | Do not expect to add a travel eSIM to this variant |
| “Sony Xperia Ace III 256GB” without a model code | No exact match established from the official listings above | Compatibility remains unverified until you check the phone itself |
The finding is specific to the official Japanese variants listed above. It does not establish the identity or eSIM capability of every device sold under a similar name in another market, nor does it authenticate a particular 256GB listing. For a purchase decision, ask the seller for the model code shown in the phone’s settings, a photo of the SIM settings screen, and confirmation of built-in storage. Then compare those details with the manufacturer or carrier information for that exact model.
Check the phone before choosing a travel plan
Use the phone in your hand rather than a shop title or a generic compatibility list. These checks can help distinguish an eSIM-capable version from a nano-SIM-only Xperia Ace III:
- Find the model number. Open Settings → About phone and record the model name/number. Look for codes such as SOG08, A203SO, or SO-53C. If the code is different, do not assume one of these variants’ SIM capabilities applies.
- Look for the eSIM controls. On the A203SO manual’s Android interface, the route is Settings → Network & internet → SIM, then add/download a SIM. Depending on the installed Android version and whether a SIM profile is already present, the control may be called “Add SIM,” “Download a SIM,” or appear as a plus sign. A visible option is useful evidence; a missing option should prompt a check of model code, software, and carrier restrictions.
- Check for an EID. Open the dialler and enter
*#06#, or check the device’s SIM status/about screens if available. An EID (eSIM Identifier) is a long identifier associated with eSIM hardware. Its presence is a positive clue, but still confirm the exact model and whether eSIM is enabled for that regional/carrier variant. If no EID appears, that does not by itself diagnose whether the menu is hidden or the hardware is absent; ask the seller or carrier to confirm the model. - Confirm the phone is not network-locked. A carrier may restrict which profiles or networks the phone can use. Check the unlock status with the original seller or operator. eSIM hardware alone does not guarantee that a different provider’s profile can be installed or used.
- Check the software and destination network. Install available system updates before travel. For the country you will visit, confirm that the chosen data plan supports the destination and that the handset’s supported cellular bands and network conditions are suitable. eSIM compatibility and radio-network compatibility are separate checks.
Before you buy a travel eSIM
A travel eSIM is a digital SIM profile that can provide mobile data without inserting another physical card. Before selecting one for Sony Xperia Ace III 256GB, complete this checklist:
- [ ] The model code in Settings matches a variant documented as eSIM-capable, or the handset itself shows an eSIM add/download option.
- [ ] The seller or original carrier confirms that the phone is unlocked for the eSIM you intend to use.
- [ ] You have reliable Wi-Fi or another internet connection during installation; the profile must be downloaded before it can connect.
- [ ] The destination or region is included in the plan’s coverage details, and the data amount and validity fit your trip.
- [ ] You understand when validity begins. Review the specific plan conditions in the app or website before confirming.
- [ ] You know whether the plan is data-only. Unless the plan terms explicitly say otherwise, do not expect it to provide a regular phone number, SMS, or standard voice calls.
- [ ] You can keep access to the QR code or installation instructions on another screen if the phone cannot scan its own display.
If any model or capacity detail remains unclear, pause before purchase and request written confirmation from the seller. If the phone is SO-53C or lacks eSIM controls, use a compatible phone or check whether a physical SIM option is suitable for your trip. Do not try to solve a hardware limitation by repeatedly scanning a QR code.
For a quick cross-check, check your device’s eSIM compatibility. That check supplements rather than replaces the model-code and settings checks above, especially when the seller describes a 256GB configuration that is not established by official listings.
How to add and activate an eSIM on a compatible Xperia Ace III
The steps below apply only if your exact variant supports eSIM and is not restricted by a carrier lock. Labels can vary with Android version and carrier software. Keep Wi-Fi connected, make sure the plan is intended for your destination, and do not delete a downloaded profile as a troubleshooting shortcut: some QR codes can only be used once.
- Check compatibility first. Confirm the model code and the eSIM option in Settings.
- Obtain the plan and its installation details. Follow the provider’s setup instructions. Have the QR code or activation details ready, and check whether installation and activation happen immediately or can be scheduled.
- Open SIM settings. On Y!mobile’s A203SO instructions, go to Settings → Network & internet → SIM. Select the plus/add option or “Download a SIM.” Other compatible variants may use slightly different wording.
- Start the download. Choose the option to add or download an eSIM, then select “Next” or the corresponding on-screen action. Allow the camera to scan the QR code, or follow the provider’s manual entry steps if offered.
- Confirm the profile. Review the displayed plan or profile details and approve the download. Enter a confirmation code only if the provider supplied one. Wait until Android reports that the eSIM has been added.
- Turn on the eSIM. Select the newly downloaded profile and enable “Use SIM” or the equivalent switch. If Android asks whether to use it for mobile data, choose the travel eSIM when you are ready to use the plan.
- Set data preferences. In SIM settings, select the travel eSIM as the mobile-data line. Keep calls and texts on your regular SIM if you need them and if your home operator’s roaming terms are acceptable. Disable data roaming on the home SIM if you want to avoid unintended roaming charges.
- Use data roaming only when required. Some travel profiles need data roaming enabled on that eSIM to connect to a partner network. Follow the plan’s instructions; enabling roaming for the travel profile does not itself change the plan’s stated allowance, but always check the applicable terms. Avoid switching roaming on for the home SIM unless you intend to use its roaming service.
- Test the connection. Once in the covered destination, turn off Wi-Fi briefly, confirm mobile data is assigned to the travel eSIM, and open a simple web page. Initial registration may take a few minutes. Restore Wi-Fi after the test if useful.
For fuller walkthroughs, see the Android eSIM installation instructions or the iOS eSIM installation instructions. The iOS guide is included as a general reference for a companion device; Xperia Ace III runs Android, so use the Android guide for its setup.
Using a travel eSIM for mobile data
A travel eSIM is a digital SIM profile for mobile data without another physical card. Once a compatible profile is installed, you can leave it switched off until the trip if the plan instructions allow. Before departure, label the profile something clear such as “Travel data” so it is easy to recognize. Keep your usual number’s SIM active only if you need it, and understand that calls, messages, and voicemail on that line may follow your home operator’s roaming rules.
At the destination, set the travel eSIM as the mobile-data SIM and enable data roaming for that profile only if the provider’s instructions require it. The phone may show the local partner network name instead of the name of the travel plan. That is normal for many roaming-based data services; the exact network depends on local availability and plan terms. A plan’s country or regional coverage does not promise the same reception in every building or rural area.
Kaspersky eSIM Store is an app and website where travelers can choose, arrange, and activate an eSIM with a mobile-data plan for an overseas trip. Review the destination, data amount, validity, and activation terms shown for the selected plan. A travel eSIM is generally intended for data; use internet messaging and calling apps for communications if your plan does not include a phone number or conventional calls and texts.
Common problems and checks
There is no “Add eSIM” or “Download a SIM” option
First confirm the exact model code. A SO-53C is documented by NTT Docomo with nano-SIM only, whereas SOG08 and A203SO are listed with eSIM. If the code appears to be a compatible variant, update Android, restart the phone, and search Settings for “SIM.” If the option still does not appear, the device’s software, carrier configuration, or seller’s description may not match. Ask the original carrier or seller to confirm eSIM capability before paying for a profile.
The phone does not show an EID
Check the dialler code and SIM-status screens again, making sure the phone is not in a restricted setup state. Then compare the model number with official specifications. An EID is a useful signal but not the only check; a product listing alone is not proof. If official information and the menus disagree, request confirmation from the carrier or manufacturer support using the exact model code.
The QR code will not scan or the download fails
Increase screen brightness on the device showing the QR code, clean the camera lens, and place the code fully inside the camera frame. Keep the phone connected to stable Wi-Fi and confirm that the code belongs to this device and plan. If the QR code has already been used, do not keep retrying or delete the profile. Contact the plan’s support team to ask whether a replacement activation method is available.
The eSIM installs but there is no mobile data
Make sure the profile is switched on and selected for mobile data. Confirm that the destination is covered, airplane mode is off, and the phone has restarted or reconnected to the network. If the provider requires data roaming on the travel profile, enable it for that profile only. Wait a few minutes, then try manual network selection only if the provider recommends it. If the phone is locked, an installation can succeed while network access remains restricted.
Mobile data is using the wrong SIM or the home line incurs charges
Open SIM settings and verify which SIM is selected for mobile data. Turn off automatic data switching if the phone offers that option. Keep the home SIM’s data roaming disabled unless you knowingly intend to use its service. Review the home operator’s roaming policy, since calls and SMS may still be handled by that line even while the travel eSIM carries data.
Signal appears, but apps or websites do not load
Check that mobile data is on, the travel eSIM is the selected data line, and the plan is active in the correct country. Temporarily disable Wi-Fi to test mobile data directly. If the provider supplies APN details, compare them carefully with the phone’s access-point settings; do not invent an APN. Restart the phone and check for a carrier outage or weak local coverage. Contact the plan support team if the account shows an active allowance but data still fails.
A plan was installed on another phone or the profile was deleted
An eSIM profile may be tied to the device or activation code and may not transfer after installation. Check the plan’s terms and ask support before removing or resetting a profile. Keep the activation email and order details accessible until the trip is complete.
FAQ
Is Sony Xperia Ace III 256GB an official model?
The official Japanese carrier specifications reviewed for Xperia Ace III show 64GB internal storage for the documented SOG08, A203SO, and SO-53C versions. They do not verify a 256GB built-in configuration. The name in a seller listing may be inaccurate or may refer to added storage. Check Settings → About phone and the seller’s written specification before treating 256GB as a device variant.
Which Xperia Ace III variants support eSIM?
Sony lists nanoSIM/eSIM for SOG08, and Y!mobile lists nanoSIM/eSIM for A203SO. NTT Docomo lists SO-53C with nanoSIM only. These are carrier-specific Japanese variants; confirm the model code on your handset because the family name does not settle compatibility.
Can I use an eSIM plan if the phone has two SIM options?
Only if one option is an eSIM profile and the phone accepts the provider’s plan. A physical SIM tray or a dual-SIM label does not prove eSIM support. Check for the EID and the add/download eSIM control, then verify the carrier lock and plan’s destination coverage.
Does the travel eSIM replace my regular SIM?
Usually it can be used alongside a physical SIM on an eSIM-capable dual-SIM variant. You choose which line handles mobile data. Keep in mind that calls, SMS, and roaming charges on your regular line remain governed by your home operator.
Will the eSIM provide a phone number?
Do not assume so. Travel data plans are commonly data-only and may not include a regular number, voice service, or SMS. Check the selected plan’s terms. Internet calling and messaging apps can work over the data connection.
What if my Xperia Ace III is the Docomo SO-53C?
The official Docomo specification lists nanoSIM and no dual-SIM configuration. Do not expect to add a travel eSIM to that model based on the SOG08 or A203SO instructions. Check whether a physical SIM option, Wi-Fi, or another confirmed eSIM-capable device better suits the trip.
Final check before your trip
For Sony Xperia Ace III 256GB, verify two separate details before choosing a travel eSIM: the phone’s actual model code and whether “256GB” is its built-in storage or a seller’s description of added capacity. The official listings reviewed identify 64GB versions; they document eSIM for SOG08 and A203SO, and nano-SIM only for SO-53C. If your code or settings differ, treat compatibility as unresolved and confirm it with the seller or carrier.
Once compatibility is established, check that the device is unlocked, select a data plan that covers your destination and trip length, and install it while you have stable internet access. You can browse current eSIM plans and destinations on the Kaspersky eSIM Store website, then review the terms shown for the specific plan before arranging it. If the handset does not show an eSIM option, use a compatible device or another suitable connection method instead of assuming the profile will work.


