Travel connectivity guide
Sony Xperia Ace III eSIM: Compatibility & Setup
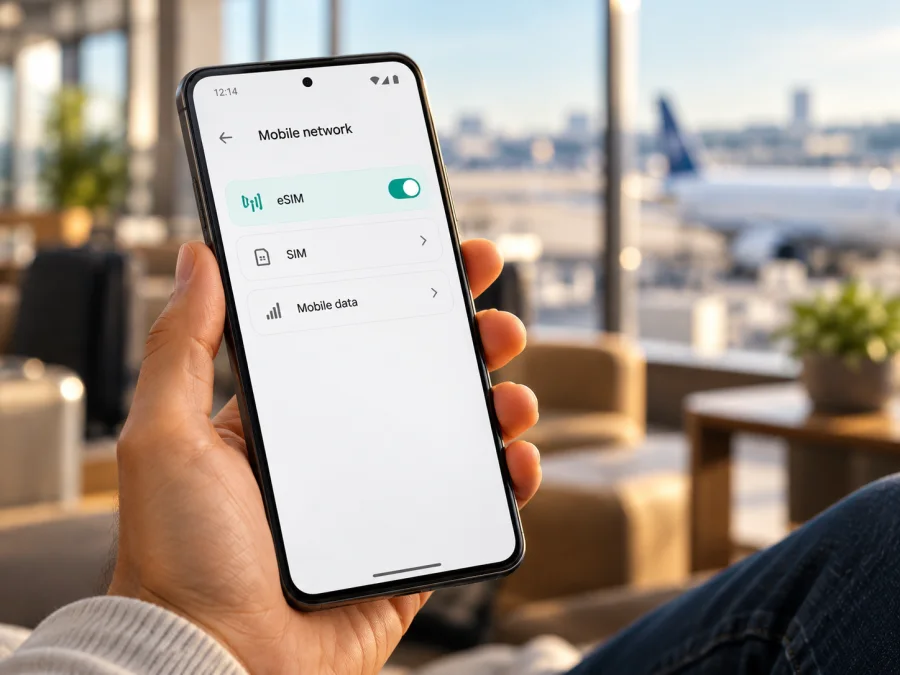
Sony Xperia Ace III eSIM: compatibility and travel setup
Short answer: eSIM support depends on the exact Sony Xperia Ace III variant. Sony’s Japanese specification pages list nanoSIM/eSIM for the au SOG08, while the NTT Docomo SO-53C is listed with nanoSIM only. Y!mobile’s Xperia Ace III, model A203SO, also lists nanoSIM/eSIM. So the model name alone is not enough: identify the model code printed in Settings or on the box before ordering a travel plan. These official specifications describe Japanese carrier-market devices; they do not establish support for every regional or imported unit sold under the Xperia Ace III name.
An eSIM is a digital SIM profile stored in the phone. It can be useful for mobile data abroad, but hardware, software, carrier configuration, and the plan must all allow it. A 5G logo or physical SIM tray does not prove eSIM support.
Xperia Ace III variants at a glance
| Model or market identifier | SIM capability stated in the official specification | What that means for eSIM |
|---|---|---|
| Xperia Ace III SOG08, au (Japan) | nanoSIM/eSIM | eSIM is listed for this specific variant. Check that the unit in your hand is actually SOG08 and is not restricted by its seller or carrier. |
| Xperia Ace III SO-53C, NTT Docomo (Japan) | nanoSIM | Sony’s specification lists a physical nanoSIM, not eSIM. Do not assume an update or a travel plan can add eSIM hardware support. |
| Xperia Ace III A203SO, Y!mobile (Japan) | nanoSIM/eSIM | Y!mobile lists both formats for this carrier model. Confirm the handset is unlocked and able to accept another provider’s profile. |
| Other or imported Xperia Ace III | Not established by the Japanese carrier pages above | Use the exact model number and the device’s own settings. Ask the seller or manufacturer for written confirmation if eSIM is essential. |
For the exact device named in this guide, the safest conclusion is therefore conditional: some official Sony Xperia Ace III variants support eSIM and some do not. If your model is SOG08 or A203SO, official Japanese specifications indicate eSIM capability, subject to carrier lock, software, and plan compatibility. If your phone is SO-53C, the published specification indicates nanoSIM only. For any other model code, treat support as unverified until the handset itself or its manufacturer confirms it.
Check your phone before choosing a plan
Do the checks below on the phone you will take on the trip. Do not rely on a product listing that says only “Xperia Ace III,” a carrier logo in a photograph, or the fact that a SIM tray accepts a card.
- Find the complete model code. Open Settings → About phone and look for Model or Model number. Menu labels vary by Android version. Compare the value with the label on the box or purchase record. The relevant Japanese codes include SOG08, SO-53C, and A203SO. If they differ, investigate the code shown by the phone itself.
- Look for an eSIM or download-SIM option. In Settings, open Network & internet and then SIMs or Mobile network. Look for Add SIM, Download a SIM, Add eSIM, or a similar option. Names and locations vary by carrier software and Android update. A menu item is useful evidence, but an error after selecting it can still indicate that the carrier or software does not permit activation.
- Check for an EID. In Settings → About phone → SIM status (or a similarly named status page), look for an EID, the identifier associated with an embedded SIM. Some Android builds also show identifiers through the dialer’s device-information screen, but not every carrier allows that route. Do not post your EID publicly; share it only with a trusted carrier or support team when they request it.
- Compare the evidence. A displayed EID and a working add-eSIM flow are strong indications that the phone contains eSIM capability. If neither appears, or if the add option is greyed out, treat the phone as not confirmed compatible. The SO-53C specification is nanoSIM-only, so an absent menu on that model is consistent with the published specification.
- Ask about the exact variant and lock status. If the code is unfamiliar, contact the seller or original carrier and ask whether that exact model can download a third-party travel eSIM. Ask whether the phone is network-unlocked. “Dual SIM” by itself is not enough: it can mean two physical SIMs or a physical SIM plus eSIM, depending on the model.
The model code on your actual phone still matters, especially where the same retail name covers carrier-specific variants. Use the checklist below before selecting a plan.
A label such as “unlocked Xperia Ace III” does not replace the model code. In Japan, the retailer or operator code identifies the configuration sold through that channel: SOG08 is the au model, SO-53C is the NTT Docomo model, and A203SO is the Y!mobile model. Their official SIM entries differ, even though the shared product name and many headline specifications look alike. If a listing omits the code, request it before purchase. If the phone is already yours, use the code shown in About phone and check it against the specification for that same carrier variant.
The evidence also has a geographic limit. The cited specifications describe devices for Japanese operator markets; they do not certify an international or imported phone with a different model code. A seller may describe an imported handset using the broad family name, while the actual software and cellular configuration follow another market. Do not infer eSIM availability from the country where the phone is currently used, its language, or the SIM card installed in it. Check the printed model identifier and the live Settings menu. Where those checks disagree, ask Sony or the original carrier rather than relying on a generic compatibility list.
Compatibility checklist
Before paying for a data plan, make sure each statement below is true:
- [ ] The model code on the phone is known and matches the variant you are checking.
- [ ] The exact variant supports eSIM, or Settings shows a functioning option to add or download one.
- [ ] The handset is not locked in a way that blocks the intended travel eSIM.
- [ ] The Android version is current enough for the carrier’s installation process, and the phone can connect to Wi-Fi during setup.
- [ ] The destination and every country on the itinerary are included in the specific plan you are considering.
- [ ] You understand the plan’s data allowance, validity period, activation timing, and any roaming setting it requires.
If any item is uncertain, pause before buying and confirm with the seller, carrier, or travel-eSIM support. A plan cannot turn a nanoSIM-only handset into an eSIM device. Likewise, confirmation that an Ace III has eSIM does not guarantee that every third-party plan is accepted or that a local network will be available everywhere on a route.
For a quick cross-check, check whether your device is compatible. The model code and settings on the phone remain the deciding checks.
What to know about eSIM for a trip
A travel eSIM is most useful when you need mobile data for maps, messages, bookings, ride services, or work while abroad. It can spare you from swapping the home SIM for a local physical card, but it is not automatically a replacement for your regular phone service. Check the terms of the selected plan: travel plans may be data-only and may not provide a regular phone number, voice calling, or SMS. Messaging and internet calls can still work through apps when you have data and the relevant accounts are set up.
Kaspersky eSIM Store is an app and website where travellers can choose, arrange, and activate an eSIM with a mobile-data plan for an international trip. It does not make a particular phone eSIM-compatible. First verify the phone and unlock status, then compare the destination, included countries, data amount, validity, and activation conditions shown for the chosen offer. Store-wide country counts are not a guarantee that one plan covers every stop on your itinerary.
Install and activate eSIM on an eSIM-capable Xperia Ace III
The steps below are a general Android path for a variant that has a working eSIM option. A203SO and SOG08 carrier software can differ, and menu names may change after system updates. Follow the instructions shown by the plan and on the phone. If your variant has no add-eSIM function, these steps cannot enable it.
- Confirm compatibility and unlock status. Check the model number, EID or add-eSIM option, and whether the phone accepts another provider’s profile. Resolve uncertainty before purchasing.
- Prepare a stable internet connection. Connect to Wi-Fi. Keep the phone charged and have the installation instructions or QR code available on another screen or printed page if you need to scan it with the Xperia camera.
- Choose a destination and plan. In Kaspersky eSIM Store’s app or website, select the country or region and review the specific plan’s data allowance, validity, destinations, and activation rules. Use the Android and iOS instructions if you need the general platform flow: Android eSIM installation and iOS eSIM installation. iOS instructions do not apply to the Xperia; they are provided as the store’s companion guide for Apple devices.
- Open SIM settings. On the phone, go to Settings → Network & internet → SIMs or the closest equivalent, then choose Add SIM or Download a SIM. If you cannot find such an option, stop and verify the exact variant rather than repeatedly scanning a code.
- Add the profile. Follow the on-screen provider flow. Depending on the offer, the profile may be installed through the app or by scanning a QR code. If prompted, confirm the download and wait for the phone to finish. Avoid deleting a profile to retry unless the provider confirms that it can be reissued; many activation codes are single-use.
- Name the line. Give the new profile a clear label such as “Travel data” so it is easy to distinguish from your home SIM. Keep your usual line enabled if you still need its number for calls or verification, while checking its roaming conditions with your home operator.
- Set the data line. In SIM settings, choose the travel eSIM for mobile data when you are ready to use it. If the plan requires data roaming on that profile, enable roaming for the travel eSIM only after checking the plan instructions. This is a device setting and does not itself determine the plan price or destination coverage.
- Activate at the right time. Some plans can be prepared before travel; others should be enabled only when you reach the destination. Follow the activation timing displayed for the particular offer. Once there, allow the device a few minutes to register on a supported network.
- Test the connection. Turn Wi-Fi off briefly, confirm the travel line is selected for data, and load a simple web page. If it does not work, restore Wi-Fi and use the troubleshooting checks below before changing or deleting the eSIM.
For a general Android overview, see how to install eSIM on Android; the iOS guide is for iPhones.
When to install and what to keep
Installing a profile and starting its data allowance are not always the same event. Check whether the plan starts at purchase, installation, a chosen date, or first connection. Save the order details and support route, keep the QR code private, and do not assume a deleted profile can be installed again.
Using the travel eSIM after arrival
At your destination, open SIM settings and confirm that the eSIM is enabled and selected for mobile data. If the plan instructions require roaming on the eSIM, switch it on for that line. Keep the home SIM’s mobile data setting as intended, and check which line is active before using data-heavy services. For a multi-country trip, verify that each country is included in your chosen plan; an eSIM profile may stay installed while the plan or its destination coverage changes.
If you rely on incoming calls or verification texts sent to your regular number, keep the home SIM available if your operator permits it and understand any roaming charges. A data-only eSIM does not automatically take over the phone number from the physical SIM. Internet messaging and calling apps can be used over mobile data, but their account and notification settings should be checked before leaving home.
Troubleshooting: eSIM will not install or connect
There is no “Add eSIM” option. Recheck the model code and carrier variant. On the Japanese versions, Sony’s specification lists eSIM for SOG08, while SO-53C is nanoSIM-only; Y!mobile lists eSIM for A203SO. Confirm the Android update and carrier software, restart the phone, and search Settings for “SIM.” If the option remains absent, ask the seller or carrier to confirm the exact device capability. An application or a QR code cannot supply missing eSIM hardware.
The QR code is not recognized. Increase screen brightness on the device showing the code, clean the camera lens, and avoid glare or cropping. Make sure the code belongs to the order you are installing and has not already been used. If available, use the provider’s in-app installation flow or enter activation details manually only when the provider gives them. Do not share a QR code in a public forum.
The profile download fails. Confirm stable Wi-Fi, sufficient battery, correct date and time, and that the phone is not in airplane mode. Restart and retry once. Check whether a previous attempt has already added the profile, and review the order page for its status. If the activation code has been consumed or the error persists, contact the plan support team with the exact error and model code; do not remove a profile that appears partially installed until advised.
The eSIM installs but shows no service. Confirm that the profile is enabled, the selected plan includes the current country, and the phone is unlocked. Check mobile data selection and, if required, data roaming for that eSIM. Toggle airplane mode briefly or restart, then allow time for network registration. If manual network selection is offered, return to automatic selection first; use a specific network only when the plan’s instructions direct you to do so.
The phone connects but data does not load. Check that mobile data is assigned to the travel eSIM, the allowance is available, and the validity period has started. Turn off Wi-Fi temporarily to test mobile data, then check the plan’s APN instructions if any are provided. Review VPN, data-saver, and per-app restrictions as possible causes. Do not change APN values based on an unrelated phone guide.
The home SIM is still using data. Reopen SIM settings and verify the default mobile-data line. Disable data roaming on the home SIM if appropriate for your contract, while leaving the line enabled for functions you still need. Check the status bar and usage counters after the change. The presence of an eSIM does not automatically prevent the physical SIM from using roaming data.
Frequently asked questions
Does every Sony Xperia Ace III support eSIM?
No. Support depends on the model variant. Sony’s Japanese specifications list eSIM for au SOG08 and nanoSIM only for Docomo SO-53C; Y!mobile lists eSIM for A203SO. Verify the code on your phone before ordering.
Does the Xperia Ace III SO-53C support eSIM?
Sony’s official Docomo specification lists nanoSIM for SO-53C, with no eSIM listed. Treat this variant as not eSIM-compatible unless Sony or the carrier provides newer confirmation for your exact unit. An Android update should not be assumed to change a hardware SIM limitation.
Does the Xperia Ace III SOG08 support eSIM?
Sony’s au specification lists nanoSIM/eSIM for SOG08. Confirm that the model code matches and that the device is unlocked and allowed to accept the travel profile you intend to use.
Is an EID enough to prove that my plan will work?
An EID supports the conclusion that the phone has embedded-SIM capability, but it does not prove that the handset is unlocked, that every provider will accept it, or that a plan covers a particular destination. Check all of those separately.
Should I enable data roaming?
Only if the instructions for your selected eSIM require it. If needed, enable roaming on the travel profile and make sure the home SIM is not selected for mobile data unless you intend to use your home operator’s roaming service.
Final check before your trip
The name Sony Xperia Ace III covers carrier variants with different SIM capability. Check the complete model code first: SOG08 and A203SO are listed with eSIM in their respective Japanese carrier specifications, while SO-53C is listed with nanoSIM only. For an imported or unidentified unit, confirm the EID or an available add-eSIM setting and ask the seller about unlock status before paying for a plan.
Once compatibility is confirmed, compare the destination list, data amount, validity, and activation conditions for the specific travel eSIM. Kaspersky eSIM Store’s website and app let you choose, arrange, and activate an eSIM with a data plan for an international trip; check the current offer details there rather than assuming a particular country tariff. Install over Wi-Fi when appropriate, select the intended line for mobile data, and test the connection after arrival. That sequence keeps the device check, plan choice, and activation timing clear before you travel.


