Travel connectivity guide
Vivo X200 eSIM compatibility and setup
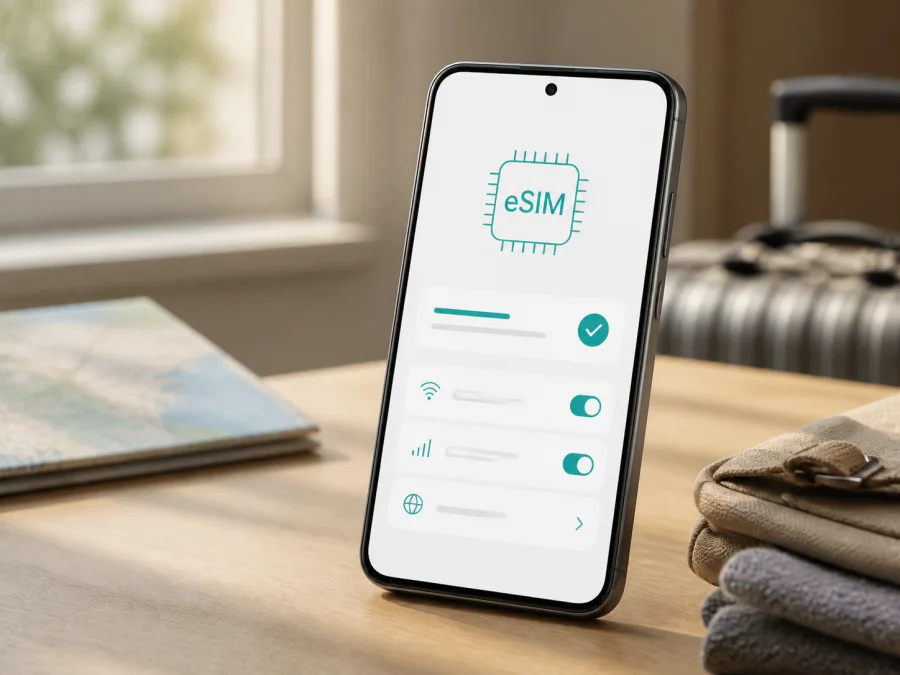
Vivo X200 eSIM: compatibility, verification, and setup
The short answer is: Vivo X200 eSIM support depends on the regional version of the phone. The current official vivo specification for India lists two nano-SIMs or one nano-SIM plus eSIM. At the same time, the official specifications for several other markets, including the global, China, and Kazakhstan pages, list two nano-SIMs without an eSIM option. That difference matters more than the model name on the box.
Do not treat every Vivo X200 as eSIM-compatible. An India-market device whose settings show an EID and an option to add eSIM can use a compatible travel profile; a two-physical-SIM regional version may not. Check the handset, software, and sales region before payment.
Quick compatibility answer for Vivo X200
The manufacturer’s current regional specifications lead to a practical conclusion:
| Question | Answer for Vivo X200 |
|---|---|
| Is eSIM supported in every Vivo X200? | No. Support is regional and must be checked on the individual phone. |
| Which official listing confirms eSIM? | The vivo India specification lists “2 nano SIMs (SIM1 + SIM2) or 1 nano SIM + eSIM.” |
| What do some other official listings show? | Global, China, and Kazakhstan specifications list two nano-SIMs and do not list eSIM. |
| What proves that a particular phone is ready? | An EID and an available Add eSIM or Download a SIM option in Settings. |
| Can 5G alone prove eSIM support? | No. 5G describes network capability; it does not confirm an embedded SIM. |
An imported or second-hand listing that says “Vivo X200” is not enough. Storage, color, RAM, and camera specifications do not determine eSIM support; the decisive details are region, firmware, carrier restrictions, and phone menus.
What the regional difference means
Vivo X200 regional pages can show different network bands, software, SIM arrangements, and features. India lists two nano-SIMs or one nano-SIM plus eSIM; global, China, and Kazakhstan listings show two nano-SIMs. The same retail name can hide a different model code, SIM tray, modem, or firmware. If the specification and menus disagree, use the phone’s EID/settings evidence and ask the seller or carrier to confirm the model code. Do not purchase a non-refundable plan because another Vivo X200 supports eSIM.
Check your Vivo X200 before purchase {#kesim-device-compatibility}
Check the device before you select a travel eSIM. The check takes only a few minutes and can prevent the most common problem: receiving a QR code for a profile that the phone cannot add.
1. Find the EID
Search Settings for EID. Depending on Funtouch OS and region, it may be under About phone, Status, SIM status, or Status information. It is different from the IMEI.
If the search returns an EID, keep the full number private. If there is no EID anywhere, this is a strong sign that this configuration cannot use eSIM; it is not a reason to keep trying QR codes.
2. Look for the eSIM command
Open Settings > Mobile network, Network & internet, or the equivalent SIM-management page. Look for Add eSIM, Add mobile plan, Download a SIM, or a plus sign next to the SIM list. The exact label can vary after a regional firmware update.
An option that opens a QR-code scanner is useful evidence. A menu showing only two physical slots, together with no EID, points to a dual-nano-SIM configuration. Do not confuse Mobile data, Dual SIM, or SIM toolkit with eSIM support.
3. Check software and lock status
Install official updates over Wi-Fi, restart, and repeat the checks. An update may correct a missing menu, but should not convert two-SIM hardware into eSIM hardware.
Ask the original carrier whether the device is unlocked. A lock can prevent an eSIM-capable phone from accepting another provider’s profile.
4. Match the plan to the trip
Before payment, confirm the covered country or region, start condition, validity, data allowance, top-up and refund rules. Also check whether it is data-only: travel eSIMs generally provide mobile internet rather than a new number, voice calling, or SMS unless the plan says otherwise.
Compatibility checklist
Use this checklist for the exact Vivo X200:
- [ ] The phone’s model code and original sales region are known.
- [ ] The relevant official vivo specification has been checked.
- [ ] An EID is visible in Settings.
- [ ] The mobile-network menu offers Add eSIM or an equivalent command.
- [ ] The phone is not carrier-locked.
- [ ] Android and Funtouch OS are up to date.
- [ ] Wi-Fi or another working internet connection is available for installation.
- [ ] The plan covers every country or region on the itinerary.
- [ ] The data allowance and validity period fit the trip.
- [ ] The primary SIM’s roaming setting has been considered so that it does not create unexpected charges.
If either the EID or add-eSIM command is missing, pause the purchase and ask vivo, the seller, or carrier about the model code. If it is a two-physical-SIM version, use a physical SIM or another device.
Check your device before selecting a travel eSIM.
How to install an eSIM on Vivo X200
Installation needs a compatible phone, a valid profile, and internet access. Display the QR code on another screen or use manual details.
For broader guidance, see the Android installation instructions and iOS installation instructions. The steps below describe Android menus for Vivo X200; labels can vary by Funtouch OS release.
1. Connect to the internet
Connect Vivo X200 to reliable Wi-Fi and keep it charged. Installation downloads a carrier profile, so an unstable connection can interrupt it.
2. Open SIM management
Open Settings > Mobile network, Network & internet, or SIM card & mobile network. Select Add eSIM, Add mobile plan, or the matching plus command. If absent, repeat the compatibility check instead of scanning.
3. Scan or enter the profile details
Choose QR-code installation and scan the code on another screen. Keep it private. If manual details are supplied, use them instead of editing the code.
4. Download the profile
Review the plan information and confirm the download. Wait for completion without switching off, leaving Wi-Fi, or scanning the code elsewhere.
5. Name the line
Give the profile a label such as Travel data or the destination name. This only helps you select the correct line; keep the primary SIM clearly separate.
6. Select mobile data
When asked which SIM provides data, select the eSIM when ready. You can install it before departure and leave it off until arrival if allowed; installation and billing do not always start together.
7. Enable data roaming when required
Some profiles need Data roaming because they use partner networks. Enable it on the travel line when required and keep it off on the primary line to avoid charges.
8. Test the connection
Turn off Wi-Fi briefly and open a webpage or messaging app. Confirm that the data indicator points to the travel eSIM. A destination-limited plan may not connect at home, which does not automatically mean installation failed.
Once these checks pass, you can choose an eSIM plan for your destination through Kaspersky eSIM Store. It is an app and website that helps you select, arrange, and activate an eSIM with a suitable mobile-internet plan for an overseas trip; it is not a mobile operator, network owner, or mobile-internet provider.
Activation and mobile data during a trip
Installation puts the profile on the phone. Activation and data use depend on the plan and network; some start at first registration, others at installation. Read the conditions first.
Scenario 1: install before departure
Over home Wi-Fi, verify the EID, add and label the profile, and confirm it is present. Leave it off until arrival if allowed; keep QR/manual details private.
Scenario 2: activate after landing
If you did not install in advance, use airport Wi-Fi or another trusted connection. Add it, select it for data, and enable roaming if required; registration can take minutes.
Scenario 3: keep the primary SIM for calls
You can often leave the physical SIM active for calls and messages while assigning data to eSIM. Disable automatic switching; for data-only service, use messaging and calling apps rather than expecting a new number.
Scenario 4: travel through several countries
Confirm one plan covers the route. A single-country plan may stop at a border even though the profile remains installed; check each destination and validity.
Manage data carefully
Use Android’s data-usage screen for the travel line. Video, backup, updates, maps, and hotspot use consume data quickly, so restrict background data and monitor allowance and validity.
Common problems and what to check
There is no Add eSIM option
Check the EID first. If it is missing and the phone has two nano-SIM slots, it may be a non-eSIM region. If it exists, update, restart, and search Settings for “eSIM” or “mobile plan”; if absent, ask vivo or the carrier about the model code.
The QR code will not scan
Increase brightness, remove glare, clean the lens, and hold the phone steady. If scanning fails, use the supplied manual details and keep the code private.
The profile will not download
Reconnect to Wi-Fi, check automatic date and time, and ensure free storage. Confirm that the code belongs to this purchase; a profile on another phone may not transfer.
The eSIM is installed but there is no service
Confirm that the eSIM is on and selected for data. Check destination, allowed network, validity, and roaming requirements, then toggle airplane mode or restart. Use automatic network selection unless specified otherwise.
The phone uses the wrong SIM for data
Set the travel eSIM as the data line and disable automatic switching. Turn off Wi-Fi and check the status bar; an installed profile can remain unused if the primary line is selected.
Data works but disappears quickly
Review Android data usage by SIM. Restrict background activity, cloud backup, updates, and hotspot use, and check the plan’s speed policy. The plan’s data and validity control usage, not phone storage.
Calls or SMS do not work
Many travel eSIM plans here are mobile-internet only and do not include a number, voice, or SMS. Keep the primary SIM if acceptable, or use internet calling and messaging apps.
The phone is locked or the profile is deleted
A carrier-locked Vivo X200 may reject another provider’s profile; ask the original carrier about unlocking. Do not delete a working eSIM unless reinstallation is confirmed.
FAQ
Does Vivo X200 support eSIM?
Some regional versions do. India’s official specification lists one nano-SIM plus eSIM, while global, China, and Kazakhstan listings show two nano-SIMs. Check the exact phone for an EID and Add eSIM command.
Does a 5G Vivo X200 automatically support eSIM?
No. 5G and eSIM are separate; network bands cannot replace an EID and settings check.
Can I add eSIM to a China-market Vivo X200 with an update?
Do not assume so. The current official China specification lists two nano-SIMs, not eSIM. Confirm the model code and hardware with vivo; an update is not guaranteed to add a regionally absent feature.
Can I use an eSIM and a physical SIM together?
On the configuration that supports one nano-SIM plus eSIM, vivo describes dual-SIM dual-standby use. Active-line behavior still depends on firmware and carrier.
Should I install the eSIM before leaving home?
Usually, yes, over reliable Wi-Fi. Whether to turn it on immediately depends on the plan’s validity start; keep primary-line roaming off if unsure.
Does Kaspersky eSIM Store provide a phone number?
Not by default. Kaspersky eSIM Store is an app and website for selecting, arranging, and activating an eSIM with a suitable mobile-internet plan for an overseas trip. It is generally data-only.
Is Kaspersky eSIM Store a mobile operator or VPN?
No. It is not a mobile operator, network owner, mobile-internet provider, VPN, or bypass tool. It helps users prepare an eSIM and select a plan for a trip.
Can I move the eSIM to another phone later?
Do not count on it. Transfer and reinstallation depend on the profile and plan; check conditions before deleting it or changing phones.
Final Vivo X200 check before a trip
Use this final block before purchasing or installing a travel eSIM:
- Confirm that this exact Vivo X200 has an EID.
- Confirm that Settings offers Add eSIM or an equivalent download command.
- Compare the model code and sales region with the official regional specification.
- Confirm that the device is unlocked and running current software.
- Confirm that the plan covers every destination and that its validity, allowance, activation rule, and data-only conditions fit.
- Install over Wi-Fi, then select the travel eSIM for mobile data only when you are ready to use it.
- Enable data roaming on the travel eSIM when required, while protecting the primary SIM from accidental roaming.
If the EID or Add eSIM check fails, treat this Vivo X200 as incompatible until the manufacturer, seller, or carrier confirms otherwise. 5G, a dual-SIM label, or another owner’s setup cannot override your phone’s evidence. If the checks pass, Kaspersky eSIM Store can help you select, arrange, and activate an eSIM with a suitable tariff for mobile internet during an overseas trip. Review the plan, keep the QR code private, and test the correct data line after arrival.


