Travel connectivity guide
Vivo X200 Pro 256GB eSIM: Compatibility & Setup
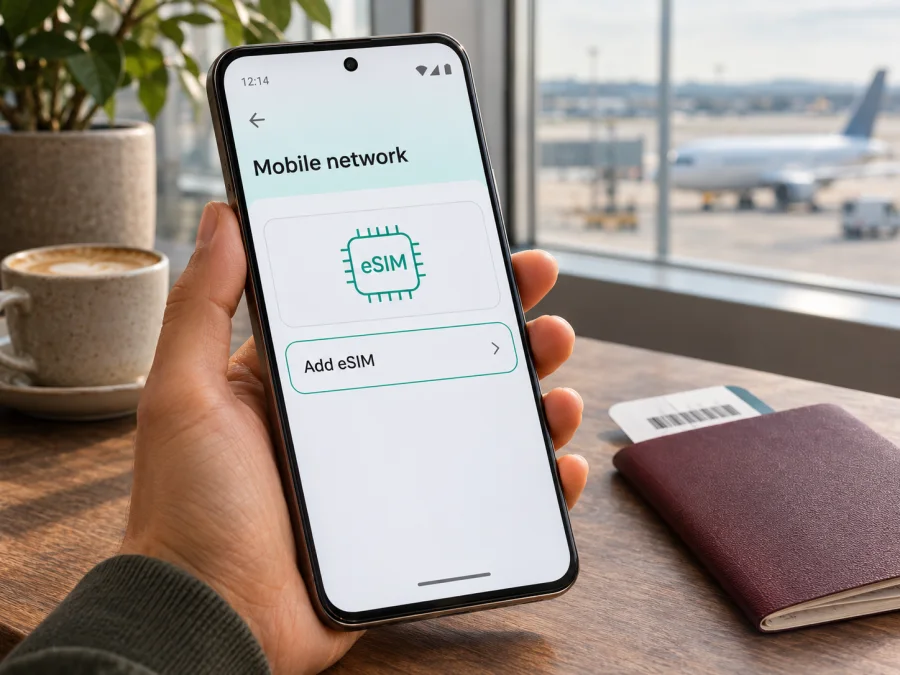
Vivo X200 Pro 256GB eSIM: compatibility and setup guide
The short answer
The Vivo X200 Pro 256GB cannot be confirmed as eSIM-compatible from the storage label alone. Vivo’s official Spanish specifications for the X200 Pro list eSIM as supported, but that page describes a 16GB + 512GB configuration. Vivo India’s official specification lists two nano-SIM slots and does not list eSIM; it also lists a 16GB + 512GB configuration. Vivo’s English global specification page likewise describes a 16GB + 512GB model and two physical SIM slots, without an eSIM field. None of these pages verifies an exact 256GB version.
That regional difference matters: “Vivo X200 Pro” is a product family name, while a phone sold under that name may have different hardware, software, or network provisioning depending on its market. Treat eSIM support on your particular 256GB handset as unconfirmed until you find an EID or an Add eSIM option on the phone itself. If you are considering a purchase, ask the seller for the exact model code and market variant, then request a live demonstration of the eSIM menu or check the device before the return period ends.
An EID is a unique identifier associated with the phone’s embedded SIM hardware. Finding an EID is a strong sign that the device can store an eSIM profile, but it does not prove that the handset is unlocked or that every eSIM provider’s profile will work. You must also check that the seller or original carrier has not restricted the phone, and that the eSIM plan is intended for your travel destination.
What the official specifications establish
| Item | What can be confirmed | What it means for the 256GB version |
|---|---|---|
| Product name on the request | Vivo X200 Pro 256GB | The storage detail is retained, but it is not enough to identify a regional model code. |
| eSIM on Vivo Spain’s X200 Pro page | Listed as supported | Positive evidence for the Spanish-market X200 Pro described on that page; the listed storage configuration is 512GB. |
| SIM details on Vivo India’s X200 Pro page | Two nano-SIM slots; no eSIM field is listed | The page does not confirm eSIM for that market. Silence on the spec page should not be treated as proof that every unit lacks it. |
| SIM details on Vivo’s English global X200 Pro page | Two nano-SIM slots; no eSIM field is listed | The global page does not establish eSIM for all regions, and it lists a 512GB model. |
| Exact Vivo X200 Pro 256GB configuration | Not verified in the manufacturer pages reviewed | Check the actual handset and its full model number instead of assuming support from another storage or regional version. |
The manufacturer pages above were checked on 3 November 2026. Vivo’s Spanish specification explicitly says eSIM is supported. The India and English global specification pages list two nano-SIM slots but do not state eSIM support. These sources describe different market pages and do not identify every retail SKU, so they cannot settle the status of an unspecified 256GB handset.
Why regional and carrier versions can differ
Manufacturers may sell phones with the same family name in multiple countries. Those versions can differ in SIM hardware, supported network bands, preinstalled software, certifications, and features enabled by a regional firmware build. A specification page for one country therefore answers a question about that market’s listed model; it is not a universal guarantee for an imported device.
A carrier lock is a separate issue from eSIM hardware. A phone can have an EID and an Add eSIM menu yet reject a profile because the original carrier has restricted it. Conversely, a dual-physical-SIM tray does not on its own prove that eSIM is impossible: the software and embedded hardware need to be checked. If the device came from a mobile carrier, ask whether it is unlocked for other providers and whether an eSIM profile from a different provider can be installed.
Check the Vivo X200 Pro 256GB yourself
Perform these checks before selecting or paying for a travel eSIM. Menu wording may vary with the device language, Funtouch OS version, and regional software.
1. Look for an EID
Open the Phone app and enter *#06#. On devices that display it, the information panel includes an EID alongside identifiers such as IMEI. You can also look in Settings for About phone, Status, or SIM status; the exact location varies. An EID is typically a long identifier of 32 digits. Do not post a screenshot or share the full EID publicly; it is a device identifier, not a compatibility badge to put in a listing.
If the panel shows an EID, note that this confirms the presence of eSIM-related hardware, not an unlocked state or a guaranteed successful activation. If no EID appears, continue with the settings check and confirm the exact model code with Vivo or the seller. Some phones present identifiers differently, so one missing screen is not enough to diagnose the device.
2. Check the SIM settings
Open Settings and search for “eSIM” or “SIM”. Look under Network & internet, Mobile network, or SIM cards and mobile networks for an option such as Add eSIM, Download a SIM, or Add mobile plan. On Vivo software the wording and nesting can differ by release and market. The presence of an add option is encouraging, but do not complete an installation with an unknown profile just to test it.
If the setting is missing, connect to Wi-Fi, install available official system updates, restart the phone, and search again. If it is still absent, ask Vivo support to confirm eSIM capability against the full model code and region. Avoid unlocking the bootloader, flashing a different region’s firmware, or using unofficial modifications to expose a menu: these steps do not reliably add the required hardware or guarantee network registration.
3. Confirm the variant and unlock status
Find the full model number in Settings → About phone and compare it with the label on the box or purchase documentation. Ask the seller which country’s version it is and whether it has been carrier-unlocked. If possible, test a SIM from a different provider before travel. A successful test is a useful indication of an unlocked device, although it does not replace the seller or carrier’s explicit confirmation.
Use this checklist before buying a plan:
- [ ] The full model code and sales region are known.
- [ ] The phone displays an EID or an Add eSIM option.
- [ ] The device is updated and can connect to Wi-Fi for profile installation.
- [ ] The handset is not locked to a carrier that blocks other providers.
- [ ] The selected eSIM plan covers the destination and the dates of the trip.
- [ ] You understand whether the plan starts on installation, activation, or first network use; check its own terms.
- [ ] You know whether data roaming must be enabled for that eSIM profile.
Check whether your device is compatible before proceeding. A model-family list is a starting point; the EID and SIM settings on the particular handset are more relevant when regional versions differ.
Install and activate an eSIM on Android
Vivo X200 Pro runs Android-based Funtouch OS on the official regional specification pages reviewed. The menu labels are not guaranteed to match Samsung-specific screenshots in a general Android guide, but the underlying flow is similar on Android devices that support eSIM. Keep the phone connected to reliable Wi-Fi, and have the QR code or activation details available on another screen or printed page before starting.
- Confirm support and unlock status. Check for an EID and an Add eSIM setting, and confirm that the handset accepts profiles from other providers.
- Choose a plan for the trip. Check the destination, data allowance, validity period, and any conditions that affect when the plan begins. Make sure the plan is for mobile data if you need internet rather than a regular phone number.
- Open mobile network settings. Go to Settings and open the SIM or mobile network section. Select Add eSIM or the closest equivalent.
- Scan the QR code. Choose the QR-code option and scan the code supplied for your plan. If scanning is not available, use manual activation details only when the provider supplies them.
- Download the profile. Follow the on-screen prompts and wait for the profile to finish installing. Keep the Wi-Fi connection active until the phone confirms that setup is complete.
- Label the profile. Give it a clear name such as “Travel data” so you can distinguish it from your everyday SIM.
- Choose the data SIM. In the SIM settings, select the travel eSIM for mobile data when you are ready to use it. Keep calls and texts assigned to your usual line if that is what you want.
- Set roaming for the correct line. Some travel eSIM profiles require data roaming to be enabled on that profile. This setting is separate for each SIM; follow the plan’s instructions and do not turn it on for your home SIM unless you intend to use its roaming service.
- Check the connection. When you reach the destination and the plan is valid, allow a few minutes for network registration. Confirm that mobile data is on, the travel eSIM is enabled, the correct line is selected for data, and airplane mode is off.
For the Kaspersky eSIM Store’s Android setup overview, see the Android installation instructions. Those illustrated steps are written for Samsung and may not use the same Vivo menu names, so follow the labels displayed on your phone. The iOS installation instructions are for Apple devices and are not the setup path for Vivo; they are included for readers comparing instructions across devices.
Installing a profile and using a plan are related but distinct steps. You can install a travel eSIM while at home on Wi-Fi, then select it for data when you arrive, if the plan’s conditions allow that sequence. Do not assume the validity period begins at the same moment for every plan: read the activation and validity terms on the plan page or in the confirmation. Once installed, do not delete the eSIM to troubleshoot unless the provider tells you to; some profiles cannot be installed again after removal.
Using a travel eSIM for mobile data
Two practical trip scenarios
- A short city break: install the profile at home over Wi-Fi, then select it for mobile data after arrival. Check the plan’s validity and data allowance before relying on it for maps, ride-hailing, and messaging.
- A multi-country itinerary: confirm that the coverage area includes each stop. If it does, keep the same travel profile available and check the plan terms before crossing a border; do not assume one country’s package automatically applies elsewhere.
Kaspersky eSIM Store is an app and website where travelers can choose, arrange, and activate an eSIM with a mobile-data plan for an international trip. It is a place to review available destination options and plan terms; it is not the mobile operator or the owner of the local network. Browse the Kaspersky eSIM Store to check currently available destinations and plan conditions. Availability and terms can change, so review the current details for your route before purchase.
Troubleshooting common problems
There is no Add eSIM option
Confirm the full model code and market version first. Install official system updates, restart the phone, and search Settings again. If the menu is still absent, contact Vivo support or the seller with the model code and ask specifically whether that region’s version has eSIM hardware. A menu missing from one regional manual cannot establish the exact status of another unit.
The QR code will not scan or the profile will not download
Use a stable Wi-Fi connection, raise screen brightness on the device displaying the QR code, and make sure the code is not cropped or already used. Check that the phone’s camera can focus and that the activation details have not expired. If the QR code is displayed on the same phone, use another screen or the provider’s manual entry method if offered. Do not repeatedly delete and rescan a profile; ask the provider whether the activation code can be reused.
The eSIM is installed but there is no service
Check that the eSIM profile is enabled and selected for mobile data. Confirm you are in a country covered by the plan and that its validity has started. Turn airplane mode on briefly and then off, or restart the phone. If required by the plan, enable data roaming for the travel eSIM. Leave roaming disabled on your home SIM if you want to avoid using its data allowance abroad. If the phone remains offline, check the plan’s APN instructions and contact the service’s support with the error message, destination, and device model.
The phone says the profile cannot be added
An EID does not remove carrier restrictions. Verify that the phone is unlocked and that the provider accepts the model and country variant. Check whether the profile is already installed, whether the activation code is valid, and whether the device has a stable internet connection. If the device is managed by an employer or carrier, an administrator or carrier policy may prevent adding a profile.
Mobile data works, but the home SIM is using roaming
Open SIM settings and inspect which line is selected for mobile data. Disable data roaming on the home SIM, and make sure automatic data switching is off if your software offers that setting. Calls and texts on the home SIM may still incur charges according to your carrier’s terms; using a travel eSIM for data does not change your home plan’s pricing.
The connection is slow or intermittent
Check signal strength and try again in a different location. Confirm the plan has remaining data and that the phone is using the intended SIM. A temporary network change or local congestion can affect performance. If the provider’s plan allows manual network selection, follow its instructions; changing network settings without guidance may make service less reliable. Verify APN details only against the plan’s own information.
Frequently asked questions
Does Vivo X200 Pro 256GB support eSIM?
It cannot be confirmed for every 256GB unit from the official pages reviewed. Vivo Spain lists eSIM support for its X200 Pro page, while Vivo India and the English global page list two nano-SIM slots without an eSIM entry; those pages show 512GB configurations. Check the exact phone for an EID or Add eSIM option and confirm its model code and sales region.
If my Vivo shows an EID, can I use any travel eSIM?
Not automatically. The EID indicates eSIM hardware, but the phone must also be unlocked, the profile must be accepted by its software, and the plan must cover your destination. Check those conditions before paying.
Can I keep my usual SIM active while using a travel eSIM?
Often a compatible dual-SIM phone can keep a physical SIM available while an eSIM handles mobile data. The exact combinations depend on the regional handset, operating system, and carrier. Select the intended data SIM and review your home carrier’s roaming terms.
Does a data eSIM include calls and text messages?
A data-only plan does not include a standard phone number, voice calls, or SMS unless its terms explicitly say otherwise. You can use messaging and calling apps over mobile data where those apps and services are available.
Should I install the eSIM before travelling?
You can install it in advance if the plan’s instructions allow it and you have a reliable internet connection. Check when validity begins, and leave the correct profile selected for data only when you are ready to use it. Keep the installation details until the profile is working.
Can I move the eSIM to another phone later?
Do not assume you can. Some profiles are bound to the device or cannot be reinstalled after removal. Check the plan’s transfer and reinstallation rules before deleting a working eSIM or changing phones.
Before your next trip
For the Vivo X200 Pro 256GB, treat eSIM compatibility as device-specific until verified. Check the EID and SIM settings, record the complete model code, confirm the region and carrier-unlock status, and ask the seller or Vivo support if any detail is unclear. Only then choose an eSIM plan for the countries on your itinerary and review its data allowance, validity, and activation conditions.
Once you have confirmed the phone, use the Kaspersky eSIM Store website or app to browse current plans for your destination, compare their terms, and follow the installation instructions for your device. This simple sequence helps you prepare mobile data for an international trip while keeping the capability of your particular handset—not a generic model name—at the center of the decision.


